Homeowners call me about twice a month asking whether they can replace shower valve without cutting wall tile that’s irreplaceable — discontinued 1990s pattern, whole-wall mosaic, you name it. The honest answer: you can very often replace shower valve without cutting wall surfaces at all, but the route depends on what’s failing and what access already exists. In rough order of likelihood, your options are a cartridge swap through the trim hole, full valve replacement through a rear access panel, or working through an enlarged front opening hidden by an oversized remodel cover plate. I’ll walk through all three, with the tools, part costs, and the two situations where the tile genuinely has to open.
Part of our Bathroom Remodeling & Flooring guide — explore the full guide →
- First Question: Does the Valve Body Actually Need Replacing?
- Option 1: Cartridge Replacement Through the Trim Opening
- Option 2: Full Replacement Through a Rear Access Panel
- Option 3: The Oversized Remodel Plate Trick
- When You Genuinely Cannot Avoid Cutting
- Tools and Materials Shopping List
- Cost and Time Comparison at a Glance
- Field Tips That Save the Job
- Bottom Line
First Question: Does the Valve Body Actually Need Replacing?
Ninety percent of “bad shower valves” are bad cartridges. The brass body soldered into the wall rarely fails; the serviceable guts inside it fail constantly. Symptoms that a $30–$70 cartridge fixes without touching any wall material: dripping when off, temperature that drifts or won’t get hot, stiff or grinding handle, whistling or moaning under flow. Symptoms that mean the body itself is done: water staining the ceiling below or the back side of the wall (cracked casting or failed solder joint), green corrosion crumbling around the ports, or stripped bonnet threads that won’t hold a cartridge anymore. Diagnose before you plan demolition — pull the trim and inspect with a flashlight. Fifteen minutes here can save a $1,500 tile repair.
Option 1: Cartridge Replacement Through the Trim Opening
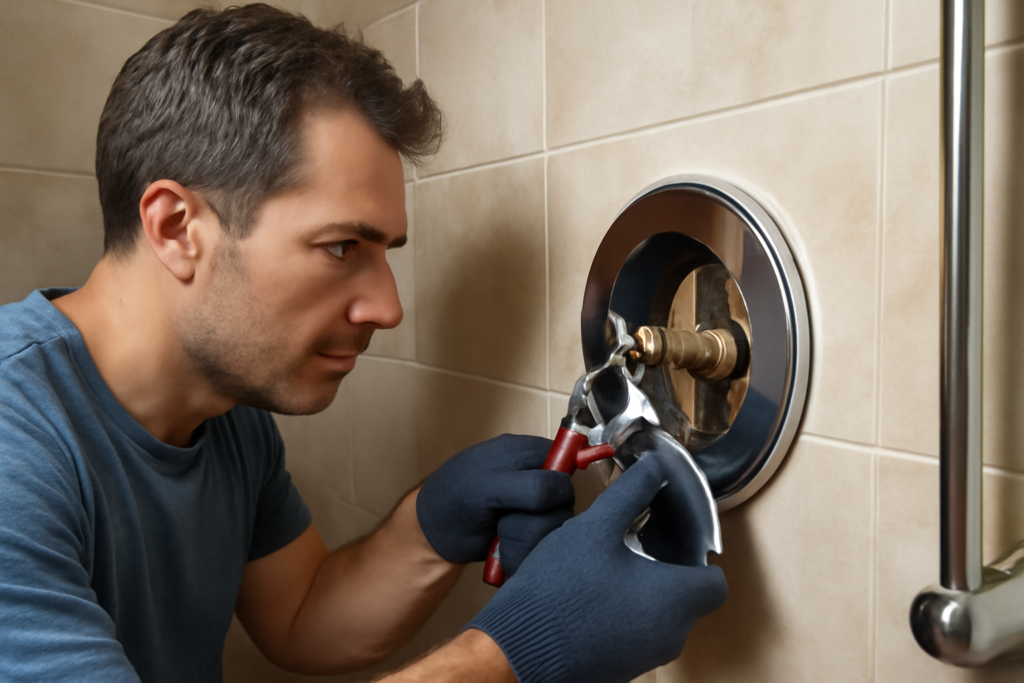
Every major single-handle valve made since the 1980s services from the front through the existing 4–6″ wall opening behind the escutcheon.
- Shut water at the valve’s integral stops if present (flathead slots visible beside the cartridge), otherwise at the house main. Open the valve to bleed pressure.
- Remove handle (set screw under the index cap), sleeve, and escutcheon plate.
- Pull the retaining clip or bonnet nut, then extract the cartridge — Moen 1222s want a $12 cartridge puller; Delta RP19804s pull by hand once the brass clip is out.
- Clean the bore, grease the new cartridge’s O-rings with silicone, install, reassemble, and reset the temperature limit stop to 110–115°F output.
Time: 30–60 minutes. Cost: $30–$95 in parts. Common cartridges: Moen 1222 ($45), Delta RP19804 ($35), Kohler GP876851 ($55), Pfister 974-042 ($40). If your valve is a pre-1985 two- or three-handle compression unit, stems and seats replace the same way through each handle hole for $15–$30 per stem.
Option 2: Full Replacement Through a Rear Access Panel
When the body truly must go, the wall behind the shower is your best friend. Most tub/shower valves back onto a closet, hallway, or bedroom wall of painted drywall — cheap and invisible to repair, unlike tile.
- Locate the valve from behind: measure from a shared reference (doorway, corner) on the shower side, transfer to the back side, and confirm with a stud finder or a 1/8″ exploratory drill hole.
- Cut a neat opening between studs, roughly 14″ wide by 16–20″ tall, centered on the valve. Score the drywall and keep the cutout clean.
- Kill water, cut the old valve out — a close-quarters tubing cutter or an oscillating multi-tool with a metal blade handles copper in tight bays.
- Solder or press the new valve in place. SharkBite-style push connections ($8–$14 per fitting) are legitimate here and remove torch risk inside a wall cavity; press tools are faster if you own one.
- Pressure test, then close the hole with a hinged plastic access panel (a 14″x14″ panel runs $15–$40) instead of patching solid. Code doesn’t require an access panel behind a shower valve in most jurisdictions, but every plumber who comes after you will bless your name.
Total cost DIY: $80–$180 including valve, fittings, and panel. Hiring it out: $350–$700, versus $800–$2,000+ when tile demolition and re-tiling enter the picture. Time: 3–5 hours.
Option 3: The Oversized Remodel Plate Trick
No rear access — exterior wall, back-to-back showers, finished paneling you can’t disturb? You can still replace the valve from the front without cutting tile beyond the existing hole, by enlarging the opening slightly and hiding the evidence under a remodel cover plate.
Remodel plates (also sold as “smitty plates” or conversion cover plates) are oversized escutcheons — typically 8″ to 13″ squares or rounds — designed to cover the scars of tub-to-shower valve conversions. Moen, Delta, and universal brands sell them for $25–$70 in matching finishes. The method:
- Remove trim and measure the existing opening. Most are 4–5″ across; a remodel plate covers up to about a 10″x10″ zone.
- Enlarge the hole only as much as needed to work — a 6–7″ opening cut with an angle grinder and diamond blade (tile) or hole saw (fiberglass surround) gives room for tools.
- Cut the old valve free and support the new one on a stringer if reachable, or use the pipe connections themselves plus the plate screws for support. Push-fit or press connections are near-mandatory in this blind, cramped scenario.
- Mount the new trim with the oversized plate spanning the enlarged hole, bedded in a bead of clear silicone around its perimeter.
Done neatly, the result reads as intentional design. This is how pros swap valves in fiberglass one-piece surrounds every week.
When You Genuinely Cannot Avoid Cutting
Two cases force real demolition. First, relocating the valve — converting a tub to a curbless shower and raising the valve from 28″ to 45″, or moving it to another wall — always requires opening the path. Second, widespread pipe failure: if the galvanized or polybutylene supplies feeding the valve are failing, replacing one valve on rotten pipe is malpractice, and the wall opens for a proper repipe. In both cases, cut from the back if humanly possible, and if the tile side must open, cut a rectangle to grout lines with a diamond blade so replacement tile drops in cleanly.
Tools and Materials Shopping List
- Cartridge puller ($10–$15) and hex key set
- Oscillating multi-tool with bi-metal blade ($60–$120) — the MVP of in-wall pipe cutting
- Close-quarters tubing cutter ($15)
- Push-to-connect valve or coupling fittings ($8–$14 each), or press tool if available
- Silicone plumber’s grease, thread sealant, brass plug for unused ports
- 14″x14″ access panel ($15–$40) or remodel cover plate ($25–$70)
- Digital thermometer for setting the limit stop
Cost and Time Comparison at a Glance
- Cartridge swap through trim hole: $30–$95 parts, 30–60 minutes, zero wall damage. Fixes ~90% of complaints.
- Stem/seat rebuild on vintage multi-handle valves: $20–$60 parts, 1–2 hours, zero wall damage.
- Full valve via rear access panel: $80–$180 DIY materials, 3–5 hours; $350–$700 hired. Drywall repair hidden inside a closet.
- Front replacement with remodel plate: $120–$250 in valve, fittings, and plate; 3–6 hours. No tile replaced, cosmetic plate visible.
- Tile demolition route: $800–$2,000+ hired once tile repair, waterproofing patch, and color-matching enter the bill; 1–3 days elapsed.
Run the numbers in that order and the strategy writes itself: exhaust the cheap rows before anyone picks up a grinder. The only wrinkle is house age — a 1960s home where you’ll be back inside that wall within five years for other plumbing arguably justifies opening it once, properly, with an access panel left behind.
Field Tips That Save the Job
Photograph everything before disassembly — handle orientation, stop positions, plumbing layout. Never torch-solder inside a closed cavity with the cartridge installed or insulation nearby; this is exactly what push and press fittings exist for. Test at full house pressure for a solid 15 minutes with the wall still open, cycling the valve hot and cold, before you close anything. And if you find polybutylene (gray plastic, usually stamped PB2110) feeding the valve, stop and price a repipe — that material fails at fittings and no valve swap should be built on it.
Bottom Line
Swap the cartridge first — it’s the fix nine times out of ten and never touches the wall. If the body is truly dead, go in through a rear access panel for $100 in materials, or use the oversized remodel-plate approach when the back side is off limits. Reserve tile cutting for relocations and repipes, and always leave an access panel behind for the next person holding the wrench.