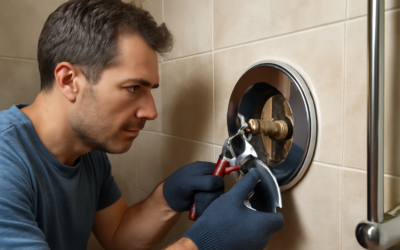
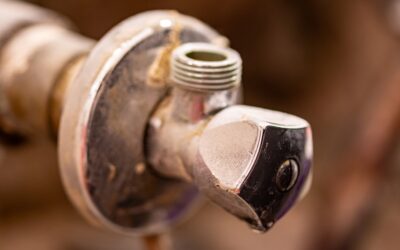
Most homeowners who search for a new shower valve do not actually need one. The shower valve replacement cost swings from roughly $20 in parts for a cartridge you swap yourself to $1,500 or more when a plumber has to cut through tile, replace the brass valve body inside the wall and then pay a tile setter to patch the damage. What drives the number is not the valve itself. It is how much of the wall has to come apart to reach it.
Part of our Bathroom Remodeling & Flooring guide — explore the full guide →
As a general range, expect about $150 to $450 for a plumber to replace a cartridge or stem, $350 to $900 to replace the complete valve body when there is an access panel behind the shower, and $800 to $2,500 or more when the valve can only be reached from the tiled side. Those figures vary by region, by whether the plumber solders copper or crimps PEX, and by how old and unusual your existing fixture is. The sections below break each scenario down so you can figure out which bucket your shower falls into before you call anyone.
- Shower Valve Replacement Cost by Scenario
- Shower Faucet Replacement Cost vs. Valve Replacement
- Wall Access: The Biggest Cost Variable
- Tools and Materials for a DIY Cartridge Swap
- How to Replace a Shower Cartridge Step by Step
- Troubleshooting After a Repair
- When to Call a Licensed Professional
- How to Keep the Final Bill Down
- Frequently Asked Questions
Shower Valve Replacement Cost by Scenario
Start by identifying the actual problem. A dripping showerhead, a handle that spins, or water that will not get hot usually points to a worn cartridge, not a failed valve body. A cracked body, a leak inside the wall, a valve that is incompatible with the trim you want, or an old two-handle setup you are converting to a single-handle pressure-balance valve are the situations where the whole valve comes out.
| Scenario | Parts | Typical total (pro) |
|---|---|---|
| Cartridge or stem swap | $15 to $90 | $150 to $450 |
| Valve body, access panel behind | $60 to $300 | $350 to $900 |
| Valve body, tile side, small cut | $60 to $300 | $700 to $1,600 |
| Valve body plus retile section | $100 to $500 | $1,200 to $2,500+ |
These ranges assume standard fixtures. Thermostatic valves, multi-outlet diverter systems and designer trim kits push parts costs higher, sometimes $400 to $900 for the valve alone. Old fixtures from brands that no longer make parts can also force a full valve replacement when all you really needed was a cartridge.
Cartridge-Only Repairs
Single-handle valves from the last few decades use a replaceable cartridge that controls both flow and temperature. Swapping it takes a plumber 30 to 90 minutes, so you are mostly paying the service call and a short labor block. If you are comfortable shutting off water and pulling a handle, this is a very manageable DIY job for $20 to $90 in parts. Older two- and three-handle valves use stems and washers instead, which are even cheaper but sometimes harder to match.
Full Valve Body Replacement
Replacing the brass body means cutting or unthreading the supply lines inside the wall, installing a new valve at the correct depth, and pressure-testing before the wall is closed. Labor typically runs two to five hours when access is easy. Soldered copper takes longer than PEX with crimp or expansion fittings, and galvanized supply lines often need to be replaced back to a sound joint, which adds time.
Shower Faucet Replacement Cost vs. Valve Replacement
People often use “shower faucet replacement cost” to mean two very different jobs. Replacing only the visible trim (handle, escutcheon plate and showerhead) costs $50 to $300 in parts and usually under an hour of labor, provided the new trim is designed for the existing valve. Manufacturers generally make trim kits that fit only their own valve bodies, and sometimes only a specific series.
That is the catch. If you fall in love with a new shower faucet from a different brand, the valve behind the wall has to change too, and you are now in full valve body territory with the wall access costs that come with it. Before buying trim, look up the model of your existing valve (often stamped on the body or listed in the original paperwork) and shop within that family if you want to keep the project cheap.
Wall Access: The Biggest Cost Variable
Walk into the room on the other side of your shower wall. If you see a removable panel, often in a closet or hallway, you are in luck. A plumber can work from the back, leaving your tile untouched, and the job stays near the low end of the valve body range.
No panel? There are three common approaches, each with its own price tag:
- Cut in from the back. If the adjacent wall is drywall, the plumber cuts an opening roughly 14 by 14 inches, does the work, and you install a plastic access panel ($15 to $40) or patch and paint. Drywall patching by a handyman usually runs $150 to $350.
- Oversized escutcheon or cover plate. Several manufacturers sell extra-large trim plates designed to hide a tile opening cut around the valve. This keeps the tile repair small and can save several hundred dollars.
- Remove and replace tile. When the opening needs to be larger than any cover plate, a tile setter removes a section, repairs the backer board and waterproofing, and sets new tile. Expect $400 to $1,200 for the tile repair alone, and more if your original tile is discontinued.
Fiberglass and acrylic one-piece surrounds add another wrinkle. Cutting them from the front is possible with a repair kit, but most plumbers strongly prefer access from behind because patched acrylic rarely matches perfectly.
Tools and Materials for a DIY Cartridge Swap
A cartridge replacement is the one part of this job that most handy homeowners can take on. Here is what you typically need:
- Replacement cartridge matched to your valve brand and model
- Phillips and flathead screwdrivers, plus an Allen key set for set-screw handles
- Adjustable wrench or the manufacturer’s cartridge puller tool if the old cartridge is seized
- Needle-nose pliers for retaining clips
- Plumber’s silicone grease (not petroleum jelly) for new O-rings
- White vinegar and an old toothbrush for mineral buildup
- A towel to cover the drain so small parts do not disappear
How to Replace a Shower Cartridge Step by Step
- Shut off the water. Use the shower’s integral stops if your valve has them (small screwdriver slots on the body), otherwise close the main water valve. Open the shower handle to drain pressure.
- Remove the handle. Pop off the decorative cap, remove the screw or loosen the set screw, and pull the handle straight off.
- Remove the trim plate. Unscrew the escutcheon and set it aside. Cut old caulk with a utility knife if needed.
- Pull the retaining clip or nut. Most cartridges are held by a U-shaped clip or a brass retaining nut. Note its orientation or snap a photo.
- Extract the cartridge. Wiggle it straight out with pliers. If it will not budge, use the puller tool rather than forcing it, which can damage the valve body.
- Clean the valve body. Wipe out scale with vinegar and inspect the seats for pitting.
- Install the new cartridge. Lightly grease the O-rings, align it exactly as the old one sat (hot on the correct side), and reinstall the clip or nut.
- Restore water and test. Turn the supply back on slowly, check for leaks at the valve, then set the temperature limit stop if your valve has one so the hottest setting stays below about 120°F.
- Reassemble the trim. Reattach the escutcheon, run a bead of silicone across the top and sides (leave the bottom open to drain), and install the handle.
Troubleshooting After a Repair
Hot and cold reversed? The cartridge is installed 180 degrees off. Pull it and rotate it, or on some models, rotate the stem. A drip that persists after a new cartridge often means debris is lodged in the seat or the valve body itself is scored, which pushes you toward full replacement.
Weak flow after the swap usually comes from sediment that broke loose when the water was shut off and is now trapped in the showerhead or the cartridge screen. Remove and clean both. If the temperature swings when someone flushes a toilet, your valve may not be pressure-balancing properly, and older non-balancing valves are a good reason to upgrade the whole unit rather than keep patching it.
When to Call a Licensed Professional
Always shut off the water supply before opening any valve, and if you cannot find or close the shutoff, stop there. Call a licensed plumber when the job involves replacing the valve body, cutting or joining supply lines inside the wall, converting a two-handle valve to single-handle, or any leak you suspect is already inside the wall cavity. Those are code-regulated alterations in most areas, and many jurisdictions require a permit and an anti-scald (pressure-balance or thermostatic) valve on any new shower installation. Check with your local building department, since requirements differ.
A licensed plumber is also the right call for anything involving gas water heater adjustments, main water lines or sewer and drain work uncovered during the repair. If the wall has visible water damage, soft backer board or mold, bring in the plumber first to stop the leak, then a contractor to rebuild the wall properly. Paying for correct waterproofing now is far cheaper than a second tile tear-out in two years.
How to Keep the Final Bill Down
- Diagnose first. Many “bad valve” calls end as a $40 cartridge.
- Get the valve model number before the plumber arrives so they can bring the right parts and avoid a second trip charge.
- Stay within the same manufacturer for trim so the valve body can stay put.
- Ask about access from an adjacent room before anyone touches tile.
- Bundle work. If the valve is coming out anyway, it is a good time to add integral stops or an access panel for future service.
- Get at least two written quotes that separate plumbing labor, parts and wall repair.
Overall, the shower valve replacement cost you end up paying depends far more on wall access than on the hardware. Pin down whether you need a cartridge, trim or a full valve body, look for back access, and you can usually keep this repair on the lower end of the range.
Frequently Asked Questions
How much does a plumber charge to replace a shower valve?
For a full valve body with access from behind the wall, most homeowners pay roughly $350 to $900. When the plumber must cut through tile, total costs including the tile repair commonly land between $800 and $2,500, depending on the region and the fixture.
Can I replace a shower valve without removing tile?
Often yes. Plumbers can work from an adjacent room through drywall, or use an oversized cover plate to hide a modest tile cut. Only large openings or inaccessible framing force a real tile tear-out.
How long does a shower valve last?
A brass valve body can last 20 years or more, while cartridges typically need replacement every 5 to 15 years depending on water hardness. Hard water shortens cartridge life noticeably.
Is a shower cartridge replacement a DIY job?
For most handy homeowners, yes. It requires shutting off the water, removing the handle and trim, and swapping the cartridge. Replacing the valve body inside the wall is a job for a licensed plumber.
Do I need a permit to replace a shower valve?
Swapping a cartridge or trim generally does not require one. Replacing the valve body or altering supply lines may, depending on your jurisdiction, so check with your local building department before the work starts.