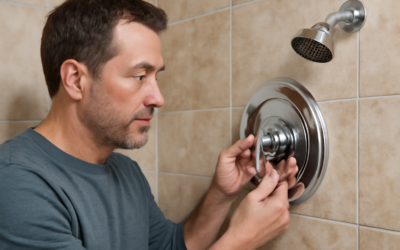
A shower valve replacement is one of those repairs that homeowners dread but rarely need to. The valve is the brass body buried behind your shower wall that mixes hot and cold water and controls flow. When it drips, sputters, scalds you, or refuses to shut off, replacing it restores a comfortable, safe shower. This guide walks through the parts, costs, tools, step-by-step process, and the mistakes that turn a two-hour job into a flooded bathroom.
Part of our Bathroom Remodeling & Flooring guide — explore the full guide →
- What a Shower Valve Actually Does
- Signs You Need a Shower Valve Replacement
- Cartridge Swap vs Full Valve Replacement
- What Shower Valve Replacement Costs
- Tools and Materials You Will Need
- Step-by-Step: Replacing the Valve
- Common Mistakes That Cost Money
- When to Call a Pro
- Identifying Your Valve Brand and Model
- Pressure-Balancing vs Thermostatic Valves
- Preventing Leaks Behind the Wall
- Keeping Your New Valve Working
- Installing a New Shower Valve: Depth, Height, and Port Setup That Decide Whether the Trim Fits
What a Shower Valve Actually Does
Behind the decorative trim plate sits the valve body, a fitting with inlets for hot and cold supply lines and outlets to the tub spout and showerhead. Inside is a cartridge, ball, or set of compression stems that regulates temperature and volume. Most homes built after 2000 use a pressure-balancing or thermostatic valve, which is now required by plumbing code to prevent scalding when someone flushes a toilet elsewhere in the house.
There are four common valve types: compression (two handles, older homes), ball, ceramic-disc cartridge, and thermostatic. Cartridge valves dominate new construction because they are compact, reliable, and repairable. Knowing which type you have determines whether you need a full valve body swap or just a cartridge replacement.
Signs You Need a Shower Valve Replacement
- A constant drip from the showerhead even when the handle is fully off.
- Water temperature that swings hot and cold or never gets hot enough.
- A handle that spins freely or feels gritty and stiff.
- Low flow that persists after cleaning the showerhead and aerator.
- Visible leaking behind the wall, shown by stains on an adjacent ceiling or a musty smell.
Many of these symptoms point to a worn cartridge rather than the whole valve. Try a cartridge swap first, which costs $15 to $60 in parts, before committing to cutting open the wall for a full body replacement.
Cartridge Swap vs Full Valve Replacement
A cartridge replacement is a surface job: pop off the handle, pull the retaining clip, extract the old cartridge with pliers or a puller tool, and slide in a new one. No soldering, no wall demolition. This is the fix for 70 to 80 percent of leaking shower complaints.
A full valve body replacement is required when the brass body itself is cracked, the threads are stripped, the valve is obsolete with no available cartridges, or you are upgrading an old two-handle setup to a modern single-handle anti-scald valve. This job usually means opening the wall from behind or cutting an access panel, and it involves sweating copper joints or using push-fit or PEX connections.
What Shower Valve Replacement Costs
Costs vary widely by scope. A DIY cartridge swap runs $15 to $60. A DIY full valve body replacement runs $50 to $200 in parts, including the valve, fittings, and possibly a new trim kit. Hiring a licensed plumber for a cartridge swap costs $150 to $350. A professional full valve replacement, including wall access and tile repair, typically runs $500 to $1,200, and can climb past $1,500 if tile matching or drywall repair gets involved.
Trim kits from Moen, Delta, Kohler, and Pfister range from $80 to $400 depending on finish and style. Matte black and brushed gold finishes cost more than chrome. Buy the valve and trim as a matched set from the same manufacturer to guarantee fit, because a Delta trim will not seat on a Moen valve.
Tools and Materials You Will Need
- Adjustable wrench and a set of Allen keys for the handle set screw.
- Cartridge puller specific to your brand (Moen and Delta sell them for about $15).
- Plumber’s grease, plumber’s tape, and a rag.
- For a full swap: a propane torch and solder, or SharkBite push-fit fittings and a PEX or copper cutter.
- A multimeter is not needed, but a bucket and towels absolutely are.
Step-by-Step: Replacing the Valve
First, shut off the water. If your shower has integral stops on the valve, use a screwdriver to close them. Otherwise turn off the main supply and open a lower faucet to drain the lines. Then remove the handle set screw, pull the handle, and unscrew the trim plate.
For a cartridge swap, remove the retaining clip with needle-nose pliers, note the orientation of the old cartridge, pull it straight out, grease the new one, and push it in the same way. Reversing hot and cold is the most common error, so match the notches exactly.
For a full valve body swap, you must reach the plumbing. Cut an access panel in the wall behind the shower if there is a closet or hallway there, which spares your tile. Disconnect the supply lines and outlets, remove the old body, and install the new valve. Solder copper joints or use push-fit connectors. Once installed, pressure-test before closing the wall by turning the water back on and checking every joint for weeping.
Common Mistakes That Cost Money
The number one mistake is not shutting off the water fully, which leads to a soaked bathroom the moment the cartridge comes out. Second is buying a mismatched trim and valve from different brands. Third is skipping the plumber’s grease, which makes the new cartridge grind and fail early. Fourth is over-tightening the retaining nut and cracking the plastic cartridge cap. Fifth is forgetting to set the anti-scald limit stop, which leaves the shower either lukewarm or dangerously hot.
When to Call a Pro
If your valve requires soldering inside a finished wall, if you have galvanized pipe that crumbles when touched, or if you cannot identify the valve brand to source parts, hire a licensed plumber. The cost of a burst joint behind tile far exceeds a service call. A pro also carries a permit knowledge base for jurisdictions that require anti-scald compliance on any valve work, which matters at resale and for insurance.
Identifying Your Valve Brand and Model
Before you buy a single part, identify what you have. Look at the trim plate and handle for a stamped or molded logo. Moen, Delta, Kohler, Pfister, and American Standard each use proprietary cartridges that are not interchangeable, so a generic part will not fit. If there is no visible branding, remove the handle and look for a model number cast into the valve body or the cartridge itself. Photograph the cartridge and take it to a plumbing supply house, which can match it far more reliably than a big-box store. Getting the exact match matters because even within one brand there are multiple cartridge families, and the wrong one will leak or fail to seat.
Pressure-Balancing vs Thermostatic Valves
When you upgrade a valve, you will choose between pressure-balancing and thermostatic. A pressure-balancing valve, the most common residential type, keeps temperature steady by reacting to changes in hot and cold water pressure, so a flushed toilet does not scald you. It has one handle controlling both temperature and flow. A thermostatic valve is more sophisticated: it holds a set temperature precisely regardless of pressure or incoming water temperature swings, and it usually separates temperature and volume onto two controls. Thermostatic valves cost more, $150 to $500 versus $40 to $150 for pressure-balancing, but they deliver spa-like consistency and let you turn the water off and back on at the same temperature. For a primary bathroom remodel, many homeowners find the thermostatic upgrade worth it.
Preventing Leaks Behind the Wall
The scariest part of any valve job is the hidden plumbing. Before you close up an access panel or set new tile, run the shower at full hot and full cold for several minutes while you feel every joint and watch for the slightest bead of water. A weeping solder joint or a loose compression fitting will only get worse once buried. If you used push-fit connectors like SharkBite, confirm each is fully seated to the insertion depth mark. Leaving the water on and checking again after an hour catches slow leaks that a quick test misses. This ten-minute verification can save you from tearing out a wall a month later.
Keeping Your New Valve Working
Hard water is the enemy of shower cartridges. Mineral scale builds inside the valve and shreds the rubber O-rings. If you have hard water, a whole-house softener extends cartridge life dramatically. Exercise the handle through its full range monthly, and address drips the week they start rather than waiting for a wall leak. With a quality valve and clean water, a modern ceramic-disc cartridge can last 15 to 20 years before it needs attention again.
A shower valve replacement is well within reach for a confident DIYer when it is a cartridge swap, and worth a plumber’s fee when the wall has to open. Diagnose the symptom, match your parts to the brand, shut the water off completely, and you will have a smooth, safe, leak-free shower for years.
Installing a New Shower Valve: Depth, Height, and Port Setup That Decide Whether the Trim Fits
When a cartridge swap will not solve the problem and you move on to installing a new shower valve, the plumbing connections are only half the job. The details that trip people up during a bathroom valve replacement are where the valve body sits in the wall, how high it is mounted, and which outlet ports are used. Get those wrong and the new trim will not seat, the handle will stand out from the tile, or the tub spout will barely flow.
Setting the rough-in depth
Every valve ships with a plastic plaster guard or depth gauge marked with the acceptable range from the front of the valve to the finished wall surface. That finished surface includes backer board, thinset, and tile, not just the studs. Measure your total wall build-up before you anchor the valve to a cross brace. Too deep and the handle may not reach the stem; too shallow and the trim plate rocks against the tile. Many manufacturers sell stem extension kits, but it is far easier to set the body correctly from the start.
Height and outlet ports
There is no single required height, but in practice shower valves are commonly set somewhere around 28 to 34 inches above the tub floor for a tub-shower, and around 45 to 48 inches off the floor for a shower-only stall. Pick a height that the shortest regular user can reach comfortably without stepping under the spray.
Most valves have a top outlet for the showerhead and a bottom outlet for the tub spout. Manufacturers usually specify a minimum distance between the valve and the spout so the diverter works properly, so follow that figure. For a shower-only install, the instructions will tell you whether the unused port must be capped or left alone; do not guess, because it affects flow and temperature control.
Shower body replacement tips
- Shut off the water at the main or the branch shutoff and drain the lines before cutting anything.
- If you are soldering, remove the cartridge and any plastic parts first so heat does not damage them.
- Confirm hot is on the left and cold on the right when you face the valve.
- Leave the plaster guard on until tile is finished to keep grout and debris out of the body.
Some jurisdictions require a permit and inspection for a full shower body replacement, and anti-scald compliance is typically checked at that time. If the job involves reworking supply lines inside a finished wall, changing pipe material, or you are unsure of local requirements, a licensed plumber is the safer call.