If your shower runs scalding hot the moment someone flushes a toilet, or you cannot pin down a comfortable temperature, the fixture to inspect is the valve buried behind your tile. A Symmons shower valve is one of the most common pressure-balancing valves installed in American homes, and understanding how it works can save you a costly plumber visit and a lot of frustration. Symmons, a Massachusetts company founded in 1939, built its reputation on the Temptrol line, and millions of these valves are still in service across the country.
Part of our Bathroom Remodeling & Flooring guide — explore the full guide →
- What a Symmons Shower Valve Actually Does
- Identifying Your Valve and Cartridge
- The Most Common Problem: Temperature Drift and Dripping
- Step-by-Step Cartridge Replacement
- Setting the Maximum Temperature Limit Stop
- Buying a New Symmons Valve or Complete Trim Kit
- DIY Versus Calling a Pro
- Maintenance Tips to Extend Valve Life
- Understanding Pressure-Balancing Versus Thermostatic Valves
- Diagnosing a Cold or Weak Shower
- Why Symmons Remains a Popular Choice
What a Symmons Shower Valve Actually Does
The core job of any modern shower valve is safety and comfort. Older two-handle setups mixed hot and cold manually, which meant a sudden pressure drop, such as a flushing toilet or a dishwasher filling, could send a slug of hot water straight to your skin. Symmons pioneered pressure-balancing technology to fight exactly that. Inside the valve body sits a piston or spool that reacts instantly to changes in hot and cold supply pressure. If the cold side drops, the piston throttles the hot side to match, keeping your outlet temperature within a few degrees.
The flagship product is the Temptrol, a single-handle pressure-balancing valve. There is also the Winslet, Origins, and Duro trim families that use the same underlying Temptrol body. Symmons also makes thermostatic valves for higher-end installs, but for the typical homeowner, the Temptrol pressure-balancing unit is what you will encounter.
Identifying Your Valve and Cartridge
Before you buy any part, identify what you have. Pull the handle and escutcheon plate and look at the stem. The Temptrol uses a distinctive spring-and-cup cartridge assembly, model number C-71 for the classic cartridge. Newer builds may use the Temptrol cartridge kit that bundles the spindle, seat, spring, and cup. If you see a brass valve body stamped with “Symmons” and a large hex bonnet nut, you almost certainly have a Temptrol.
- Handle style: Lever, cross, or knob trim will tell you the trim family (Winslet, Origins, etc.), but the internal repair part is often the same.
- Bonnet nut: A 1-1/16 inch or larger deep socket is usually needed to remove it.
- Model plate: Some newer valves have a sticker inside the wall access; if you have documentation, note the model.
The Most Common Problem: Temperature Drift and Dripping
The number one complaint is a shower that no longer gets hot enough, or one that drips constantly. Both symptoms usually trace back to a worn cartridge. Rubber seals harden, the seat pits from mineral-laden water, and the spring loses tension. When the piston sticks, pressure balancing fails and temperature swings return.
The good news is that Symmons designed the Temptrol to be rebuilt rather than replaced. A complete rebuild kit runs roughly $25 to $50, versus $300 to $600 for a plumber to cut open the wall and swap the whole valve body. For most homeowners, rebuilding is a one-hour Saturday job.
Step-by-Step Cartridge Replacement
Rebuilding a Temptrol is genuinely DIY-friendly because you almost never have to open the wall. Here is the sequence:
- Shut off water. If there are no integral stops, close the main supply to the house.
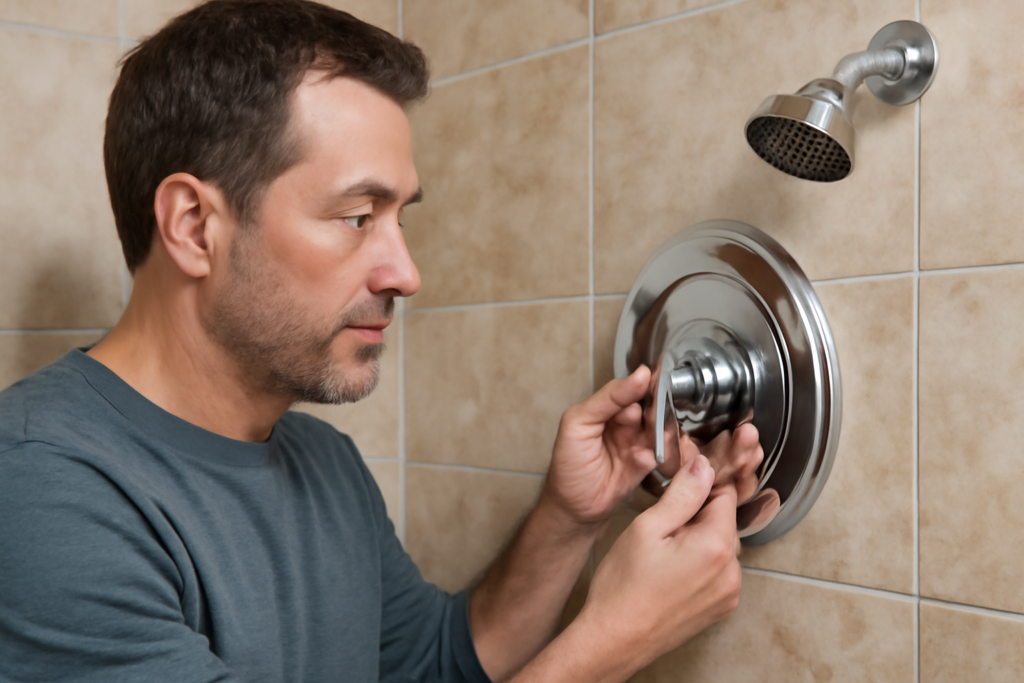
- Remove the handle screw, handle, and escutcheon plate.
- Unscrew the bonnet nut with a deep socket. Water trapped in the line will drain, so keep a towel handy.
- Pull the entire spindle assembly straight out. Note the orientation of the piston and cup.
- Inspect the seat at the bottom of the valve body. If it is pitted, use the Symmons seat wrench to back it out and install a fresh brass seat.
- Install the new cartridge kit: seat, spring, cup, and spindle. Lubricate O-rings with plumber’s silicone grease.
- Reassemble, restore water, and test temperature before reinstalling the trim.
A common mistake is over-tightening the bonnet nut, which can crack the plastic on newer spindles. Snug plus a quarter turn is plenty. Another frequent error is forgetting to replace the seat; a new cartridge on a pitted seat will drip again within weeks.
Setting the Maximum Temperature Limit Stop
Every Temptrol has a rotational limit stop, a plastic collar under the handle that caps how far you can rotate toward hot. After a rebuild or if scald protection feels off, reset it. Turn the water to full hot, measure the outlet with a thermometer, and adjust the stop so full rotation delivers no more than 110 to 120 degrees Fahrenheit. This matters for households with children or elderly residents, where the CPSC recommends keeping delivered water at or below 120 degrees to prevent scald injuries.
Buying a New Symmons Valve or Complete Trim Kit
If you are remodeling or the valve body itself is corroded beyond repair, you will buy a new unit. Expect these ballpark prices:
- Temptrol valve body only: $80 to $150.
- Complete valve plus trim kit (handle, escutcheon, showerhead): $150 to $350 depending on finish.
- Premium finishes such as brushed bronze or matte black add 20 to 40 percent over chrome.
When you buy trim, confirm it matches your rough-in valve. Symmons trim kits are designed to fit the Temptrol body, so if you keep the existing body you only need the trim, which is far cheaper than a full valve swap.
DIY Versus Calling a Pro
A cartridge rebuild is well within reach for a homeowner comfortable with a wrench and a socket set. You need no soldering and, in most cases, no wall demolition. Where a professional earns their fee is a full valve replacement, which requires cutting open tile or drywall, sweating copper or crimping PEX connections, and re-waterproofing the wall. That job typically costs $350 to $700 including materials, more in high cost-of-living areas or if tile repair is involved.
Consider a plumber if you find corroded supply lines, a cracked valve body, or evidence of a hidden leak behind the wall. Water damage inside a wall cavity is far more expensive than any valve.
Maintenance Tips to Extend Valve Life
Hard water is the enemy of any shower valve. Mineral scale builds on the seat and piston, causing sticking and temperature swings. A few habits help:
- If your home has hard water, consider a whole-house softener; it protects every fixture, not just the shower.
- Exercise the handle through its full range occasionally to keep the piston from seizing.
- Replace the cartridge proactively every 8 to 12 years rather than waiting for failure.
- Keep a spare rebuild kit on the shelf; they are inexpensive and save an emergency store run.
Understanding Pressure-Balancing Versus Thermostatic Valves
It helps to know exactly what your Temptrol does and does not do compared to pricier valves. A pressure-balancing valve, which is what the standard Temptrol is, reacts to changes in pressure between the hot and cold supply lines. If someone flushes a toilet and the cold pressure drops, the valve reduces hot flow to keep the outlet temperature roughly stable. What it does not do is hold an exact numeric temperature; if your water heater output drifts, so will your shower slightly.
A thermostatic valve, by contrast, senses actual water temperature and holds a precise setpoint regardless of pressure or incoming temperature swings. Symmons makes thermostatic models for higher-end installs, and they cost considerably more. For the vast majority of homeowners, the pressure-balancing Temptrol is entirely adequate and far cheaper to buy and repair. Knowing the difference keeps your expectations realistic: if your shower temperature wanders even without a toilet flush, the water heater or a worn cartridge is usually the cause, not a flaw in the valve type.
Diagnosing a Cold or Weak Shower
When a Temptrol shower suddenly runs lukewarm, work through the likely causes in order before assuming the worst:
- Water heater first. Confirm hot water is strong at a nearby sink. If every fixture is lukewarm, the problem is the heater, not the valve.
- Rotational limit stop. A limit stop set too conservatively caps how hot the shower can get. Adjust it before replacing parts.
- Clogged cartridge or seat. Mineral scale restricts hot flow. A rebuild clears it.
- Cross-flow. A failed cartridge can let cold bleed into the hot side even when off, showing up as a lukewarm max temperature and a warm cold-water line.
This orderly approach saves you from buying parts you do not need and pinpoints whether the fix is a five-minute adjustment or a full rebuild.
Why Symmons Remains a Popular Choice
Part of the enduring appeal is repairability. Where some brands push you toward proprietary cartridges that are discontinued after a few years, Symmons has kept the Temptrol platform remarkably consistent for decades. Parts remain widely available at hardware stores and online, and the lifetime warranty on many residential models reflects the company’s confidence in the design. For a homeowner, that means a valve you can service yourself for the life of the house rather than one you tear out at the first sign of trouble.
Whether you are chasing a drip, resetting a temperature limit, or planning a bathroom remodel, knowing your valve is a Temptrol gives you a clear, affordable path forward. Identify the cartridge, keep a rebuild kit handy, set your scald limit correctly, and this classic American valve will deliver steady, safe showers for years to come.