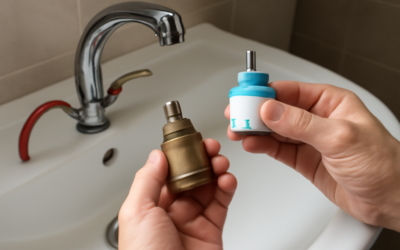
The shower mixing valve is the hidden brain of your shower, quietly blending hot and cold water to deliver a steady, safe temperature every time you turn the handle. Most homeowners never think about it until the water runs scalding hot when someone flushes a toilet, or the temperature swings wildly for no reason. Understanding what this valve does, the different types available, and when it needs replacing can save you from a cold shock, a burn, or an expensive plumbing bill.
Part of our Bathroom Remodeling & Flooring guide — explore the full guide →
- What a Shower Mixing Valve Actually Does
- The Main Types of Shower Mixing Valves
- Signs Your Mixing Valve Is Failing
- Cartridge Replacement Versus Full Valve Replacement
- How to Replace a Shower Valve Cartridge
- Cost of Professional Replacement
- Preventing Future Problems
- Matching a Valve to Your Water Pressure and Household
- Common Installation Mistakes
- Shower Mixing Valve Repair: Match the Symptom to the Part
What a Shower Mixing Valve Actually Does
A mixing valve sits behind your shower wall, connected to both the hot and cold supply lines. When you move the handle, the valve adjusts the ratio of hot to cold water flowing to the showerhead. In older homes, a simple two-handle setup let you mix manually, but modern single-handle valves do the blending internally. The valve also plays a critical safety role by preventing sudden temperature spikes that can cause serious burns, especially in households with young children or elderly family members.
The importance of temperature control is not just about comfort. Water heated above 120 degrees Fahrenheit can cause third-degree burns in seconds. A properly functioning mixing valve keeps outlet temperatures within a safe range even when supply pressures fluctuate, which is why building codes across the country now require anti-scald protection in showers.
The Main Types of Shower Mixing Valves
Not all mixing valves are created equal. The type you have determines how well your shower handles pressure changes and how you replace it.
- Pressure-balancing valves: The most common type in American homes today. These valves react to changes in water pressure and adjust the flow to keep temperature stable. When someone flushes a toilet and cold pressure drops, the valve reduces hot flow to compensate. They typically cost $30 to $100 for the cartridge and are required by code in most jurisdictions.
- Thermostatic valves: These sense actual water temperature rather than pressure and hold your chosen temperature precisely, often within a degree or two. They usually have two controls, one for temperature and one for volume, allowing you to turn the water off and back on without resetting the temperature. Expect to pay $150 to $500 or more.
- Diverter valves: Not strictly mixing valves, but often integrated into the same body. These direct water between the tub spout and showerhead, or between multiple showerheads and body sprays.
- Manual mixing valves: The old-school two-handle design with separate hot and cold controls. These offer no anti-scald protection and are generally considered outdated.
Signs Your Mixing Valve Is Failing
A worn or clogged mixing valve announces itself in several ways. Catching these symptoms early prevents water damage and uncomfortable showers.
- Water temperature fluctuates suddenly, going hot or cold on its own.
- You cannot get the water hot enough even with the handle turned all the way.
- The shower drips or leaks continuously even when turned off.
- The handle feels loose, stiff, or spins without changing anything.
- Reduced water flow or sputtering from the showerhead.
- You hear a rattling or humming noise inside the wall.
In many cases, the culprit is the internal cartridge rather than the entire valve body. Mineral buildup from hard water, worn rubber seals, and corroded springs all degrade cartridge performance over time. Replacing just the cartridge is far cheaper than replacing the whole valve.
Cartridge Replacement Versus Full Valve Replacement
The good news for most homeowners is that a failing shower usually needs only a new cartridge, a repair that costs $10 to $60 in parts and takes under an hour. Major brands like Moen, Delta, Kohler, and Pfister sell replacement cartridges keyed to specific valve models. The key is identifying your exact valve. Look for a brand stamp on the handle or trim plate, and take a photo of the old cartridge to match it at the hardware store.
A full valve body replacement becomes necessary when the brass housing itself cracks, corrodes, or when you are switching from a manual to a pressure-balancing or thermostatic design. Because the valve body is soldered or connected to the supply pipes inside the wall, this job often requires cutting into the shower wall and sweating copper joints, pushing it firmly into professional territory for most people.
How to Replace a Shower Valve Cartridge
If you are comfortable with basic tools, swapping a cartridge is a manageable DIY project. Here is the general process, though you should always follow the manufacturer’s instructions for your specific model.
- Shut off the water. Use the main house shutoff or, if present, the integral stops on the valve itself.
- Remove the handle. There is usually a set screw hidden under a decorative cap or on the underside of the handle.
- Take off the trim plate, escutcheon, and any retaining clip or nut holding the cartridge in place. A cartridge puller tool, available for around $15, makes stubborn cartridges much easier to extract.
- Pull the old cartridge straight out, noting its orientation.
- Lubricate the new cartridge O-rings with silicone plumber’s grease and insert it in the same orientation.
- Reassemble in reverse order, restore water, and test for leaks and proper hot-cold operation.
One common mistake is installing the cartridge upside down or rotated, which reverses hot and cold. Another is forgetting to set the anti-scald limit stop, a small dial that caps the maximum temperature. Take a moment to adjust it so the hottest setting stays below 120 degrees.
Cost of Professional Replacement
Hiring a plumber to replace a cartridge typically runs $150 to $350 including labor and parts. A full valve body replacement that requires opening the wall ranges from $300 to $800, and can climb higher if tile work and wall repair are involved. Upgrading to a high-end thermostatic valve pushes the total toward $600 to $1,200 once you factor in the premium valve, trim kit, and finish carpentry. Getting two or three quotes is worthwhile, and always confirm whether the plumber will patch the wall or leave that to you.
Preventing Future Problems
You can extend the life of any mixing valve with a few habits. If your home has hard water, consider a water softener or periodic descaling to reduce mineral buildup. Exercise seldom-used valves occasionally so seals do not dry out. When you notice the first hint of temperature drift, replace the cartridge promptly rather than waiting for a complete failure that might coincide with a leak inside the wall.
Choosing quality matters too. Spending a bit more on a reputable brand with readily available replacement parts pays off over the fifteen-to-twenty-year life of a valve. Off-brand valves may save money upfront but leave you hunting for obscure cartridges years later.
Matching a Valve to Your Water Pressure and Household
Choosing the right valve depends heavily on your home’s plumbing and who uses the shower. Homes with older galvanized piping or well systems often experience larger pressure swings, which makes a thermostatic valve especially worthwhile because it holds temperature regardless of what happens elsewhere in the house. Households with small children or older adults benefit enormously from the precise, repeatable temperature control a thermostatic valve provides, since it eliminates the guesswork and the risk of a scalding surprise.
Flow rate matters too. Some high-end thermostatic valves are rated for higher gallons-per-minute output to feed rain heads, handheld sprayers, and body jets simultaneously. If you dream of a spa-style shower with multiple outlets, undersizing the valve will leave you with weak, disappointing flow. Check the valve’s rated flow capacity against the combined demand of every showerhead and sprayer you plan to run at once, and choose a valve body designed for multiple outlets if needed.
Common Installation Mistakes
Even a well-chosen valve can perform poorly if installed carelessly. A frequent error is soldering the valve body with the cartridge still inside, which the intense heat can warp or melt the internal seals. Always remove the cartridge before sweating copper joints near the valve. Another mistake is setting the valve at the wrong depth in the wall, leaving the trim plate unable to reach the finished tile surface or, conversely, forcing the handle too deep. Manufacturers stamp a plaster-ground or depth marking on the valve body to guide correct placement relative to the finished wall.
Reversing the hot and cold supply lines is another avoidable problem that leaves you turning the handle the wrong way for hot water. Finally, forgetting to install or open the integral shutoff stops can lead to confusion during future repairs. Taking time to install the valve at the correct depth, with the supplies oriented properly and the anti-scald stop set, prevents a cascade of frustrations down the road.
Your shower mixing valve is a small component doing a big job every single day. By knowing which type you have, watching for warning signs, and tackling cartridge swaps before they escalate, you keep your showers comfortable, safe, and leak-free for years to come. When the work moves inside the wall, do not hesitate to call a licensed plumber, as the cost of a botched solder joint far exceeds the price of a service call.
Shower Mixing Valve Repair: Match the Symptom to the Part
Cartridges get blamed for everything, but good shower mixing valve repair starts with pinning down which part is failing. Some symptoms that feel like a dead cartridge are really debris, a limit stop set wrong, or worn seals that cost a few dollars. Work through the likely causes before you order parts, and shut off the water at the valve’s integral stops or at the house main before you pull the handle.
| Symptom | Likely cause | Repair |
|---|---|---|
| Never gets hot enough, but flow is normal | Rotational limit stop set too low | Adjust the stop a notch at a time and check the temperature |
| Weak flow after plumbing or water-main work | Sediment caught in the cartridge inlets or screens | Pull the cartridge, flush the valve body briefly with the stops open into a bucket, clean any screens |
| Drips from the showerhead after shutoff | Worn seals, seats, or O-rings | Rebuild kit or new cartridge, depending on the valve design |
| Temperature swings when toilets flush | Sticking pressure-balance spool | Replace the cartridge; the balance spool is built into most single-handle cartridges |
| Handle spins without doing anything | Stripped handle adapter or broken stem | Replace the handle adapter; a cracked stem means a new cartridge |
How to Repair a Single Handle Shower Valve Without Replacing It
To repair a single handle shower valve, first work out whether yours takes a one-piece cartridge or a rebuildable design. Some older single-handle valves use small rubber seats and springs behind a ball or cartridge. Those seals wear long before the rest of the valve does, and an inexpensive rebuild kit from the valve’s maker brings the drip to a stop. One-piece cartridges are usually replaced as a unit, though a stiff but otherwise healthy cartridge often frees up after cleaning off mineral scale and applying fresh silicone grease to its O-rings.
When you reassemble, check that the cartridge’s orientation marks line up. On many single-handle valves, rotating the cartridge the wrong way is what flips hot and cold. Turn the water back on slowly, since a sudden pressure surge can dislodge a seat that has not seated yet. Run the shower at full hot and full cold for a minute each to confirm the limit stop and flow.
If you see water behind the trim plate while the shower runs, or the valve body is corroded or cracked, stop there. That points to a problem inside the wall, and it belongs with a licensed plumber.