Swapping a mildew-stained curtain for glass instantly makes a bathroom feel larger, brighter, and more upscale. A well-chosen shower door contains water better, shows off your tile work, and can become the centerpiece of the whole room. But the options run from a $150 sliding kit to a $2,000 custom frameless enclosure, and the choice affects your budget, your cleaning routine, and how the space looks for the next decade. This guide walks through every decision so you land on the right door for your bathroom and your wallet.
Part of our Bathroom Remodeling & Flooring guide — explore the full guide →
- Framed, Semi-Frameless, or Frameless
- Door Configurations
- Choosing the Glass
- What a Shower Door Costs
- Can You Install It Yourself?
- Installation Basics for a Framed Kit
- Keeping the Glass Spotless
- Preventing Leaks and Mold
- Hardware and Finish Options
- Measuring Your Shower Opening
- Choosing the Right Door for You
Framed, Semi-Frameless, or Frameless
The framing style is the biggest decision, driving both price and appearance. Each has a distinct look and a different maintenance profile.
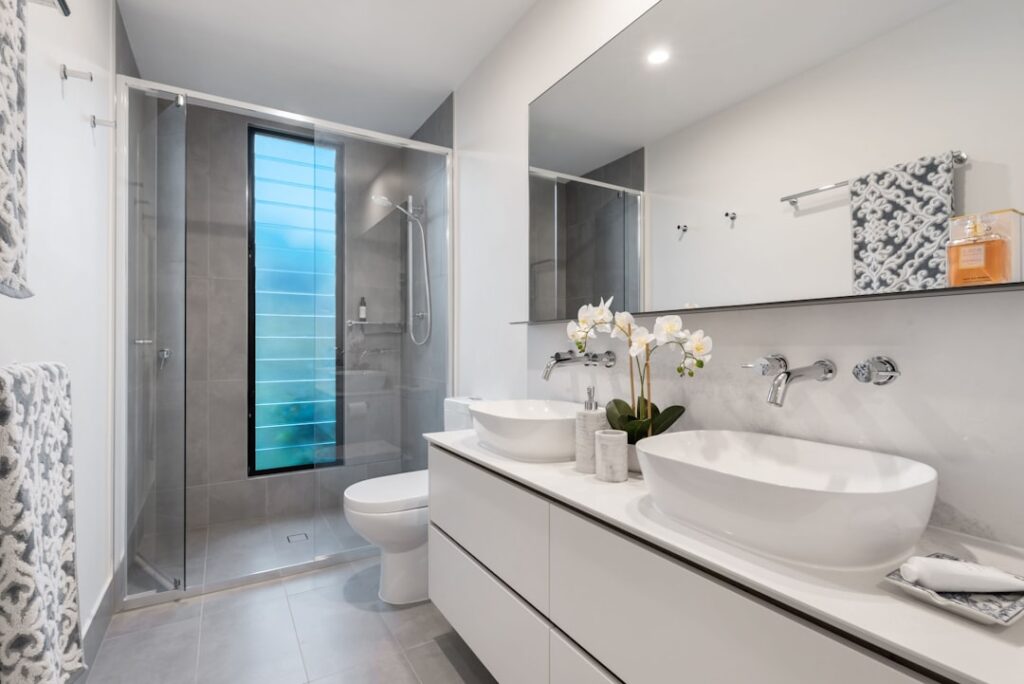
- Framed: Metal framing surrounds every glass edge. The most affordable and structurally forgiving option, but the metal channels trap water and grime.
- Semi-frameless: Framing on some edges only, usually the perimeter, with a frameless door panel. A middle-ground look and price.
- Frameless: Thick tempered glass with minimal or no metal, held by discreet clips and hinges. The cleanest, most modern look and the easiest to wipe down, but the most expensive.
Frameless doors use thicker glass to stay rigid without a frame, which is part of why they cost more. The payoff is an open, luxurious look and far fewer crevices for mildew.
Door Configurations
How the door opens has to suit your bathroom’s layout and the space in front of the shower. Pick the configuration before you fall in love with a finish.
- Sliding (bypass): Two panels glide past each other on a track. Perfect for tub-shower combos and tight bathrooms since nothing swings out.
- Hinged (pivot): A single door swings open like a regular door. Needs clearance in front and suits walk-in showers.
- Bi-fold: The door folds in half as it opens, saving swing space.
- Neo-angle: An angled door for corner shower stalls.
- Pivot with return panel: A hinged door paired with a fixed glass panel for larger openings.
Choosing the Glass
Glass thickness and finish shape both durability and style. All shower glass is tempered for safety, meaning it shatters into small pebbles rather than dangerous shards if it ever breaks.
Thickness ranges from 3/16 inch on framed doors to a hefty 3/8 or 1/2 inch on frameless panels; thicker glass feels solid and hangs flatter. Beyond clear glass, you can choose frosted or rain-textured glass for privacy, low-iron glass that eliminates the greenish tint of standard glass for true clarity, and factory-applied protective coatings that make water bead and roll off. That coating, sold under names like ClearShield or EnduroShield, is worth the upgrade because it dramatically cuts cleaning time.
What a Shower Door Costs
Price tracks closely with the framing style and whether the glass is stock or custom-cut. Here is the 2026 landscape.
- Framed sliding door kit (DIY): $150 to $500.
- Semi-frameless door, installed: $500 to $1,000.
- Frameless door, installed: $900 to $2,500.
- Custom frameless enclosure: $1,500 to $4,000+.
- Professional installation labor alone: $200 to $600.
Custom sizing, heavy low-iron glass, and premium hardware finishes push costs toward the top of these ranges.
Can You Install It Yourself?
A stock framed or semi-frameless kit is a realistic weekend DIY project if you are comfortable with a level, a drill, and a caulk gun. These kits are engineered with adjustable channels to absorb the small out-of-plumb reality of most shower walls.
Frameless doors are a different story. The heavy glass is unforgiving, the holes for hinges and clips must be drilled into tile with exact placement, and any error can crack a costly panel. Most frameless installations are measured and installed by the glass company, both for accuracy and because custom glass is often non-returnable. If you go DIY on a framed kit, drill tile carefully with a diamond bit, seal every anchor, and let the silicone cure a full 24 hours before the first shower.
Installation Basics for a Framed Kit
Success with a framed door comes down to a level base track and watertight sealing. Rushing either step leads to leaks.
Start by measuring the opening at several heights and cutting the bottom track to fit. Set it in place and shim it dead level, since the tub or curb is rarely perfectly flat. Mark and drill the wall jamb holes into the tile, insert wall anchors, and fasten the vertical channels plumb. Hang the door panels on the track, adjust the rollers so the door glides smoothly and seals evenly, then run a continuous bead of clear silicone along the inside seams. Critically, leave a small gap or weep holes at the outside bottom track so any water that gets in can drain back into the shower rather than pooling.
Keeping the Glass Spotless
The enemy of clear shower glass is hard-water spotting and soap scum, which etch permanently if left too long. The single best habit is keeping a squeegee in the shower and wiping the glass down after each use; 20 seconds prevents the buildup that takes an hour to scrub later.
For a weekly clean, spray a mix of equal parts white vinegar and water, let it sit a few minutes, then wipe. Avoid abrasive pads that scratch glass and dull metal finishes. If you skipped the factory coating, a consumer glass sealant applied a few times a year makes water bead and keeps spots from bonding.
Preventing Leaks and Mold
Most shower door leaks come from failed caulk or a missing sweep. Inspect the silicone seams a couple times a year and recaulk any that have cracked or pulled away. Replace the clear vinyl sweep along the bottom of the door when it hardens or tears, since that strip is what blocks water at the threshold. On framed doors, keep the bottom track clean and clear so its weep holes can drain, preventing the standing water that breeds mold.
Hardware and Finish Options
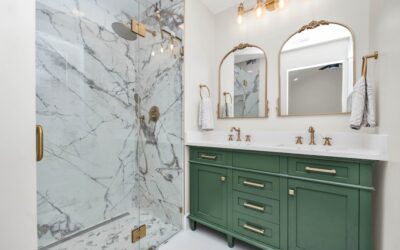
The metal hardware is where a shower door’s style and durability come together. Handles, hinges, towel bars, and framing come in finishes that should coordinate with your faucets and other bathroom fixtures for a pulled-together look. Popular choices include polished chrome, brushed nickel, matte black, and warm brushed gold, each setting a different tone from crisp and traditional to moody and modern.
Beyond looks, hardware quality affects longevity. Solid brass or stainless hinges resist corrosion far better than cheap plated zinc, which can pit and flake in the constant humidity of a shower. On frameless doors, the hinges carry the full weight of heavy glass, so paying for quality hardware is not just cosmetic; it keeps a 100-pound panel swinging true for years. Check that the finish carries a warranty against corrosion, since a bathroom is the harshest environment in the house for metal.
Measuring Your Shower Opening
Accurate measurements are the foundation of a door that seals and operates properly, and showers are almost never perfectly square. Measure the width of the opening at three heights, the top, middle, and bottom, because walls bow and tile is rarely plumb. For a stock kit you generally work from the widest measurement and rely on adjustable channels to take up the slack, while a custom frameless door is cut to a precise field measurement.
Check the opening for plumb with a level on each side jamb, and note any out-of-square condition so you or your installer can plan for it. Also confirm the curb or threshold is reasonably level, since a sloped base affects how the door seals at the bottom. For frameless glass, these measurements are usually taken by the glass company because the panels are custom-cut and non-returnable, and an error of even a quarter inch can ruin an expensive piece of tempered glass.
Choosing the Right Door for You
Balance budget, bathroom size, and how much cleaning you are willing to do. A framed sliding door is the practical, affordable pick for a busy family bathroom or a tub combo. A frameless enclosure is the splurge that transforms a primary bath into something that feels custom-built. Whichever you choose, prioritize tempered glass, a good water-repelling coating, and a watertight installation, and your new shower door will look sharp and keep the floor dry for years to come.