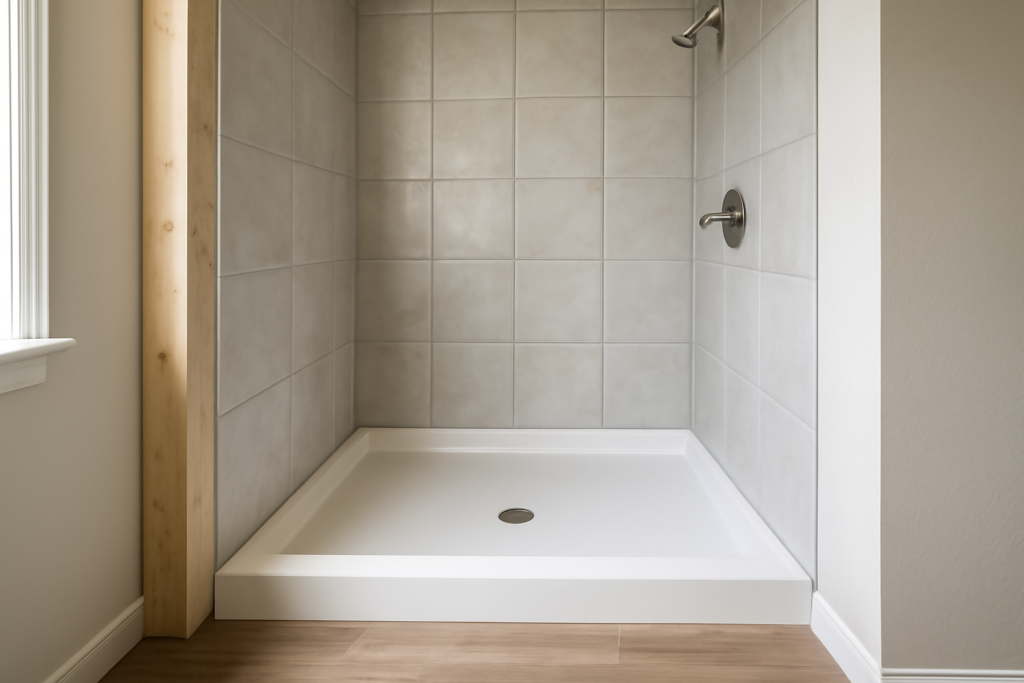
Some of the smartest showers I build aren’t fully tiled. Pairing a factory shower pan with tile walls above it — an acrylic, fiberglass, or solid-surface base on the floor, real tile from the pan’s flange to the ceiling — gets you the custom look where your eyes actually go, while handing the hardest, leak-prone part of the job to a factory. I call it the hybrid build, and for budget remodels, DIYers, and anyone traumatized by shower-pan horror stories, it’s frequently the right answer. The whole trick is in one detail: how the tile meets the pan flange. Get that right and this shower outlives the mortgage. Get it wrong and you’re feeding water behind a plastic lip for years.
Why Go Hybrid Instead of Full Tile?
Be clear on what this build is: it is not a ready-to-tile foam base kit, where you tile the floor itself. Here the pan is the finished floor — you stand on acrylic or composite, not on mosaic. That’s the trade, and it cuts both ways:
- Leak risk plummets. A tiled shower floor has a membrane, a slope, a drain connection, and dozens of grout joints that all have to be right. A one-piece factory pan has a molded drain and zero field-built waterproofing on the floor. The floor is the part of tiled showers that fails; the hybrid deletes it.
- Cost drops $700 to $1,500. A quality 60×32 acrylic pan runs $250 to $600; a solid-surface pan $500 to $1,000. A properly built tile floor — pre-sloped base or mud bed, membrane, drain, mosaic, labor — runs $1,200 to $2,000 installed.
- Maintenance is a wipe. No shower-floor grout to scrub, seal, or recolor. Anyone who’s knelt in a shower with a grout brush understands.
- The compromise: the floor looks like a plastic pan, because it is one. Solid-surface and stone-composite pans in matte white or slate textures close most of the visual gap; glossy fiberglass closes none of it.
Choosing the Pan
Materials, worst to best
- Gelcoat fiberglass ($150–$350): lightweight, flexy, scratches and yellows. Fine for rentals; I rarely spec it for keepers.
- Acrylic ($250–$600): the mainstream choice. Warmer underfoot, holds gloss, decent rigidity — buy one with a reinforced, fully supported bottom.
- Solid surface / stone composite ($450–$1,100): heavy, dead-solid underfoot, matte textured finishes that photograph like stone. Brands like Swanstone, Tile Redi’s composite line, and the big plumbing houses’ “stone resin” pans. This is what makes a hybrid shower look intentional rather than economical.
Sizes and specs to check
Standard alcove sizes are 60×30, 60×32, 60×36, 48×32, 48×36, 36×36, and 32×32, in left, right, and center drain — match your existing drain location or budget plumbing work to move it ($300 to $600 if the trap has to relocate). Critically for this build, the pan must have an integral tiling flange (also called a tile lip or nailing flange) on all wall sides — a vertical upstand of 1 to 3 inches that laps behind the wall system. Some cheap pans have no flange or a stubby half-inch lip; skip them. No flange, no reliable tile transition.
The Flange Detail: Where Hybrids Live or Die
Water will get through grout — always assume it. The wall assembly has to shed that water onto the pan’s surface, shingle-style. The correct stack, from studs out:
- Pan set in a bed of mortar (yes, even “no-mortar-required” pans — a mortar bed under the base kills flex, and flex kills caulk joints), flange screwed or nailed to studs through the pre-punched holes, pan dead level both directions.
- Cement board or foam backer installed with its bottom edge lapping over the front face of the flange, held about 1/4 inch above the horizontal pan deck. If the flange kicks the board out, shim the studs so the wall plane stays flat. Never tuck the board behind the flange.
- Waterproofing membrane (liquid or sheet) over the backer, carried down over the flange face. I run sheet band or liquid right onto the flange itself so any water in the wall exits on top of the pan.
- Tile set to within 1/8 inch of the pan deck, and that joint filled with 100 percent silicone — never grout. Pan and tile move differently; grout there cracks by spring.
That’s the entire secret of this build, and it costs nothing extra — it’s purely sequence and care. Every failed hybrid I’ve opened up had backer board stopped short above a bare flange, or grout packed into the movement joint.
Wall Tile Over a Pan: What Works
Above the flange you’re building a normal tiled wall, so all the usual guidance applies: cement board or foam board plus membrane in the spray zone, modified thinset, tile to the ceiling if the budget allows. A few hybrid-specific notes:
- Plan the layout from the pan up. The pan deck is your visual baseline. Set a level ledger for the first full course about a tile’s height above the pan, tile upward, then cut the bottom course to fit with the 1/8-inch silicone gap. Pans are level; framing isn’t — never just stack off the flange.
- Large format shines here. With no floor mosaic to coordinate, 12×24 or 4×12 walls with tight joints look sleek against a solid-surface pan. Fewer grout lines also means less maintenance contrast with the grout-free floor.
- Match undertones. A bright-white acrylic pan against warm cream tile looks off. Bring a tile sample to the pan (or vice versa) before committing. Matte gray composite pans are the most forgiving partners.
Real Numbers for a 60×32 Alcove
| Item | DIY materials | Contractor installed |
|---|---|---|
| Acrylic pan w/ flange | $350 | $650 |
| Mortar bed, fasteners | $40 | incl. |
| Backer board + membrane, 3 walls | $300 | $700 |
| Wall tile, 90 sq ft @ $2.50 | $225 | $225 + $1,400–$2,200 labor |
| Thinset, grout, silicone, trim | $160 | incl. |
| Total | ~$1,075 | $3,000–$4,500 |
A comparable full-tile shower with a built floor typically quotes $5,500 to $9,000 in my market. The hybrid saves 30 to 45 percent and shaves two to four days off the schedule, since there’s no pan membrane cure or flood test on the critical path — though I still water-test the drain connection before walls close in.
Who Should and Shouldn’t Build This
The hybrid is my recommendation for: DIYers doing their first shower (the pan removes the highest-skill component), rental and flip bathrooms, hall baths, and anyone whose budget forces a choice between cheap-everything and a good pan with good walls. It’s the wrong call when you want a curbless entry (factory curbless pans exist but options thin out fast), a nonstandard footprint where no pan fits without dead space, or a primary-suite showpiece where the floor mosaic is the design. And if you’re up in the $8,000-plus bracket anyway, a fully tiled floor with a linear drain is worth its premium.
The Five Mistakes That Sink Hybrid Builds
Since the flange detail carries the whole system, most failures trace to a short list I can recite from memory. One: setting the pan on bare subfloor because the box said mortar was optional — the pan flexes, the silicone joint works open, and water finds the seam within a couple of years. Bed every pan. Two: hanging the backer board behind the flange instead of over its face, which routes wall water directly into the framing; I find this in roughly half the amateur tear-outs I do. Three: grouting the tile-to-pan joint because the silicone gap “looked unfinished” — that grout line cracks by the first winter. Four: skipping the level check and shimming later with caulk; a pan that’s an eighth out of level drains fine but shows a tapering caulk line against your dead-level first tile course forever. Five: buying the pan and the drain separately without confirming the drain rough-in location, then discovering the trap is two inches off. Dry-fit the pan over the open drain before anything is glued, screwed, or bedded. None of these mistakes costs money to avoid — only sequence and patience.
After twenty-odd years, my honest scorecard: the shower pan with tile walls build has the lowest callback rate of anything I install. The factory handles the geometry that gets field-builders in trouble, the tile handles the beauty, and one careful silicone joint handles the marriage between them. Set the pan level in mortar, lap everything over the flange, keep grout out of the movement joint, and this is the shower you never hear from again.
Prefer to explore on your own?
See how new flooring looks in your actual room in seconds — free, no signup.
Try the free Floor Studio →