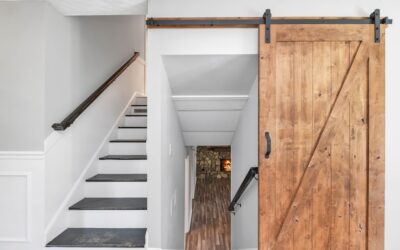
A sliding pocket door kit lets you install a door that slides neatly into a hidden cavity inside the wall, freeing up the floor space a swinging door would otherwise occupy. Pocket doors are a brilliant solution for tight spaces like bathrooms, closets, laundry rooms, and small hallways, and modern kits make what was once a specialized carpentry job accessible to determined homeowners. This guide covers how pocket doors work, what comes in a kit, how to size one, and the steps to install it.
Part of our Windows & Doors guide — explore the full guide →
Whether you are remodeling a cramped bathroom or simply want a cleaner, more open feel, understanding pocket door kits helps you decide if this space-saving upgrade is right for your home.
How a Pocket Door Works
Instead of swinging on hinges, a pocket door hangs from rollers on an overhead track and slides horizontally into a hollow pocket built inside the adjacent wall. When open, the door disappears almost entirely into the wall, leaving the doorway clear. When closed, it slides back out to fill the opening like a normal door. Because it needs no arc of floor space to swing, a pocket door reclaims valuable square footage, sometimes as much as ten square feet of usable floor area.
The trade-off is that the wall must be able to house the pocket, which requires a non-load-bearing wall section wide enough for the door to slide into, and no electrical or plumbing lines in that cavity.
What Comes in a Pocket Door Kit
A typical sliding pocket door kit includes the framing and hardware needed to build the pocket and hang the door. Common components are:
- The overhead track that the door rollers ride along.
- Roller hangers or trolleys that attach to the top of the door and glide on the track.
- Split-stud framing or steel-reinforced studs that form the pocket cavity inside the wall.
- A header and end brackets to support the track and frame.
- Floor guides and bumpers to keep the door aligned and stop it at the right point.
Most kits do not include the door slab itself, so you buy the door separately and match it to the kit’s specifications. Kits come in versions for different door sizes and wall thicknesses, so read the specs carefully.
Sizing Your Pocket Door
Correct sizing is critical because the wall pocket must be large enough to fully receive the door. Key measurements include:
- Door width: the pocket cavity needs to be roughly twice the door’s width, since the door must slide entirely inside the wall.
- Rough opening: the framed opening must accommodate both the visible doorway and the hidden pocket, so plan for the full span in the wall.
- Wall thickness: standard interior walls are built with 2×4 studs; kits are made to fit these, and thicker walls need the matching kit version.
- Header height: allow room above the opening for the track and rollers.
Common door widths for pocket doors range from 24 to 36 inches, with wider and double-door kits available for larger openings. Measure carefully and confirm the wall section has enough clear width and no obstructions before ordering.
Where Pocket Doors Work Best
Pocket doors shine anywhere floor space is at a premium or a swinging door would be awkward:
- Small bathrooms where a swinging door would hit the vanity or toilet.
- Closets and pantries in tight hallways.
- Laundry rooms and utility closets.
- Openings between rooms where you want the option to close off space without sacrificing floor area.
- Home offices and small bedrooms.
They are best suited to non-load-bearing interior walls free of plumbing and wiring in the pocket area. If the wall carries structural load or utilities, relocating those adds significant cost and complexity.
Installing a Pocket Door Kit
Installing a pocket door is a moderately advanced project, typically done during a remodel when the wall is open or being rebuilt. The general process is:
- Prepare the opening. Remove drywall and existing framing to create a rough opening sized for both the doorway and the pocket.
- Install the track and header. Level and secure the overhead track according to the kit instructions, since a level track is essential for smooth sliding.
- Assemble the split-stud frame. Set the pocket studs plumb and secure them to form the cavity, taking care that fasteners will not protrude into the pocket where they could scratch the door.
- Hang the door. Attach the roller hangers to the top of the door slab and hook them onto the track, then adjust the height so the door hangs level.
- Install guides and bumpers. Add the floor guide and stops so the door tracks straight and stops cleanly.
- Close up the wall. Hang drywall over the pocket framing, but use only short screws where indicated so they do not pierce the pocket and hit the door.
Getting the track perfectly level and the frame plumb is the most important part of the job; a door that is out of level will slide open or closed on its own and bind against the frame.
Pros and Cons to Consider
Weigh the benefits against the drawbacks before committing:
- Pros: saves floor space, creates a clean and open look, ideal for tight rooms, and adds a modern architectural feel.
- Cons: more involved to install than a hinged door, requires opening the wall, offers less sound insulation, and repairs to hardware inside the wall are harder to reach.
Choosing a Quality Kit
The quality of the kit you choose has a big impact on how smoothly and quietly the door operates over the years. When comparing kits, pay attention to:
- Track and roller quality: heavy-duty steel tracks and precision ball-bearing rollers glide more smoothly and last longer than lightweight ones.
- Weight capacity: confirm the kit is rated for the weight of your chosen door slab, especially for solid-core or glass doors.
- Split-stud strength: steel-reinforced or well-braced pocket studs resist warping and keep the cavity true.
- Soft-close options: some kits include a soft-close mechanism that prevents slamming and adds a premium feel.
- Adjustability: roller hangers that adjust easily make leveling and future tweaks simpler.
Spending a little more on a robust kit pays off in years of quiet, reliable operation and fewer repairs down the road.
Door Slab Options
Because the slab is usually purchased separately, you have flexibility in the look and feel of the door. Options include:
- Solid-core doors for better sound insulation and a substantial feel, though they require a kit rated for the extra weight.
- Hollow-core doors for a lighter, more affordable option suitable for closets and low-traffic areas.
- Glass or frosted-glass doors to let light through while maintaining privacy, popular for bathrooms and offices.
- Panel or flat-slab styles to match your home’s interior doors.
Choose a slab that complements your other doors and suits the room’s needs, keeping the weight within your kit’s rating.
Improving Sound and Privacy
One limitation of pocket doors is that they typically offer less sound insulation than a hinged door, since they do not seal as tightly against a frame. If privacy and quiet matter, especially for a bathroom or bedroom, choose a solid-core slab, add soft-close hardware, and consider a pocket door with a privacy latch. Some systems include seals or brushes along the edges that improve both sound dampening and the finished look when the door is closed.
Maintaining a Pocket Door
Once installed, pocket doors need little upkeep. Keep the track clean and free of dust so the rollers glide smoothly, and occasionally check that the door still hangs level, adjusting the roller hangers if it begins to drag. Quality hardware makes a big difference in long-term smoothness and quiet operation, so investing in a well-made kit pays off.
For homeowners who want to reclaim floor space and add a sleek, modern touch, a sliding pocket door kit is an excellent solution. With careful sizing, a level installation, and quality hardware, a pocket door slides silently out of sight when you need the room open and closes cleanly when you want privacy, all without stealing a single inch of your valuable floor space.