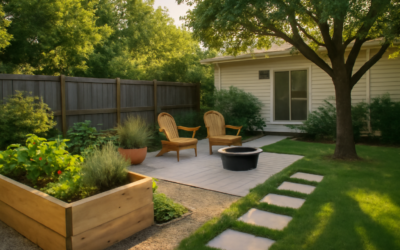
The difference between a backyard that looks thrown together and one that feels designed often comes down to a single brick feature. A planter, a fire pit, a stretch of paver edging — any of these can anchor a yard without demanding a contractor or a permit. Small outdoor brick projects are the gateway DIY for homeowners who have never mixed mortar, and they pay off in curb appeal for thirty-plus years if you get the base right.
Part of our Windows & Doors guide — explore the full guide →
Why Brick Beats Concrete for Most DIY Yards
Brick weathers gracefully. A poured concrete pad cracks, stains, and looks dated within ten years, while a brick walkway laid over a compacted base will outlast the house. Standard modular brick measures 3-5/8 by 2-1/4 by 7-5/8 inches and weighs about 4.5 pounds, which means an average adult can handle the lifting without strain.
Pricing has stayed remarkably stable. Common red clay brick at Home Depot runs about $0.55 to $0.85 each. Pavers go for $0.65 to $1.50 depending on style. Compare that to a Belgard or Techo-Bloc concrete paver at $3 to $6 per sq ft, and traditional brick wins on budget every time.
Project 1: A 4×4-Foot Brick Patio Pad
This is the perfect first project. A 16-square-foot pad sits a grill, a small bistro set, or a chiminea, and teaches you the technique behind any larger brick install. You need about 75 modular brick pavers laid in running bond.
- Excavate 7 inches deep — 4 inches for compacted gravel base, 1 inch of bedding sand, 2-1/4 inches for the brick.
- Compact the gravel with a hand tamper or rent a plate compactor from Home Depot ($65 a day).
- Screed the sand level using a 2×4 dragged along temporary rails.
- Lay brick tight, sweep polymeric sand (Techniseal HP NextGel runs $35 a bag) into joints, mist with water, and let it cure.
Total material cost lands near $120 to $160. Budget six to eight hours from the first shovel to the final sweep.
Project 2: A Mortared Brick Planter
A 24-inch-square brick planter dresses up a front porch or anchors the corner of a vegetable garden. Build it three courses high (about 8 inches) using Type N mortar — Quikrete Mason Mix sells for around $8 per 60-pound bag at Home Depot and covers roughly 12 sq ft of joints at standard thickness.
Mix mortar to peanut-butter consistency on a mortar board. Lay a 3/8-inch mortar bed for the first course, butter the ends of each brick, and tap into place with a rubber mallet. Use a level on every course. Twenty-eight bricks and one bag of mortar get the whole planter done for under $40 in materials. Drill four 1/2-inch weep holes near the base before backfilling with potting soil.
Project 3: Brick Edging for Garden Beds
Edging is the easiest entry point because no mortar is required. Set bricks on their narrow long side, half-buried, along a string line. This soldier course gives crisp definition between lawn and bed and stops mulch migration when you’re hitting the edge with a Toro or Husqvarna trimmer.
Dig a 4-inch-deep trench, add a thin layer of sand, set the brick, backfill, and tamp. Forty linear feet of edging takes about 60 bricks at a cost of roughly $50. The look reads more permanent than plastic edging from any big-box store and shrugs off the freeze-thaw cycles that wreck rubber edging within two winters.
Project 4: A Simple Backyard Fire Pit
A 36-inch diameter fire pit uses about 80 fire-rated bricks stacked four courses high. Skip standard red brick — it spalls and explodes when it superheats. Use fire brick rated to 2000°F, sold at Home Depot for around $3 each, or buy a Pavestone fire pit kit for $179 to $329 that pre-cuts the curve.
The International Residential Code (IRC) typically requires fire features sit at least 10 feet from any structure or property line, but municipal codes vary — check with your city before lighting it up. Use a 24-inch ring of high-temp mortar refractory cement (Rutland 211 runs $20 per tub) only on the inside courses if you want a permanent install.
Tools You Actually Need
One of the reasons small outdoor brick projects work as DIY is the tool list stays short. You don’t need a wet saw for most of them — score and snap with a brick chisel handles 95 percent of cuts.
- 4-inch brick trowel and a 3/8-inch jointer (Marshalltown sets, about $35 total)
- 4-foot level — a quality Empire or Stabila runs $30 to $60
- Brick chisel and 3-pound drilling hammer ($25 combined)
- Mason’s line, line blocks, and stakes ($10)
- Plate compactor rental for patios ($65 a day) — skip for planters and edging
- Rubber bucket, mixing hoe, and a sponge for cleanup ($25)
Mortar Versus Dry-Lay: When to Use Each
Mortar locks brick permanently and is required for vertical structures over 12 inches tall like planters, columns, and BBQ surrounds. Dry-lay with polymeric sand suits anything horizontal that sits on a properly compacted base — patios, walkways, edging. Dry-lay also lets you lift and reset individual bricks if the ground heaves after a hard winter.
If you live in a climate zone with deep freezes, like USDA zones 3 through 5, dry-lay is more forgiving. Mortared joints crack when the soil moves; sanded joints just need a re-sweep every two or three years.
Permits, HOAs, and Property Lines
Most small outdoor brick projects fly under the permit radar. Decorative work under 30 inches tall, garden edging, and small patios usually do not require a building permit, but fire pits and any structure tied to gas or electrical lines do. Call 811 at least three business days before digging — it is free and federally mandated.
HOA covenants are stricter than most homeowners realize. Some require approval for visible front-yard masonry. Pull your declaration before you order brick. A weekend project becomes a multi-month headache fast if the architecture committee tells you to tear it out.