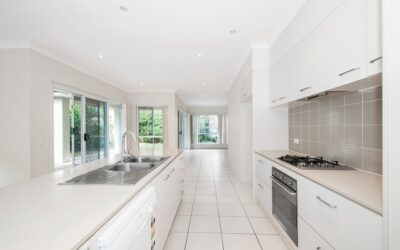
A stainless steel backsplash in kitchen design is the surface every commercial line cook takes for granted and every homeowner second-guesses. Across restaurant panels and residential range walls, the material itself is nearly beyond criticism on performance: it’s heatproof, waterproof, nonporous, and cleans faster than anything else you can put on a wall. The hesitation is always about looks and livability: fingerprints, scratches, and whether brushed metal feels cold in a family kitchen. This article lays out both sides honestly, with real prices and the spec details (gauge, grade, finish) that decide whether you love it or regret it.
Part of our Kitchen Remodeling guide — explore the full guide →
- The Pros: Why Commercial Kitchens Use Nothing Else
- The Cons: What Nobody Tells You at the Showroom
- Costs: Sheet, Fabricated Panel, and Tile
- Specification: Grade, Gauge, and Finish
- Installation Notes
- Living With It: The Two-Minute Care Routine
- Who Should Choose It, and Who Shouldn't
- Design Moves That Keep Stainless From Feeling Cold
The Pros: Why Commercial Kitchens Use Nothing Else
- Completely heatproof. Stainless doesn’t scorch, melt, discolor, or off-gas behind a range. It’s one of the few backsplash materials with no clearance concerns behind high-BTU cooktops, which is why it’s the default answer behind pro-style ranges.
- Nonporous and hygienic. Nothing absorbs. Grease, tomato sauce, and raw-chicken splatter wipe off with a cloth and degreaser, and there are no grout lines to harbor bacteria or mildew. This is the reason health codes push stainless in commercial cooking zones.
- Waterproof with no maintenance cycle. No sealing, ever. Compare that to stone (annual sealing) or grout (sealing plus eventual regrouting).
- Fast installation, few seams. A single fabricated panel can cover the entire range wall in an hour of installation. No tile layout, no thinset cure time, no grouting day.
- Durability measured in decades. A properly specified panel will outlast the kitchen around it. It cannot crack, spall, or delaminate.
- Design range. Beyond the familiar brushed sheet, stainless comes in mirror polish, non-directional swirl finishes, embossed patterns (quilted diamond is the diner classic), and stainless subway or mosaic tile for a softer, textured take.
The Cons: What Nobody Tells You at the Showroom
- Fingerprints and smudges. Brushed stainless shows every touch, especially in raking light. This is the number one daily complaint. Non-directional and embossed finishes hide prints dramatically better than standard #4 brushed.
- Scratches are permanent-ish. Stainless scratches, and unlike tile you can’t replace one damaged unit in a seamless sheet. Fine scratches on brushed finishes can be blended by hand with an abrasive pad following the grain, but a deep gouge is there for good. Mirror finishes are unforgiving and rarely a good fit for working kitchens.
- Dents. Thin material over hollow drywall can dent from an impact and will “oil-can” (show waviness) if the wall isn’t flat. This is a specification problem more than a material problem; more on gauge below.
- Cold, commercial aesthetic. In an all-white kitchen a full stainless wall can read like a restaurant supply catalog. Most residential installs look best as a defined panel behind the range, balanced with warmer materials elsewhere.
- Noise and glare. Big metal planes reflect sound and light. Under bright under-cabinet LEDs, a polished panel can throw glare at eye level.
- Not scrub-proof against the wrong products. Chlorine bleach and steel wool are the two enemies: bleach pits stainless over time, and steel wool leaves carbon particles that rust-stain the surface. Neither is needed anyway.
Costs: Sheet, Fabricated Panel, and Tile
| Option | Material $/sq ft | Installed $/sq ft |
|---|---|---|
| Raw sheet, 24-gauge, DIY-adhered | $7–$15 | $10–$20 (DIY) |
| Fabricated panel, 18–20 gauge, hemmed edges | $15–$30 | $25–$50 |
| Embossed/quilted panels | $12–$25 | $20–$45 |
| Stainless tile (subway/mosaic) | $15–$35 | $30–$60 |
A typical 8-square-foot range-wall panel (30 inches high behind a 36-inch range, counter to hood) runs $200 to $450 fabricated and installed, which makes it one of the cheapest “premium” backsplash moves in a kitchen. Full-perimeter stainless for a 30-square-foot kitchen lands between $750 and $1,500 installed.
Specification: Grade, Gauge, and Finish
Three spec decisions determine whether a stainless steel backsplash in kitchen duty performs like a restaurant’s or disappoints.
- Grade: 304 stainless. This is the standard 18/8 chromium-nickel alloy for kitchens, resistant to food acids and cleaners. Cheaper 430-grade is magnetic, slightly less corrosion-resistant, and acceptable on a budget wall away from heavy moisture; near coastal salt air, step up to 316.
- Gauge: 20 or 18 for panels. Gauge runs backward: smaller number, thicker metal. Flimsy 26-gauge sheet dents if you look at it hard; 24-gauge is the DIY minimum when fully glued to a flat substrate; 20-gauge (about 0.036 in) or 18-gauge (0.048 in) is what fabricators use for hemmed, self-supporting panels that feel solid.
- Finish: #4 brushed is the default; non-directional hides wear best. Match the grain direction to your appliances (usually horizontal) if the panel sits beside them.
Installation Notes
Stainless goes over clean, flat drywall or cement board with panel adhesive applied in full serpentine coverage, pressed and braced until grab. Flatness matters: skim humps first, because a glued-down panel telegraphs every wave, especially in polished finishes. Order the panel with hemmed (folded) edges or cap raw cuts with J-channel, both for looks and because sheared stainless is sharp. Cutouts for outlets are best done at the fabricator; field cuts in 18-gauge need a step bit, jigsaw with a metal blade, and patience. Seal the counter-to-panel joint and any exposed top edge with clear neutral-cure silicone. For DIY tile-format stainless, install exactly like ceramic tile with white thinset and unsanded grout, but tape the tile faces because they scratch during grouting.
Living With It: The Two-Minute Care Routine
Daily: wipe with dish soap and water or a vinegar-water mix, then dry with a microfiber cloth following the grain. Weekly or as needed: a dedicated stainless cleaner or a drop of mineral oil buffed thin evens the tone and slows fingerprinting. Never bleach, never steel wool, never abrasive powders. Fine scratches on brushed panels can be blended with a gray non-woven abrasive pad stroked strictly with the grain; practice on an offcut first. That’s the entire maintenance story, which is precisely the appeal.
Who Should Choose It, and Who Shouldn’t
A stainless steel backsplash in kitchen service makes sense if you cook hard and hate cleanup, you’re pairing it with a pro-style range and hood where it looks native, you want a landlord-grade surface that survives tenants, or your design leans industrial, modern, or true-commercial. Think twice if your kitchen aesthetic is warm and traditional (copper or handmade-look tile serves that better), if household members will bang cookware against the wall regularly and dents would bother you, or if you’re a fingerprint-neurotic buyer eyeing a mirror finish, which is a bad marriage waiting to happen. A popular middle path: an 18-to-20-gauge non-directional stainless panel behind the range only, with tile on the remaining runs. You get all of the performance where it matters and none of the cafeteria vibe.
Design Moves That Keep Stainless From Feeling Cold
The complaints about stainless looking sterile almost always trace to using too much of it in a room that has no warmth anywhere else. A few pairings fix that reliably. Wood is the classic counterweight: a stainless range panel over butcher block counters or beside white oak cabinets reads as workshop-warm rather than cafeteria-cold, which is why the look dominates restaurant-inspired residential kitchens. Warm metals help too; unlacquered brass hardware and a bronze faucet sitting against brushed stainless give the eye a temperature contrast that a monochrome steel wall never provides. Matte-black accents, leathered granite, and handmade elements elsewhere in the room do the same job.
Scale is the other lever. A panel that stops at the hood’s width and the counter’s height reads as an appliance surround, intentional and framed. Steel run wall-to-wall on every backsplash surface reads as commercial cladding, which is a legitimate look in a loft and a strange one in a colonial. If you want stainless everywhere but fear the vibe, quilted or embossed panels split the difference: the texture catches light, hides prints and scratches, and adds a diner-era personality that flat sheet lacks. Under-cabinet lighting deserves a test before you commit, since a warm 2700K strip flatters brushed steel while a harsh 5000K strip turns the same panel blue-gray and clinical.
The verdict: behind a range, stainless steel is the best-performing backsplash material money can buy, and it’s not particularly much money. Spec 304 grade, 20 gauge or heavier, a finish that hides prints, and a fabricator-made panel with hemmed edges. Do that, and the pros bury the cons; skip the spec homework and buy a thin shiny sheet, and the cons will introduce themselves within the month.