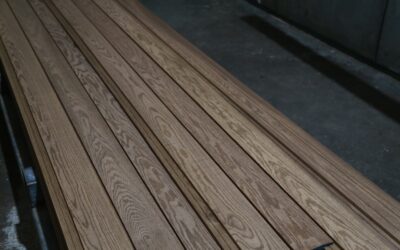
Learning the steps to refinish hardwood floors can save you thousands of dollars and bring a tired, scratched-up floor back to life better than almost any other home project. I have sanded and finished a lot of floors, and the honest truth is that the work is not complicated, but it is unforgiving. The machines move fast, the sanding is dusty and physical, and mistakes get sealed in permanently under the finish. Follow the sequence carefully, do not rush the grits, and respect the dry times, and a determined homeowner can absolutely produce a professional-looking result over a long weekend.
Know When Refinishing Is the Right Call
Before you rent a single machine, confirm the floor is a candidate. You need solid hardwood, or engineered wood with a thick enough wear layer, to survive a full sanding. Solid boards can typically be refinished several times over their life. To check, pull a floor vent and look at the cross-section of a board, or find a spot where the flooring is cut. If you see a thin veneer under a few millimeters, that engineered floor may only tolerate a light screen-and-recoat rather than an aggressive sand. Deep gouges, water stains that reach the wood, and worn-through finish all point to a full refinish being worth the effort.
Prep the Room and Yourself
Clear the room completely and pull up any shoe molding or base trim you plan to reuse. Countersink every protruding nail with a nail set, because a single nail head will shred a sanding belt instantly. Seal off doorways with plastic sheeting and tape, since fine wood dust travels through an entire house. Set up ventilation and commit to wearing a proper respirator, safety glasses, and hearing protection. Sweep and vacuum thoroughly so no grit gets dragged under the sander. This prep hour is not optional; it protects both your lungs and your finish.
The Sanding Sequence: 36, 60, Then 100 Grit
Sanding is the heart of the whole job, and it happens in progressive grits. You rent a drum sander or, for a more forgiving experience, an orbital sander for the main field, plus an edger for the perimeter the big machine cannot reach. Start with a coarse 36-grit to cut through the old finish and level the wood. Always keep the drum moving; if you let it sit in one spot for even a second while it is lowered, it will dig a dish-shaped gouge that is nearly impossible to fix. Work with the grain, in the direction of the boards, moving at a slow, steady walking pace and lifting the drum gently at the end of each pass.
After the coarse pass strips the finish, move to 60-grit to remove the deeper scratches the 36 left behind. Finish the field with 100-grit, which refines the surface to a smooth, stain-ready state. Never skip a grit. Jumping from 36 straight to 100 leaves coarse scratches that the fine paper cannot erase, and they will scream at you once stain goes on. Match each field pass with the edger at the same grit so the perimeter blends with the center.
Edge, Blend, and Vacuum
The edger is aggressive and spins in a circle, so it leaves swirl marks that look different from the straight-line grain of the drum. Feather the edger work into the field and, once you have finished the final grit, hand-sand or use a pole sander along the very edges and corners to blend the two surfaces. Any spot where edger swirls meet drum lines will show up dramatically after stain, so take your time here. When all sanding is done, vacuum the entire floor, then go over it with a slightly dampened cloth or a tack cloth to lift the last of the fine dust. A clean floor is the difference between a glassy finish and one full of embedded grit.
Staining for Color, or Skip Straight to Finish
Deciding whether to stain is a design choice. If you love the natural tone of the wood, you can skip straight to a clear finish. If you want to change the color, this is the moment. Test your stain on an inconspicuous area or a sanded scrap first, because species like oak, maple, and pine all drink stain differently. Apply the stain with a rag or brush along the grain, let it penetrate for the time the manufacturer specifies, usually a few minutes, then wipe off all the excess thoroughly. Leftover stain that is not wiped away stays tacky and ruins the finish coats on top. Let stain dry fully, typically 24 hours, before you apply any polyurethane.
Applying Polyurethane: Coats and Dry Times
The finish is what protects everything you just did. Oil-based polyurethane is durable, ambers the wood slightly, and takes longer to dry, while water-based poly dries fast, stays clear, and has lower odor. Apply the first coat with a high-quality applicator pad or a natural-bristle brush for oil-based, working with the grain in thin, even passes and avoiding puddles. Maintain a wet edge and do not overwork it. Let the first coat dry, roughly 24 hours for oil-based and 2 to 4 hours for water-based.
Between coats, lightly abrade the surface with a fine screen or 220-grit paper so the next coat bonds; this is called scuff-sanding, and you must vacuum and tack the dust off afterward. Apply a total of three coats for a durable floor, more in high-traffic areas. Keep the room warm and stable, ideally between 65 and 75 degrees Fahrenheit, since cold or humid air slows curing and can cloud the finish. These final steps to refinish hardwood floors are where patience pays off, so resist the urge to rush a coat before the previous one is ready.
Tools, Rentals, and What It Costs
Part of what makes refinishing worth it is the economics. A professional refinish runs roughly $3 to $8 per square foot, so a 500-square-foot living and dining area might cost $1,500 to $4,000 done for you. Doing it yourself brings that down dramatically. A drum sander or orbital rents for about $50 to $75 a day, an edger another $30 to $50, and you will burn through sandpaper in all three grits, plus stain, finish, applicators, and a respirator. Most homeowners can refinish a average room for a few hundred dollars in materials and rental fees.
Rent the machines for a full weekend rather than a single day so you are not racing the clock, and pick up more sandpaper than you think you need since coarse belts wear out fast on old finish and you cannot return opened packs mid-job easily. If you have never run a drum sander, seriously consider the orbital version; it is slower but far more forgiving, and it will not gouge the floor if your technique wobbles. The rental counter will also stock the abrasive belts sized for their specific machine, so confirm they have your grits in stock before you haul the sander home.
Curing and Moving Back In
There is a difference between dry to the touch and fully cured. You can usually walk on the floor in socks after the final coat has dried overnight, but the finish keeps hardening for days. Wait at least 24 to 48 hours before light foot traffic, several days before moving furniture back, and up to two weeks before laying down area rugs, which can trap solvents and leave a permanent outline if placed too soon. Move furniture in by lifting rather than dragging, and add felt pads to every leg. Follow these steps to refinish hardwood floors from prep through curing, and you will have a floor that looks brand new and lasts for years before it ever needs attention again.
Prefer to explore on your own?
See how new flooring looks in your actual room in seconds — free, no signup.
Try the free Floor Studio →