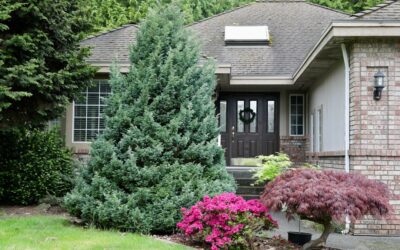
Most stone fronts that look wrong fail for one reason: the stone stops in a place where real masonry never would. Good stone facing for a house reads as if it is holding something up, so it sits low, wraps corners, and ends at a logical break such as a window sill line, a porch beam, or an inside corner. Get those stopping points right and even a modest wainscot of stone veneer can lift the whole facade.
The quickest answer for most homes is a partial accent rather than a full stone facade. A 30 to 42 inch wainscot skirt across the front, stone column bases on the porch, or a stone surround at the entry gives you the look of a stone house at a fraction of the cost and weight. Full-height stone is best saved for one strong element, such as a chimney mass or a projecting gable, where it can look structural.
- Choosing Stone Facing for a House: Start With the Right Layout
- Where to Stop the Stone
- Pairing Stone With Siding
- Stone Facade Panels vs Individual Veneer
- Materials and Prep for a Stone Front
- Safety on Ladders and Scaffolds
- Cost Ranges for Stone Front Accents
- Troubleshooting Common Stone Front Problems
- When to Call a Pro
- Frequently Asked Questions
Layout, stopping points, siding pairings, materials, rough cost ranges, and the point where a mason should take over all play a part in a stone front that looks right.
Choosing Stone Facing for a House: Start With the Right Layout
Before picking a stone color, decide how much of the front the stone will cover. The layout matters more than the product. Here are the five arrangements that work on most American house styles.
Wainscot Skirt
A stone wainscot runs along the base of the front wall, usually 30 to 42 inches tall, capped with a sill or ledgestone. It grounds the house visually and protects the lower wall from splashback and mower debris. Run it the full width of the front and wrap it around both corners at least 2 feet so it does not look like a stick-on panel. On ranch homes, a skirt that aligns with the bottom of the front windows looks especially intentional.
Porch Column Bases
Tapered or square stone piers under wood columns are a Craftsman staple, and they suit farmhouse and transitional homes too. Size matters: a pier base should be at least 18 to 24 inches square for a typical 8 inch column, and it usually rises 30 to 48 inches. Matching the pier height to a stone wainscot on the house ties the porch and wall together.
Entry Surround
Framing the front door with stone, from grade up to the porch ceiling or a header line, puts the visual weight where visitors look. This layout works well when every other wall is sided and you want one focal point. Keep the stone at least 12 to 16 inches wide on each side of the door so it reads as a pier, not a thin strip.
Gable or Bump-Out Accent
A projecting garage bay, front gable, or bay window bump-out can be clad in stone from foundation to roofline. Because it is a separate mass, the stone has a natural place to start and stop at the inside corners. This is one of the few spots where full-height stone looks believable on an otherwise sided house.
Chimney Mass
An exterior chimney chase faced in stone is one of the most convincing uses of stone veneer for a house. The chase is already a vertical, load-looking element, so stone feels natural there. Pair it with a matching skirt elsewhere for consistency.
Where to Stop the Stone
The most common mistake with stone facing for house exterior walls is stopping at an outside corner, which exposes the thin edge and makes the stone look like wallpaper. Use these rules instead:
- Wrap outside corners. Carry the stone around every outside corner by at least 2 feet, or better, to the next inside corner, downspout, or fence line.
- Stop at inside corners. An inside corner is the cleanest termination point because the change in plane hides the edge.
- Cap a wainscot. Finish the top of a skirt with a sill cap or a flat ledge course that projects slightly and sheds water.
- Align with existing lines. Window sills, porch floors, the bottom of the soffit, and the garage door header are all natural heights to end the stone.
- Avoid floating patches. Stone should always reach down to the foundation line. A stone panel hovering halfway up a wall looks fake.
- Keep heavy material low. Never stack stone on top of siding on the same plane.
One more rule worth following: limit stone to one or two elements on the front. A wainscot plus column bases is plenty. Adding a stone entry surround, a stone gable, and a stone chimney all at once tends to look busy.
Pairing Stone With Siding
Stone rarely stands alone on a facade, so the siding next to it has a big influence on the finished look. Pull one color from the stone and use it for the siding or trim, and let the stone carry the texture.
- Warm stacked ledgestone (tans, rusts, browns) pairs with cream, khaki, or warm gray lap siding and dark bronze trim.
- Cool gray fieldstone looks crisp against white or charcoal board-and-batten and black window frames.
- Limestone or light cut stone suits brick-free traditional homes with white or pale blue siding.
- Dark rustic river rock works on mountain or lodge-style homes with stained cedar-look shakes.
Texture contrast helps too. Smooth fiber cement or vinyl next to rough stacked stone gives a clear change. Rough shake next to rough stone can look muddy, so choose a tighter cut stone or a smoother siding profile in that case. If you are unsure, hold a sample board against the wall at different times of day before committing, because stone colors shift a lot between morning and late afternoon light.
Stone Facade Panels vs Individual Veneer
You have three main material routes for stone facing for exterior walls, and each affects weight, look, and installation.
- Manufactured stone veneer: Cast concrete pieces molded from real stone, typically 1.5 to 2 inches thick and about 10 to 15 pounds per square foot. They go up one piece at a time over a lath and mortar system, so the pattern looks natural and corners can be wrapped with matching corner units.
- Thin natural stone veneer: Real stone sawn to roughly 1 inch thick. It has the most authentic color variation and weathers like real masonry, but it costs more and needs more skill to fit.
- Stone veneer panels: Interlocking panels, either cast concrete or lightweight polyurethane, that cover 2 to 4 square feet at a time. They install faster and suit DIY skirts, though the repeating pattern can show on long, flat runs. Mixing panel orientations and using the matching corner pieces helps.
For a front accent such as a wainscot or column bases, stone veneer panels are a reasonable DIY choice. For a whole outdoor stone facade or a chimney mass, individual veneer installed by a mason usually looks better and handles moisture more reliably.
Materials and Prep for a Stone Front
Moisture management is the hidden part of any stone facade on a house. Stone veneer is not waterproof; water passes through it and must drain out the bottom. A typical adhered veneer assembly includes:
- Sheathing in good condition on the wall.
- Two layers of water-resistive barrier, or one layer plus a drainage mat.
- Corrosion-resistant metal lath fastened into the studs.
- A scratch coat of mortar, scored and allowed to set.
- The stone set in mortar, with joints tooled or left dry-stacked depending on the style.
- A weep screed at the base, held several inches off grade and a couple of inches off paved surfaces, so water can escape.
Flashing over windows, doors, and at the top of a wainscot cap is critical. Most failures with stone veneer for a house come from missing weep screeds, stone buried in soil or mulch, and poor flashing at openings, not from the stone itself. If your home has older wood siding, removing it along the area to be faced will expose the sheathing for inspection, which is worth doing before you cover it for decades.
Safety on Ladders and Scaffolds
A wainscot can be done from the ground, but gable accents, chimney chases, and tall entry surrounds put you on a ladder or scaffold with a heavy bucket and stone. Use a stable extension ladder set at a 4 to 1 angle with feet on firm, level ground, and keep three points of contact. For anything more than a few courses up, rent walk-board scaffolding with guardrails so you are not lifting 15 pound stones while balancing on rungs. Wear eye protection and gloves when cutting stone, and work with a helper who can hand up material. Any stone work at the second-story level or on a tall gable is a job for a pro with proper staging.
Cost Ranges for Stone Front Accents
Costs vary widely by region and material, but general ranges help you plan:
- Manufactured veneer, installed: roughly mid-teens to high-$20s per square foot in many markets.
- Thin natural stone, installed: often $25 to $45 or more per square foot.
- DIY stone veneer panels: material frequently falls between about $8 and $20 per square foot, plus lath, mortar or adhesive, and trim pieces.
A 40 foot wide, 3 foot tall wainscot is about 120 square feet plus corners, which puts a professionally installed skirt in a manageable range for many homeowners. Full stone facades for homes cost far more because of the square footage and the scaffolding time.
Troubleshooting Common Stone Front Problems
- White efflorescence on the stone: salts carried by water. It usually means water is not draining well. Check the weep screed, grade clearance, and gutters before scrubbing.
- Stone looks fake: often caused by repeating panels, exposed edges at outside corners, or stone that stops mid-wall. Add corner pieces and extend to an inside corner.
- Cracks at the top cap: the cap may lack slope or flashing. A sloped sill with a drip edge sheds water better.
- Staining on siding: mortar splatter or runoff from the stone. Keep a wet sponge handy during installation and confirm the cap directs water outward.
When to Call a Pro
Hire a qualified mason or siding contractor for full-height stone, chimney chases, gable accents higher than the first floor, or any job where flashing around windows and doors must be integrated with the existing wall. A pro will also know whether your area needs a permit or HOA approval for facade changes, which many neighborhoods require. A DIY-friendly scope is a ground-level wainscot or column bases using stone veneer panels, as long as you take the drainage details seriously.
Frequently Asked Questions
How high should stone go on the front of a house?
For a wainscot, 30 to 42 inches is typical, or the height of the front window sills. Full-height stone looks best only on a separate mass, such as a chimney or bump-out, where it can start and stop at inside corners.
Can stone veneer be installed over existing siding?
No. Siding has to come off so the veneer can be installed over sheathing, a water-resistive barrier, and lath. Installing over siding traps moisture and does not give a secure attachment.
Is stone facing for a house worth it for resale?
A tasteful stone accent tends to improve curb appeal, and manufactured stone veneer is often cited as one of the better-returning exterior projects. Keep it to one or two elements so it suits the style of the neighborhood.
What is the easiest stone front project for a DIYer?
A ground-level wainscot or porch column bases using interlocking stone veneer panels. They install faster than individual stones and do not require scaffolding, though the drainage details still matter.
How do you keep stone veneer from failing?
Use a proper water-resistive barrier, a weep screed at the base, flashing at openings, and keep the stone several inches clear of soil and mulch. Clean gutters so overflow does not soak the stone.