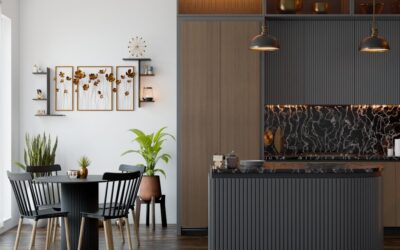
Most kitchens stop at under-cabinet lighting and miss the details that make the room glow at night. Well-placed strip lights for kitchen toe-kicks, cabinet tops, island overhangs, and open shelves add depth, work as a gentle night light, and make even a builder-grade kitchen look custom. The trick is treating them as one plan rather than a collection of random strips.
Part of our Kitchen Remodeling guide — explore the full guide →
Start by choosing where the light should land: floors, ceilings, or display surfaces. Pick one color temperature for the whole room, usually 2700K to 3000K for a warm look, and group the accent strips on a single dimmer zone so they turn on together. Then size a UL-listed driver for the total wattage, route low-voltage wiring separately from household wiring, and mount strips in aluminum channels where they will be seen.
- Planning Strip Lights for Kitchen Spaces: Zones and Goals
- Toe-Kick Lighting
- Cabinet-Top and Cove Uplighting
- Island Overhang Lighting
- Open Shelves and Glass-Front Cabinets
- Choosing the Right LED Strip Lights for Kitchen Units
- One Switch, One Dimmer: The Zone Plan
- Tools and Materials
- Installation Steps
- Fire and Electrical Safety
- Troubleshooting
- General Cost Ranges
- When to Call a Licensed Professional
- Frequently Asked Questions
Under-cabinet task lighting is its own topic; this guide focuses on the other locations and how to tie them into a clean, switch-and-dimmer plan.
Planning Strip Lights for Kitchen Spaces: Zones and Goals
Kitchen lighting works in layers: ambient ceiling light, task light over counters, and accent light. LED strips mostly fill the accent layer, with under-cabinet strips doing task duty. Before buying anything, sketch your kitchen and mark each run with its length in feet.
- Toe-kick: the 4-inch recess at the base of cabinets.
- Cabinet tops: the space between upper cabinets and ceiling, or behind crown molding.
- Island overhang: under the countertop lip on the seating side.
- Open shelves and glass cabinets: display lighting for dishes and decor.
- Coves and soffits: indirect uplighting on ceilings.
Add up the lengths, then multiply by the strip’s watts per foot to get your total load. That figure decides driver size and how many power feeds you need.
Toe-Kick Lighting
Toe-kick strips wash the floor with soft light, making cabinets appear to float. They are ideal as a night light for late trips to the fridge.
- Mount the strip on the underside of the cabinet base or the back of the toe-kick face, angled so you see the glow on the floor, not the diodes.
- Use a diffused channel or a strip with a built-in silicone cover, since toe-kicks get kicked, mopped, and splashed. Choose a strip rated for damp locations near sinks and dishwashers.
- Keep brightness low, around 100 to 200 lumens per foot, so it reads as ambient light.
- Glossy tile and polished floors reflect strips as a line of dots; a diffused channel avoids that effect.
Cabinet-Top and Cove Uplighting
If your uppers stop short of the ceiling, strips on top of the cabinets bounce light off the ceiling and make the room feel taller.
- Set the strip back 2 to 4 inches from the front edge, or hide it behind a crown molding lip, so it is not visible from below.
- Point the light upward or toward the wall to create an even wash.
- Clean the cabinet tops before installing; adhesive will not hold on grease and dust. Aluminum channels screwed in place are more reliable than adhesive alone.
- Keep strips away from heat sources: do not run adhesive strips near a range hood duct, recessed can housings, or directly above a cooktop.
Island Overhang Lighting
A strip tucked under the countertop overhang on the seating side outlines the island and lights the stools or the panel below.
- Mount the strip in a channel set 1 to 2 inches behind the countertop edge so knees and heads do not see the diodes.
- Run power from the island’s existing outlet circuit or a box inside the cabinet, installed by an electrician if a new feed is needed.
- Consider a slightly warmer tone or lower brightness than the task lights, because diners look toward this light.
- If the island has a waterfall edge or panels on multiple sides, return the strip around the corner for a continuous line.
Open Shelves and Glass-Front Cabinets
Shelves and glass doors display dishes, glassware, and plants. Here the goal is highlighting objects, not flooding the room.
- For floating shelves, rout a shallow groove on the underside near the front edge and inset a slim channel to light the shelf below.
- In glass-front cabinets, run vertical strips in the front corners of the cabinet frame, or add strips to the underside of each shelf.
- Glass shelves let light pass through multiple levels; wood shelves need a strip per shelf.
- Plan wire routing through the back of the cabinet or a hollow shelf so no cords show.
Choosing the Right LED Strip Lights for Kitchen Units
Buying good led strip lights for kitchen units makes a bigger difference than the brand name on the package. Compare these specs:
- Color temperature: 2700K to 3000K feels warm and matches most ceiling fixtures; 3500K to 4000K feels crisp. Pick one and use it everywhere.
- CRI: A color rendering index of 90 or higher makes food, wood, and stone look natural.
- Voltage: 24V strips allow longer runs with less voltage drop than 12V strips, meaning more even brightness from end to end.
- LED density: Higher density, or COB-style strips, produce a smoother line without visible dots.
- Moisture rating: Coated or damp-rated strips belong near sinks and toe-kicks.
- Dimming compatibility: Confirm the driver and dimmer are designed to work together.
- Listing: Choose UL-listed or equivalent certified strips and drivers.
A quality led strip for kitchen accent use does not need to be extremely bright. For toe-kicks and cabinet tops, moderate output looks more refined than a harsh glow.
One Switch, One Dimmer: The Zone Plan
The easiest way to make a strip-lighting project feel professional is controlling all accent runs together.
- Group accent runs. Toe-kick, cabinet top, shelves, and island overhang share one zone. Under-cabinet task lights get their own switch.
- Centralize drivers. Place one or two drivers in an accessible, ventilated spot, such as inside an upper cabinet or above the range hood cabinet, not buried in insulation or behind drywall without access.
- Size drivers correctly. Choose a UL-listed driver rated for at least 20 percent more than the total strip wattage. Never overload a driver.
- Choose the control. A wall dimmer compatible with the driver, or a low-voltage dimmer between driver and strips, gives smooth control. Smart dimmers and scene controllers let you set evening levels.
- Route wiring cleanly. Run low-voltage wire through cabinet backs and toe-kick cavities, keeping it separate from line-voltage wiring.
Tools and Materials
- LED strips (24V recommended) and aluminum channels with diffusers
- UL-listed driver sized to the load, plus compatible dimmer
- Low-voltage wire, connectors, and wire clips
- Drill, small screws, hacksaw for channels
- Isopropyl alcohol and rags for surface prep
- Non-contact voltage tester if touching any existing switch or circuit
Installation Steps
- Turn off the breaker for any circuit you will touch, then confirm power is off with a non-contact voltage tester before opening boxes.
- Clean surfaces with isopropyl alcohol and let them dry.
- Cut channels and strips to length, cutting strips only at marked cut points.
- Mount channels with screws or clips, then press strips into place.
- Run low-voltage leads to the driver location, keeping them away from household wiring and heat sources.
- Connect strips to the driver and dimmer following the manufacturer’s diagram. Hardwired drivers and new switch boxes should be connected by a licensed electrician.
- Test each zone at low and full brightness, then snap on diffusers.
Fire and Electrical Safety
LED strips run cool compared to old incandescent rope lights, but they still produce heat and need care. Use UL-listed drivers sized to the load, and never cover strips with insulation or bunch coils together while powered. Keep adhesive-backed strips off heat sources such as range hoods, recessed can housings, and ovens. Keep low-voltage wiring separate from line-voltage wiring, and give drivers ventilation and access.
Troubleshooting
- Far end looks dimmer or yellower: Voltage drop. Switch to 24V strips or feed power from both ends or the middle.
- Flickering when dimmed: Dimmer and driver are not compatible. Match them per the maker’s list.
- Visible dots on glossy surfaces: Add a diffuser channel or use a higher-density strip.
- Strip peeling off: Surface was greasy or the adhesive got warm. Clean, and use screwed channels.
- Mismatched colors: Strips from different batches or brands can vary. Buy the whole project at once.
General Cost Ranges
A DIY kit for one or two runs is inexpensive, often under the cost of a single pendant light. A full-kitchen accent package with quality 24V strips, channels, drivers, and dimmers costs more but remains modest compared to other kitchen upgrades. Hiring an electrician for new switch boxes, hardwired drivers, or new circuits adds labor that varies by region and wall access.
When to Call a Licensed Professional
Plug-in strip kits are DIY-friendly. Call a licensed electrician for hardwired drivers, adding or moving a switch or outlet, new circuits, or any work inside a junction box. An electrician can also place drivers in accessible, code-compliant locations and confirm the dimmer and load are matched.
Frequently Asked Questions
What color temperature is best for kitchen strip lights?
Warm white between 2700K and 3000K suits most kitchens and matches typical ceiling fixtures. Choose 3500K to 4000K for a crisper look, but keep one temperature throughout the room.
Can LED strips go in toe-kicks near the sink?
Yes, if you choose a coated or damp-rated strip in a covered channel and keep connections away from spills. Mount them on the cabinet base so water from mopping does not reach them.
Should kitchen strip lights be 12V or 24V?
24V is usually better for kitchens because it allows longer runs with less voltage drop, so brightness stays consistent from end to end.
How do I hide the wires for cabinet strip lights?
Route low-voltage wires through the cabinet backs, the toe-kick cavity, or behind crown molding, and use small clips. Keep them separate from household line-voltage wiring.
Can all the accent strips run on one dimmer?
Yes, as long as the driver or drivers are sized for the combined wattage and the dimmer is compatible with them. This single-zone approach gives the cleanest result.