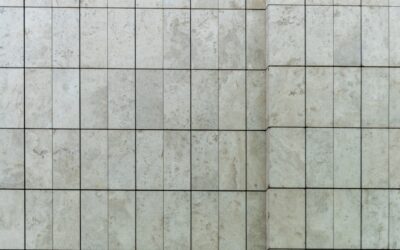
White subway tile black grout is one of the most photographed combinations in modern kitchens and bathrooms, and for good reason. The dark grout lines snap each rectangular tile into sharp relief, turning a plain backsplash into a graphic, almost tailored pattern. It reads as intentional and high-contrast where matching white grout fades into the background. But this look comes with real maintenance and design considerations, and choosing black grout is as much about upkeep as it is about style. Here is what to know before you commit.
- Why the Black Grout Look Works
- Layout Matters More With Dark Grout
- Staining: The Real Concern
- Sealing Is Essential
- White vs Black Grout Maintenance, Side by Side
- Where Black Grout Works Best (and Worst)
- Pros and Cons at a Glance
- Softer Alternatives to True Black
- Installation and Color Tips
- The Bottom Line
Why the Black Grout Look Works
The appeal is contrast. Classic 3×6 inch white subway tile with white grout looks clean but visually blends into a single field. Swap in black or charcoal grout and every tile is outlined, emphasizing the brickwork pattern and giving the wall structure and rhythm. The effect leans modern, industrial, and a touch retro, which is why it suits everything from farmhouse kitchens to contemporary baths.
It also flatters the geometry of subway tile specifically. Because subway tiles are laid in offset rows, the grid created by dark grout becomes a deliberate design element rather than just a filler between tiles. The look is most dramatic with bright white tile but also works with subtle gray, green, or pale blue subway tiles.
Layout Matters More With Dark Grout
Dark grout is unforgiving of sloppy installation. Because the lines are so visible, any inconsistency in grout width, crooked rows, or lippage (tiles sitting at uneven heights) jumps out. With white-on-white you can hide minor flaws; with black grout, you cannot. Use tile spacers religiously, keep grout lines a consistent 1/16 to 1/8 inch, and check that your rows stay level. If you are not confident in your tiling, this is a look worth hiring out, because the contrast that makes it beautiful also exposes mistakes.
Staining: The Real Concern
Here is the honest core of the black grout decision. Both colors have a staining issue, but in opposite directions:
- White grout shows dirt, grease, soap scum, and mildew. It darkens and yellows over time, especially behind a stove or in a shower, and needs frequent scrubbing.
- Black grout hides dirt and grease beautifully, a genuine advantage in a backsplash. But it can fade, lighten, or develop a chalky, blotchy look over time, particularly with harsh cleaners or in wet areas. Hard water and certain cleaners can leave white mineral residue that is very visible on dark grout.
In short, black grout wins on hiding grime but is vulnerable to fading and uneven color, while white wins on color stability but shows every speck of dirt. Neither is maintenance-free.
Sealing Is Essential
Whatever grout you choose, sealing protects it, and with black grout, sealing also helps prevent fading and patchiness. You have two main routes:
- Cement grout is porous and must be sealed with a penetrating grout sealer after it cures (typically 48 to 72 hours), then re-sealed periodically, often once a year in wet areas. Sealing helps black grout resist water spotting and color loss.
- Epoxy grout is non-porous, stain-resistant, and holds color far better than cement grout. It costs more and is harder to install, but for black grout it is the smart long-term choice because it largely eliminates fading and staining worries.
For a black-grout shower or a heavily used kitchen backsplash, epoxy grout is genuinely worth the upgrade. For a low-moisture backsplash on a budget, sealed cement grout is fine if you commit to resealing.
White vs Black Grout Maintenance, Side by Side
Day-to-day care differs by color:
- White grout: needs frequent cleaning to stay bright; responds to oxygen bleach and grout brushes; prone to mildew in showers; can be refreshed with grout whitening pens or recoloring.
- Black grout: hides everyday grime, but avoid acidic or bleach-based cleaners that can fade or discolor it; wipe up hard-water spots promptly; touch up faded areas with grout colorant or recoloring product.
A practical tip: clean black grout with pH-neutral cleaners and a soft cloth. Skip abrasive pads and bleach, which strip color. If the grout fades unevenly over a few years, a grout color refresh product can restore a uniform deep black without re-grouting.
Where Black Grout Works Best (and Worst)
Black grout is excellent for kitchen backsplashes, where hiding grease is a real benefit and moisture exposure is limited. It also works for accent walls and laundry rooms. Be more cautious in showers and tub surrounds: constant water and hard-water minerals are the conditions most likely to cause fading and white residue on dark grout. If you love the look in a shower, use epoxy grout and keep the surface squeegeed and well ventilated.
Pros and Cons at a Glance
- Pros: striking high contrast, hides dirt and grease, modern and timeless, makes the tile pattern pop.
- Cons: exposes installation flaws, can fade or look chalky over time, shows hard-water residue, demands gentle (non-bleach) cleaning, best with pricier epoxy grout in wet areas.
Softer Alternatives to True Black
If you love the contrast but worry about fading or harshness, you do not have to commit to jet black. A charcoal or dark gray grout gives much of the graphic effect while hiding fade and hard-water residue better than pure black, the lighter the dark tone, the more forgiving it is over time. A soft gray grout offers subtle definition that frames each tile without the dramatic outline, a popular middle ground for homeowners who want some contrast but not a stark grid. Sampling a few grout colors against your actual tile, and looking at them in your kitchen’s real lighting, is the smartest way to decide, because grout often dries lighter than the wet sample and reads differently under warm versus cool light.
Installation and Color Tips
A few practical pointers make dark grout look its best and last longer:
- Mix grout consistently. With cement grout, inconsistent water ratios between batches cause shade variation that is glaring on dark colors. Mix uniformly and ideally in one session.
- Clean the haze promptly. Dark grout leaves a visible film on white tile if not wiped at the right time; follow the cure window and use a grout haze remover if needed.
- Seal at the right moment. Let cement grout cure fully (48 to 72 hours) before sealing, and reseal on schedule.
- Test cleaners first in an inconspicuous spot to be sure they will not lighten the grout.
The Bottom Line
Subway tile black grout delivers one of the boldest, most enduring looks in tile design, and it hides everyday kitchen grime better than white ever will. The trade-offs are real: precise installation is non-negotiable, the grout can fade without care, and wet areas demand epoxy grout and gentle cleaning. If pure black feels risky, charcoal or gray gives a softer, more forgiving contrast. Choose epoxy grout, seal cement grout faithfully, skip bleach, and the contrast that drew you to this look will stay crisp for years.
Prefer to explore on your own?
See how new flooring looks in your actual room in seconds — free, no signup.
Try the free Floor Studio →