A tankless water heater flush kit is the single most important tool for keeping your on-demand heater alive past a decade. Hard water leaves mineral scale inside the heat exchanger, and left alone that scale strangles flow, drops efficiency, throws error codes, and eventually kills the unit — often just as the warranty lapses. The good news: descaling is a straightforward, hour-long DIY job once you own a $130 kit and know the steps. Do it yourself and you’ll save the $150-plus a plumber charges for the same work every year.
- Why Flushing Matters
- What’s in a Tankless Water Heater Flush Kit
- The Critical Prerequisite: Isolation Valves
- Vinegar vs. Commercial Descaler
- Step-by-Step Flushing Procedure
- How Often Should You Flush?
- Best Flush Kits to Buy
- The Payoff
- Mistakes That Ruin a Flush
- Signs You’re Overdue for a Flush
- Frequently Asked Questions
Why Flushing Matters
Every gallon of hard water that passes through your tankless unit leaves behind a whisper of calcium and magnesium. Inside the narrow passages of the heat exchanger, those deposits accumulate into a chalky scale. Scale is an insulator — it forces the burner to work harder to transfer heat, which drops efficiency and drives up your gas bill. Worse, it restricts flow, so your shower weakens and the unit may flash error codes like Rinnai’s “10” or Navien’s scaling warnings.
Left unchecked, scale can crack a heat exchanger, and that’s a repair costing more than the whole flush routine over the unit’s life. Manufacturers require periodic descaling to honor the warranty. A flush kit turns that requirement into an easy annual chore.
What’s in a Tankless Water Heater Flush Kit
A complete kit bundles everything you need in one box, typically for $110 to $180:
- Submersible pump: A small utility pump that circulates cleaning solution up through the unit.
- 5-gallon bucket: Holds the descaling solution during the flush.
- Two hoses: One feeds solution into the cold service port, one returns it from the hot port to the bucket.
- Adapters and fittings: To connect the hoses to your isolation valves’ hose bibs.
Some kits (like the ones from Rheem, Camco, or KELARO) add descaling solution or test strips. You’ll separately need white vinegar or a commercial descaler — more on that below.
The Critical Prerequisite: Isolation Valves
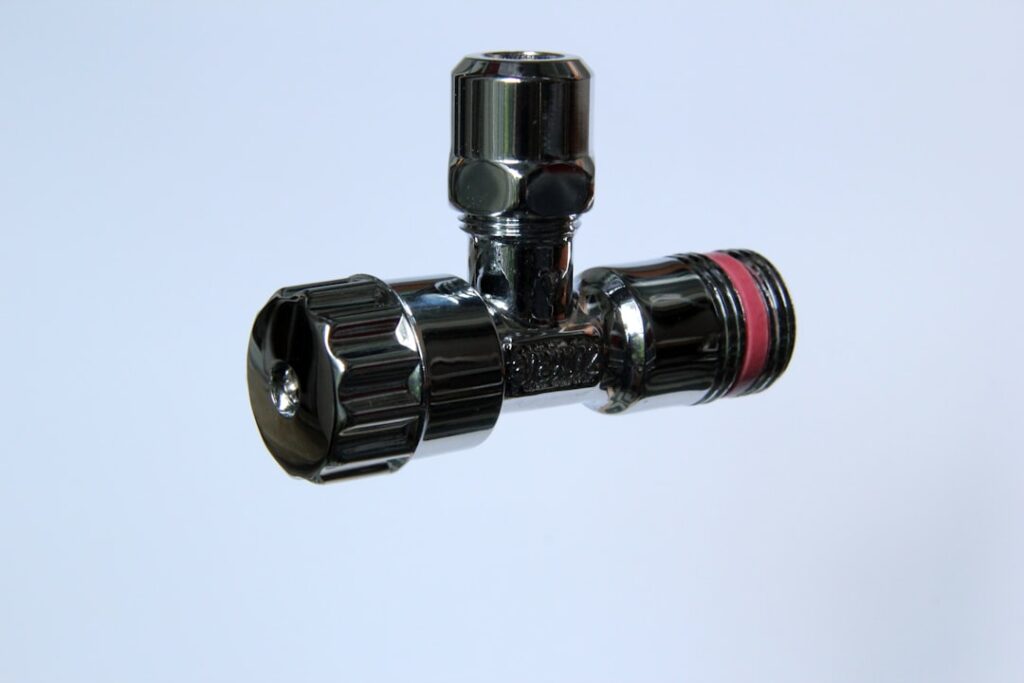
You cannot flush a tankless heater without isolation valves (also called service valves) on the hot and cold lines. These are the T-handle valves with small hose-bib ports that let you close off the unit from house plumbing and connect your flush hoses. If your installer put them in — always insist on this at installation — you’re set. If not, you’ll need a plumber to add a valve kit ($150 to $300) before you can service the unit yourself. It’s a worthwhile one-time investment that pays for itself in DIY flushes.
Vinegar vs. Commercial Descaler
Two solutions work. White vinegar (undiluted, about 2.5 to 4 gallons) is cheap, food-safe, and gentle — it’s the go-to for most homeowners and takes 45 to 60 minutes to work. Commercial descalers like CLR PRO or CrudMD are more aggressive, cut heavy scale faster (20 to 30 minutes), and are formulated for heat exchangers, but they cost more and demand careful rinsing. For routine annual flushing on moderately hard water, plain white vinegar does the job. Save the commercial stuff for heavily scaled units that have been neglected.
Step-by-Step Flushing Procedure
- Power down: Turn off the gas (or electric breaker) to the unit. For gas condensing units, some leave power on to run the fan; check your manual.
- Close the isolation valves: Turn both the hot and cold service valves to isolate the heater from the house.
- Connect the hoses: Attach one hose from the pump (in the bucket) to the cold-side hose bib, and the return hose from the hot-side hose bib back into the bucket.
- Open the service ports: Open the small bleed valves on both isolation valves so solution can flow through the unit.
- Fill and circulate: Pour vinegar or descaler into the bucket, drop in the pump, plug it in, and let it circulate for 45 to 60 minutes.
- Flush with fresh water: Dump the solution, then close the ports, reopen the isolation valves briefly, and run clean water through to rinse all traces of vinegar.
- Clean the inlet filter: Many units have a small cold-water inlet screen — remove and rinse it while you’re here.
- Restore service: Reconnect everything, reopen valves, restore power/gas, and run a hot tap to confirm normal flow.
Budget an hour start to finish, most of which is unattended circulation time.
How Often Should You Flush?
Frequency scales with water hardness:
- Soft water (0-3 grains per gallon): every 18 to 24 months.
- Moderately hard (3-7 gpg): once a year.
- Hard water (7-10 gpg): every 6 to 12 months.
- Very hard (10+ gpg): every 6 months, and seriously consider a water softener.
Not sure how hard your water is? A $10 test strip pack or your water utility’s annual report will tell you. If you see declining flow or scaling error codes before your scheduled flush, do it early.
Best Flush Kits to Buy
Any complete kit with a decent pump works, but a few stand out. The KELARO tankless flush kit is a popular all-in-one with a sturdy pump and bucket. Camco’s kit is widely available and reliable. Rinnai and Navien sell branded kits guaranteed to fit their fittings if you want zero adapter guesswork. Look for a pump rated for at least 300 gallons per hour and hoses long enough to reach your bucket comfortably — a cheap underpowered pump makes the flush drag on.
The Payoff
Spending an hour and $130 on a tankless water heater flush kit is the best maintenance value in your home. A unit that’s flushed on schedule can run 20 years or more; a neglected one in hard water can fail in half that. Combine annual flushing with an inlet-filter cleaning and — where water is truly hard — a softener, and your tankless heater will deliver endless hot water long after a storage tank would have rusted through. Set a reminder, keep the kit on a shelf near the heater, and make it a yearly ritual.
Mistakes That Ruin a Flush
Flushing is simple, but a few errors turn it into a headache or a hazard:
- Leaving the gas or power on: The burner or elements must be off before you circulate solution. Firing a unit with vinegar in it damages the exchanger.
- Not closing the isolation valves: If you skip closing them, you push cleaning solution into your house plumbing instead of through the heater.
- Skipping the fresh-water rinse: Leftover vinegar or descaler tastes and smells bad and can corrode fittings. Always flush clean water through afterward.
- Ignoring the inlet screen: A clogged cold-water inlet filter restricts flow just like scale does. Clean it every flush.
- Using a weak pump: A pump under 300 GPH struggles to move solution through the exchanger, dragging out the job. Match the pump to the task.
Signs You’re Overdue for a Flush
Your heater usually tells you when scale is winning, well before it quits. Watch for a noticeable drop in hot-water flow at the tap, a burner that short-cycles or rumbles, water temperature that fluctuates during a shower, or a scaling-related error code (Rinnai’s “10,” Navien’s maintenance warnings). A sudden efficiency dip or a higher gas bill can also point to a scaled exchanger working harder than it should. If you hit any of these before your scheduled service, flush early — scale only gets more stubborn the longer it sits.
Frequently Asked Questions
Can I use CLR or must it be vinegar?
Both work. White vinegar is cheap, food-safe, and fine for routine annual flushing. Commercial descalers like CLR PRO or CrudMD cut heavy neglected scale faster but require careful rinsing. For most homes, vinegar is the sensible default.
What if I don’t have isolation valves?
You can’t properly flush without them. Have a plumber add a service-valve kit ($150 to $300 installed) — after that, every flush is a DIY job you can do yourself for years.
Will flushing void my warranty?
The opposite — most manufacturers require periodic descaling to keep the warranty valid. Skipping it is what voids coverage. Keep a simple log of your flush dates as proof.