A pop-up camper has one rule that hard-sided campers never worry about: everything inside has to fold flat under a roof that a cable or crank system lifts by hand. A tent trailer remodel that ignores that rule ends with a roof that will not raise, cabinets that hit the bunk ends or a lift that wears out in one season. Done right, a few thousand dollars and some weekends can turn a tired, musty pop-up into a bright, dry and genuinely comfortable camper.
The priorities, in order: fix water leaks and soft floor, clean or replace the canvas, keep added weight minimal so the lift system stays within its rating, then refresh the interior with lightweight cushions, paint and cabinet fronts. Leave propane appliances and LP lines to a qualified RV technician, and make sure working carbon monoxide and LP detectors are installed before you sleep in it.
- Tent Trailer Remodel Planning: What Makes Pop-Ups Different
- Canvas Care, Mold Cleanup and Replacement
- Lift System Weight Limits and Pinch Points
- Tools and Materials
- Step-by-Step Pop-Up Makeover
- Propane Appliances and Detectors
- Troubleshooting
- Cost Ranges
- When to Call a Pro
- Frequently Asked Questions
Tent Trailer Remodel Planning: What Makes Pop-Ups Different
Hard-sided camper projects can add solid wood counters, tile backsplashes and heavier furniture. A tent trailer renovation cannot. The roof on most pop-ups is raised by a lift system of cables, pulleys and posts, or by a crank-driven bar, and the manufacturer rates it for the roof plus a limited amount of extra load. Anything you mount to the ceiling, such as a new fan, light fixtures or storage, counts against that rating. The box itself is low profile, so anything inside must clear the roof when it is closed, usually with only a few inches to spare.
Before buying materials, measure the closed interior height above the counters, the swing of each cabinet door, and the gap between the folded bunks and the galley. Write down the roof lift rating if you can find it in the owner’s manual or on a data plate. Then weigh your plans against those numbers, not against what looks nice in photos.
Canvas Care, Mold Cleanup and Replacement
Canvas is the most common problem area. Stored damp, it grows mildew within weeks, and old canvas loses its water resistance and stitching strength. Start by setting up the camper on a dry, sunny day and inspecting every panel, seam, zipper and window.
For surface mildew, put on gloves, safety glasses and an N95 or better respirator, and work outdoors with the camper open. Brush off loose growth, then clean with a mild soap solution or a cleaner made for tent fabric, scrubbing with a soft brush and rinsing thoroughly. Avoid bleach on canvas unless the fabric maker approves it, since it weakens fibers and can strip coatings, and never mix cleaning products. Let the canvas dry completely in the sun before closing the camper. If mold covers large areas, has stained deep into the fabric or has spread into the cushions and wall panels (more than roughly 10 square feet in total), replacement or a professional cleanup is the safer path.
Once clean and dry, treat the canvas with a canvas waterproofing spray in light, even coats, paying extra attention to seams. Re-seal seams with a compatible seam sealer if the stitching shows wicking. Replacement canvas is sold custom-cut to many models; installing it takes patience, a helper and careful attention to the bow and track channels, but it is a realistic DIY task.
Lift System Weight Limits and Pinch Points
The lift is the heart of a pop-up and the part most easily damaged by a remodel. Keep the roof load as light as possible: lightweight LED fixtures instead of heavy domes, a thin ceiling liner rather than paneling, and no roof storage boxes unless the system is rated for them. If the crank suddenly feels harder after your changes, stop. That is the system warning you about added weight or binding.
The lift also creates pinch points. Keep hands, hair and loose clothing clear of cables, pulleys, posts and the roof edge while cranking, and keep children well away from the camper while the roof moves. Before working under a raised roof, confirm the lift is locked per the manual and never rely on the crank alone to hold weight while you are inside reaching overhead. Inspect cables for fraying and kinks each season; frayed cables should be replaced, and if you are not comfortable adjusting cable tension, an RV service shop can do it.
Tools and Materials
- Drill and driver, multi-tool, jigsaw, utility knife and putty knife
- Canvas cleaner, soft brushes, canvas waterproofing spray and seam sealer
- Gloves, safety glasses and an N95 or P100 respirator
- Lightweight plywood (1/4 inch for cabinet faces) or replacement laminated panels
- Exterior-grade plywood for floor repair, construction adhesive and wood hardener
- Peel-and-stick or loose-lay vinyl flooring
- Primer and paint suited to laminate surfaces
- High-density foam cushions and outdoor or performance fabric
- RV-rated sealant for roof seams and windows
Step-by-Step Pop-Up Makeover
- Stop the water. Inspect roof seams, the roof vent and window frames. Re-seal with RV-compatible sealant. Remodeling over an active leak wastes everything that follows.
- Repair the floor. Press across the floor, especially near the door, galley and wheel wells. Soft spots usually mean rotted plywood. Cut out the damaged section back to solid wood, check that the frame below is sound, then glue and screw a matching patch of exterior plywood. Light, shallow softness can sometimes be firmed with wood hardener once dry.
- Clean or replace the canvas. Follow the mold cleanup steps with full PPE, then waterproof the canvas once dry.
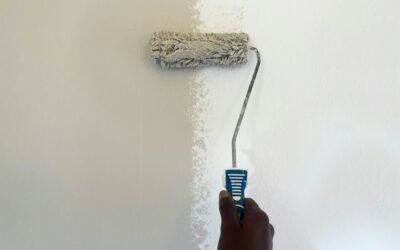
- Refresh the cabinets. Clean with a degreaser, scuff sand, apply a bonding primer and paint. Replace damaged doors with thin plywood rather than solid boards. Swap hardware for low-profile pulls that will not snag the roof or canvas when closed.
- Lay new flooring. Peel-and-stick or loose-lay vinyl is light, waterproof and flexible enough for the slight movement of a trailer floor. Leave a small gap at walls and seal the door threshold.
- Upgrade cushions. Replace old foam with high-density foam that still fits the closed height. Choose mildew-resistant fabric and add zippers so covers can come off for washing.
- Swap the lighting. Low-voltage 12 volt LED fixtures cut weight and battery draw. Disconnect the battery and shore power before working on any wiring. Anything on the 120 volt side should go to an RV technician or licensed electrician.
- Test fold. Lower and raise the roof several times, watching for anything that rubs, catches or binds.
Propane Appliances and Detectors
Many pop-ups carry a propane stove, furnace or water heater. Keep LP line work, appliance swaps and leak testing in the hands of a qualified RV technician. If you smell gas, turn off the tank valve if you can do it safely, get everyone out, and call for help. Never use the stove or an oven for heat.
Install or replace a combination carbon monoxide and LP gas detector, mounted per its instructions (LP gas is heavier than air, so LP sensors usually sit low). Test detectors before every trip and replace them by the date printed on the unit. Keep a small fire extinguisher by the door and make sure everyone knows how to open the canvas quickly.
Troubleshooting
- Roof will not close fully: new cushions or cabinet hardware are too tall, or canvas is folded in wrong. Check clearances with the roof partway down.
- Crank is harder than before: added roof weight or a binding post. Remove ceiling additions and have the lift inspected.
- Musty smell returns: the camper was closed damp. Always open it within a few days of packing up wet, and add a moisture absorber during storage.
- Paint peeling off cabinets: laminate needed a bonding primer and more cure time before use.
- Floor bounces near the door: rot extends farther than the patch. Cut back to solid wood.
Cost Ranges
A cosmetic tent trailer remodel with paint, flooring, cushions and LED lights often lands in the several hundred to low thousands range. Replacement canvas adds a significant amount, typically more than the cosmetic work, depending on size and quality. Floor repair is usually inexpensive in materials if the frame is sound. Lift cable service and propane system checks at an RV shop are moderate, but they are money well spent.
When to Call a Pro
Bring in an RV technician for any propane line, appliance or leak test, for lift system repairs beyond basic cable inspection, and for 120 volt wiring. A canvas shop is worth it if mold has penetrated deep into the fabric or the canvas needs custom fitting. If you find rust or cracks in the trailer frame, axle or hitch, have a trailer shop inspect it before any trip.
Frequently Asked Questions
How much weight can I add to a pop-up roof?
Very little in most cases. Check the owner’s manual or data plate for the lift rating, and assume lighting and a fan are about the limit unless the maker says otherwise.
Can I paint pop-up camper cabinets?
Yes. Degrease, scuff sand, use a bonding primer made for laminate and let the paint cure fully before closing the camper.
What flooring works best in a tent trailer?
Thin peel-and-stick or loose-lay vinyl is light, waterproof and flexible, and it keeps closed clearances intact.
Is a tent trailer renovation worth it?
For a structurally sound pop-up with a solid frame and lift, yes. A cosmetic refresh costs far less than a newer camper.
How do I keep mildew off the canvas?
Never store the camper closed while the canvas is damp. Open it to dry within a few days of a wet trip and treat the canvas with waterproofing spray each season.