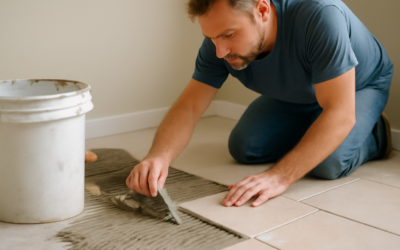
Picking the wrong adhesive is the fastest way to end up with tiles sliding down a wall or popping loose behind a shower a year later. Choosing the right tile glue for walls comes down to three things: where the wall is, how big and heavy the tile is, and whether the surface ever gets wet. Get those right and the rest of the job is straightforward. This guide breaks down the real differences between the products, the trowel and coverage details installers rely on, and the mistakes that cause callbacks.
Part of our Tile & Grout guide — explore the full guide →
- The Three Types of Wall Tile Adhesive
- Mastic vs Thinset for Wet Areas
- Tile Size and Weight Limits
- Surface Prep Comes First
- Trowel Notch Sizes and Coverage
- Open Time and Working the Adhesive
- Back-Buttering for a Full Bond
- Cure Times Before Grouting
- Common Mistakes to Avoid
- Temperature, Humidity, and Timing
- Cost to Budget
The Three Types of Wall Tile Adhesive
Not all “tile glue” is the same chemistry. There are three families, and they are not interchangeable:
- Pre-mixed mastic: An acrylic adhesive that comes ready to use in a bucket. It grabs fast, holds tile without slumping, and is the easiest product for a beginner on a dry wall. It is organic, meaning it can break down with prolonged water exposure.
- Thinset mortar: A cement-based powder you mix with water or a latex additive. It is stronger, waterproof once cured, and rated for larger and heavier tile. This is the professional standard for showers and any wet area.
- Epoxy adhesive: A two- or three-part resin system that bonds to nearly anything and resists chemicals and moisture. It is expensive and fussy to work with, reserved for demanding situations like glass tile, metal, or industrial settings.
Mastic vs Thinset for Wet Areas
This is the single most important decision, so be precise about it. Mastic dries by releasing moisture into the air; it needs to breathe. In a constantly wet environment like a shower floor, a tub surround below the splash line, or a steam shower, mastic can stay soft, re-emulsify, and let tile detach or grow mildew behind it. For those areas, use thinset mortar, full stop.
Mastic is acceptable on dry walls: a kitchen backsplash above the counter, a bathroom accent wall away from direct spray, or a laundry room. Even on many backsplashes near a sink, thinset is the safer long-term call. When in doubt, choose thinset. It costs a few dollars more per bag and rewards you with a bond that does not care about water.
Tile Size and Weight Limits
Adhesives carry sag and weight ratings, and large tile is where mastic fails. As a working rule, keep mastic to tiles no larger than roughly 8 by 8 inches or the manufacturer’s stated limit. Heavier stone and porcelain planks, large-format tiles over 15 inches, and anything on a ceiling need a mortar rated for the load, often a medium-bed or large-format thinset that resists slumping. Always read the bag: manufacturers print the maximum tile size and whether the product is approved for walls, floors, and wet areas.
Surface Prep Comes First
No adhesive bonds to a dirty or unstable wall. Prep like this:
- Confirm the substrate is right for the location. Use cement backer board or a waterproof membrane in showers, never standard drywall or greenboard behind wet tile.
- Clean the surface of dust, grease, and old paint gloss. Wipe down and let dry.
- Check for flatness with a straightedge. Walls should be flat within about 1/4 inch over 10 feet for standard tile, tighter for large format.
- Prime porous or chalky surfaces if the adhesive manufacturer calls for it.
Trowel Notch Sizes and Coverage
The notched trowel controls how much adhesive goes on and how well the tile beds. Too small a notch starves the bond; too large leaves gaps and oozing. Match the notch to tile size:
- Mosaics and small tile up to 4 inches: 3/16-inch V-notch or 1/4-inch square-notch.
- Standard 4 to 8 inch tile: 1/4-inch square-notch.
- 8 to 12 inch tile: 1/4 by 3/8-inch notch.
- Large-format 12 inch and up: 1/2-inch square-notch or a large-format-specific trowel.
Coverage varies with notch size. A gallon of mastic covers roughly 40 to 50 square feet with a 1/4-inch notch, while a 50-pound bag of thinset covers about 90 to 95 square feet at that notch and much less with a larger trowel. Buy 10 to 15 percent extra to account for waste and cuts.
Open Time and Working the Adhesive
Open time is how long the adhesive stays sticky enough to grab tile after you spread it. Mastic and thinset both skin over in roughly 15 to 30 minutes depending on heat and airflow. If the surface looks glazed or dry when you press a finger to it, scrape it off and re-spread. Spread only as much as you can tile in that window, usually 3 to 6 square feet at a time. Comb the ridges in one direction so air can escape as tiles are pressed in.
Back-Buttering for a Full Bond
Back-buttering means applying a thin skim of adhesive to the back of each tile in addition to combing the wall. It is essential for large-format tile, natural stone, and any tile whose back has deep ridges. The goal is full contact, at least 80 percent coverage in dry areas and 95 percent in wet areas, with no hollow voids. Voids trap water, crack under pressure, and sound hollow when tapped. Periodically pull a set tile off the wall to check that the adhesive is transferring evenly to the back.
Cure Times Before Grouting
Rushing the cure is a common mistake. Mastic needs air to cure, so dense tile on a nonporous wall can take 48 to 72 hours before grouting, longer in humid conditions. Standard thinset is usually ready to grout in 24 to 48 hours, and rapid-set formulas can be grouted in as little as 2 to 4 hours. Do not run water in a new shower until the mortar and grout have fully cured, typically several days. Check the specific product data sheet, because temperature and humidity change everything.
Common Mistakes to Avoid
- Using mastic in a shower or on large heavy tile.
- Spreading more adhesive than you can tile before it skins over.
- Skipping back-buttering on large-format tile and leaving hollow spots.
- Grouting before the adhesive has cured, which traps moisture and weakens the bond.
- Ignoring the trowel size printed on the bag.
Temperature, Humidity, and Timing
Adhesives are chemistry, and chemistry responds to conditions. Both mastic and thinset want a working range of roughly 50°F to 95°F. Below 50°F, cement thinset can fail to hydrate properly and the bond weakens; above 95°F or in a dry breeze, the open time shrinks and the surface skins over before you can set tile. Never tile a wall in direct sun or a room with a fan blowing across fresh adhesive. In cold weather, keep the room and the materials warm for at least 24 hours before and after installation. A little patience with conditions prevents bond failures that only show up months later as loose or drummy tile.
Cost to Budget
A gallon of quality pre-mixed mastic runs $20 to $35 and covers a small backsplash. A 50-pound bag of modified thinset costs $15 to $30 and covers far more area. Epoxy adhesive is the outlier at $60 to $120 or more per unit. Factor in the tools too: a good notched trowel is $10 to $20, a margin trowel and mixing paddle add another $25, and spacers, a level, and a bucket round out a basic kit. For most homeowners, the right tile glue for walls is modified thinset for anything near water and mastic only for small, dry, above-counter jobs. Spending a little more on the correct adhesive, and matching it to the location, is cheap insurance against a wall of loose tile and a costly redo.
Prefer to explore on your own?
See how new flooring looks in your actual room in seconds — free, no signup.
Try the free Floor Studio →