Drill into a porcelain tile with the wrong bit and you will hear it crack before you see it. A tile hole saw is the specialized cutter that lets you bore clean, round openings for shower valves, faucet stems, towel bars, and electrical boxes without shattering a $4 piece of tile or, worse, a whole installed wall. The difference between a finished hole and a spiderweb of cracks usually comes down to the bit you pick, the speed you run, and whether you remembered to keep the cut wet. After two decades of bathroom and backsplash work, I can tell you the saw is the easy part. Technique is what saves the tile.
Part of our Tile & Grout guide — explore the full guide →
What a Tile Hole Saw Actually Is
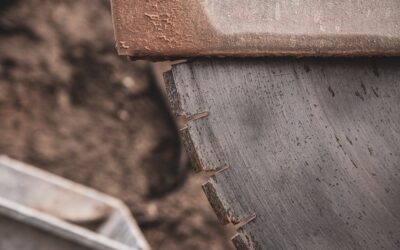
Unlike a wood hole saw with teeth, a tile hole saw cuts through abrasion rather than chipping. The two main types are diamond-grit hole saws and tungsten carbide hole saws. Diamond versions have industrial diamond particles bonded to the rim of a thin metal cylinder, and they grind their way through dense material. Carbide versions use a hardened serrated edge and work best on softer ceramic and glazed wall tile.
You will also see “guided” diamond bits sold with a spring-loaded center drill or a separate drilling jig. These solve the single biggest beginner problem, which is the bit skating across the glaze before it bites. For anyone cutting more than a hole or two, a guide pays for itself almost immediately.
Diamond vs. Carbide: Which One You Need
Match the bit to the tile, not to the price tag. Get this wrong and you will either burn through cash on dull bits or burn through a tile.
- Porcelain and natural stone: Diamond only. Porcelain is too hard and dense for carbide, which will dull in a single hole.
- Glazed ceramic wall tile: Carbide-tipped saws work fine and cost less, often $8 to $15 each.
- Glass tile and mosaics: Diamond, run slow and wet, to avoid chipping the edges.
- Granite and quartz slabs: Wet-rated diamond core bits, ideally on a drill press or with a jig.
A quality diamond hole saw runs $15 to $40 for common sizes and lasts dozens of holes in porcelain when kept cool. Cheap dry-rated kits exist for under $20 for a whole set, but expect maybe five to ten clean holes before they glaze over.
Sizing the Hole Correctly
Measure the fixture, then add clearance. A shower mixing valve typically needs a 1-1/4 inch to 1-1/2 inch opening, while a standard supply line wants 1 inch. Common kits cover 1/4 inch through 2 inches. Always cut slightly oversized so the escutcheon or trim plate covers the edge. A hole that is too tight forces the pipe against the tile, and thermal movement will crack it within a year.
For toilet supply lines and angle stops, a 1-3/8 inch bit gives comfortable room. When in doubt, hold the trim plate over your planned cut to confirm it will hide the opening.
For openings larger than 2 inches, such as a vent or a recessed niche supply, you have two routes. A large-diameter core bit exists up to about 5 inches but gets expensive fast. The smarter budget move is to drill a ring of small overlapping holes around your marked circle, knock out the center, then clean the edge with a carbide rod or rotary tool. It is not pretty, but the cut hides behind trim anyway. Curved or partial cuts near an edge call for an angle grinder fitted with a diamond blade, which lets you nibble notches and L-shaped cutouts a round hole saw simply cannot reach.
Step-by-Step: Drilling a Clean Hole
- Mark the center with a grease pencil. Place a strip of painter’s tape over the spot first to give the bit grip and reduce skating.
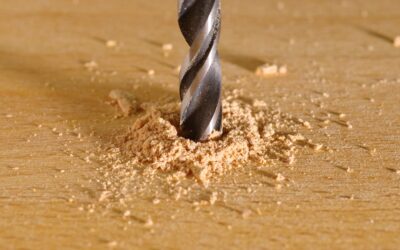
- Set your drill to its lowest speed, ideally 200 to 600 RPM. High speed builds heat and destroys diamond bonds.
- Start at a shallow angle to nick the glaze, then bring the saw upright once it bites a groove.
- Keep the cut wet. Trickle water from a sponge or bottle into the kerf every few seconds. Heat is the enemy of every diamond bit.
- Use light, steady pressure. Let the abrasive do the work. Leaning hard cracks tile and overheats the rim.
- Ease off as you break through the back face to prevent blowout on the exit side.
The whole cut on a 4-inch porcelain wall tile should take 60 to 90 seconds. If it is taking five minutes, your bit is dull or you are running dry.
Wet vs. Dry Cutting
Wet cutting cools the bit, flushes slurry, and produces the cleanest edge. It is mandatory for porcelain and stone. For occasional ceramic cuts, dry-rated carbide saws are acceptable, but pause every 15 seconds to let the tip cool and dip it in water. A simple water dam made from plumber’s putty around the hole keeps a small pool over the cut and dramatically extends bit life on vertical surfaces.
Common Mistakes That Crack Tile
Even experienced DIYers ruin tile by rushing. Watch for these:
- Drilling too close to an edge or corner. Stay at least 1 inch from any tile edge or unsupported area.
- Hammer mode left on. Never use a hammer drill setting on tile. Vibration fractures the surface instantly.
- Cutting unsupported tile. On a loose tile, back it with a scrap of plywood so it cannot flex.
- Pushing through grout lines. Grout is softer and grabs the bit unevenly. Center your holes on the field of the tile when possible.
Recommended Bits and Budget
For a homeowner doing a single bathroom, a diamond hole saw set in the 1/4 inch to 1-1/2 inch range, priced around $25 to $35, will handle valves, supply lines, and accessory anchors. Brands like Bosch, Diablo, and QEP make reliable wet-rated diamond saws. If you only need one specific size for a faucet, buy that single bit rather than a kit. Pair it with a $10 drilling guide and you will get professional results on the first try, even on glossy porcelain.
Final Thoughts
A tile hole saw turns one of the most nerve-racking parts of a tile job into a routine 90-second cut. Pick diamond for porcelain and stone, carbide for soft ceramic, run slow and wet, and let the bit grind at its own pace. Add a guide, keep your holes off the edges, and back up loose tiles. Do that, and you will drill perfect openings every time without sacrificing a single piece to the scrap pile.
Prefer to explore on your own?
See how new flooring looks in your actual room in seconds — free, no signup.
Try the free Floor Studio →