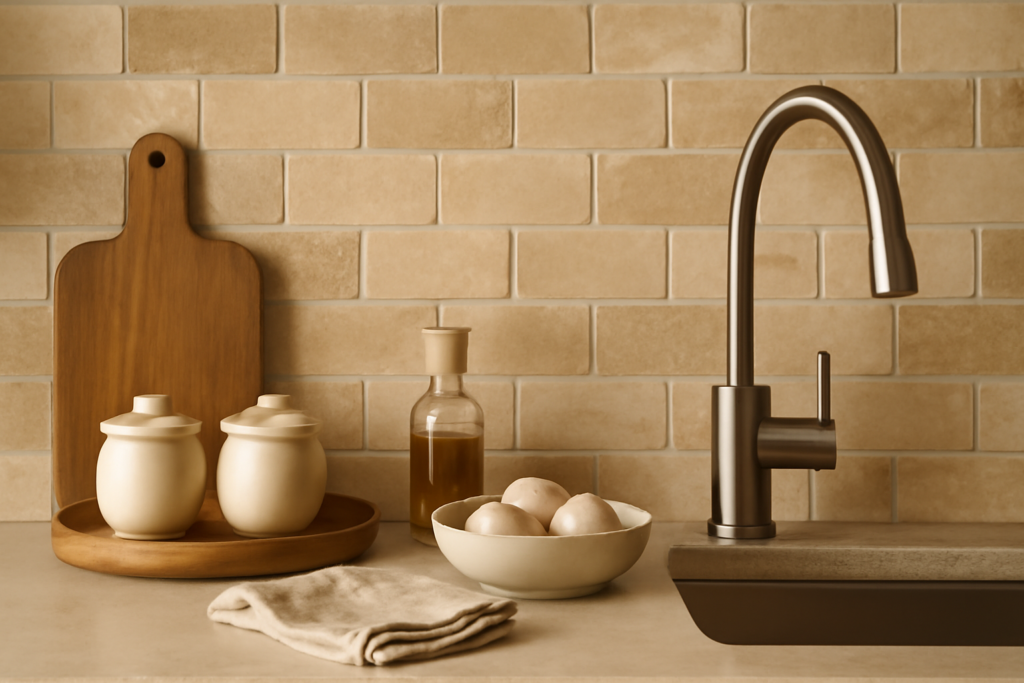
White ceramic subway tile had a fifteen-year run as the default kitchen backsplash, and the reaction to it is well underway: warmth, texture, and natural material. A travertine subway tile backsplash sits exactly at that intersection — the familiar 3×6 brick format everyone trusts, executed in a stone that brings cream, beige, walnut, and gold tones with genuine surface character. I have set a lot of travertine over the years, on floors and walls both, and the backsplash is honestly where this stone belongs in a modern kitchen: it gets the beauty of travertine without subjecting a soft, porous stone to foot traffic. But travertine is not ceramic, and treating it like ceramic is how these installations go wrong. Here is the full picture.
What Travertine Is, and Why It Behaves the Way It Does
Travertine is a sedimentary limestone formed by mineral springs, and its defining feature is porosity — the stone is riddled with small natural voids and pits left by escaping gases as it formed. Those voids are the character and the maintenance story in one. Most travertine tile sold in the US comes from Turkey, Mexico, Italy, and Peru, in color families from pale ivory through classic beige (the workhorse), noce (walnut brown), and gold with rust veining. Because it is a natural stone cut from quarried blocks, no two tiles match, and a backsplash gets a gentle tonal movement that printed porcelain still cannot honestly replicate up close.
Two vocabulary pairs decide almost everything about how your backsplash will look and live:
- Filled vs unfilled. Filled travertine has its natural voids factory-filled with color-matched resin or cement, giving a smoother, more uniform face. Unfilled leaves the pits open for a rustic, antique surface. For a kitchen backsplash — a surface that catches grease aerosols and tomato sauce — filled is the strongly practical choice; unfilled pits become grease traps at eye level. If you love the unfilled look, your grout will fill most of the pits during installation anyway, which is a legitimate technique but commits you to that grout color forever.
- Honed vs tumbled vs polished. Honed (smooth, matte) is the contemporary pick and the easiest to wipe down. Tumbled (edges and face softened in a tumbler, slightly cupped and chalky) is the Old-World farmhouse look that made travertine subway famous in the 2000s. Polished travertine exists but reads formal and shows etching fastest; I rarely recommend it for kitchens.
Formats and Layouts That Flatter the Stone
The classic 3×6 subway is everywhere in travertine, and larger bricks — 3×9, 4×12, 6×12 — are gaining ground because bigger faces show more of the stone’s movement with fewer grout lines. Layout matters more with stone than with flat ceramic because the tonal variation animates the pattern:
- 50 percent offset (classic running bond): the timeless choice, though with longer tiles a one-third offset controls lippage on any slightly cupped tumbled stock.
- Stacked horizontal: straight vertical and horizontal grout lines, very current, works beautifully with honed 4×12 travertine in modern kitchens.
- Herringbone: the premium look with travertine’s tonal shifts, and worth the roughly 20 percent extra labor and waste on a feature wall behind the range.
- Vertical stack: emphasizes ceiling height above a slab counter-to-ceiling run; use tight, color-matched grout.
Blend tiles from multiple boxes as you set — every stone job, no exceptions. Dry-lay a few square feet first, and pull any tile with a distracting flaw for cuts. With tumbled stock, expect wider joints (3/16 inch is common) that suit the rustic look; honed rectified-edge stock can go as tight as 1/16 to 1/8 inch for a cleaner, modern line.
Installation: Where Travertine Diverges From Ceramic
Travertine is soft (around 3 to 4 on the Mohs scale), porous, and often light-colored, and each of those drives a rule. Use white thinset, never gray — travertine is translucent enough at the edges that gray mortar can shadow through and permanently dull light stone. Use a quality polymer-modified white thinset and back-butter for full coverage. Cut with a wet saw; travertine chips if you get aggressive, so feed slowly, and tumbled edges forgive small chips while honed edges do not. Mastic is a poor partner for stone in general; the moisture in it can stain light stone as it cures, so thinset is the answer even in the dry zones where mastic would be fine under ceramic.
The step that separates pros from regret: seal before you grout. Wipe the dust off, apply a penetrating (impregnating) sealer to the tile faces, and let it cure per the label. Unsealed travertine grabs grout pigment into its pores during grouting, and a smeared haze on unsealed stone can be effectively permanent. After grouting and curing, seal the whole assembly again. Choose an unsanded or fine-sanded grout carefully — coarse sanded grout can scratch honed stone during float work — and match grout color close to the stone’s ground tone unless you deliberately want the grid to read.
Living With Stone Behind a Stove
Here is the honest maintenance contract. Travertine is calcium carbonate, which means acids etch it — lemon juice, vinegar, wine, and tomato splatter can leave dull marks if they sit, and no sealer prevents etching (sealers slow staining, which is a different chemical event). In practice, a sealed honed backsplash shrugs off day-to-day cooking if you wipe splatter within a reasonable time; the horror stories almost always involve unsealed stone or spray-and-forget habits with acidic cleaners. The rules are short: clean with a pH-neutral stone cleaner or dish soap and water; never vinegar, never citrus-based degreasers, never abrasive pads; reseal every one to two years (the water-drop test tells you — if water stops beading and darkens the stone, it is time, and resealing a backsplash is a 20-minute wipe-on job). Behind the range, a fresh coat annually is cheap insurance.
What It Costs
| Item | Typical US Price |
|---|---|
| Travertine subway tile (filled, honed) | $5-$12 per sq ft |
| Tumbled travertine subway | $4-$10 per sq ft |
| Premium select-grade or specialty sizes | $10-$18 per sq ft |
| Setting materials, sealer, grout | $2-$4 per sq ft |
| Professional installation | $12-$25 per sq ft |
| Typical 30-40 sq ft kitchen, installed | $700-$1,600 |
That material pricing is the quiet surprise: real stone travertine subway routinely costs less than designer ceramic and far less than handmade-look zellige. The premium shows up in labor and in the sealing discipline, not the tile bill.
Travertine vs the Look-Alikes
Before committing, know what you are choosing against. Travertine-look porcelain has gotten genuinely good — the better inkjet lines capture the color and even a printed suggestion of pitting at $3 to $8 per square foot, and porcelain never etches, never needs sealing, and grouts without pre-sealing anxiety. What it cannot do is repeat honestly: a backsplash-sized field shows the same printed faces recurring, and the surface feels uniformly glassy where real stone feels mineral. Marble subway (honed carrara and its cousins at $8 to $15) competes at the same price as premium travertine with cooler gray tones and the same acid-sensitivity contract. Limestone offers the warm tones with a smoother, less pitted face. My framing for clients: choose porcelain if the maintenance conversation in this article made your shoulders tense; choose real travertine if the warmth and irregularity are the point, because at eye level and arm’s reach — which is exactly where a backsplash lives — the difference between real stone and a picture of stone is at its most visible.
Styling It So It Reads Current, Not 2006
Travertine subway earned a dated reputation from the Tuscan-kitchen era — tumbled noce with dark emperador accents, ropes, and listello borders over cherry cabinets. The 2026 version drops every one of those moves. Keep the field a single stone, skip accent borders entirely, run honed ivory or classic beige in a stacked or tight running bond, and pair it with the finishes that love warm stone: white oak or painted cream cabinetry, quartz or marble-look counters in warm whites, unlacquered brass or matte black hardware, and plaster-toned walls. Take it to the ceiling behind a hood if the budget allows — stone gains presence with area. Done this way, the same material that anchored 2006 Tuscan kitchens reads as the warm-minimalist stone moment every design magazine is currently selling, with the difference that yours is the real thing. Buy an extra half box for the attic, seal it on schedule, and this is a backsplash you will still be defending happily in twenty years.
Prefer to explore on your own?
See how new flooring looks in your actual room in seconds — free, no signup.
Try the free Floor Studio →