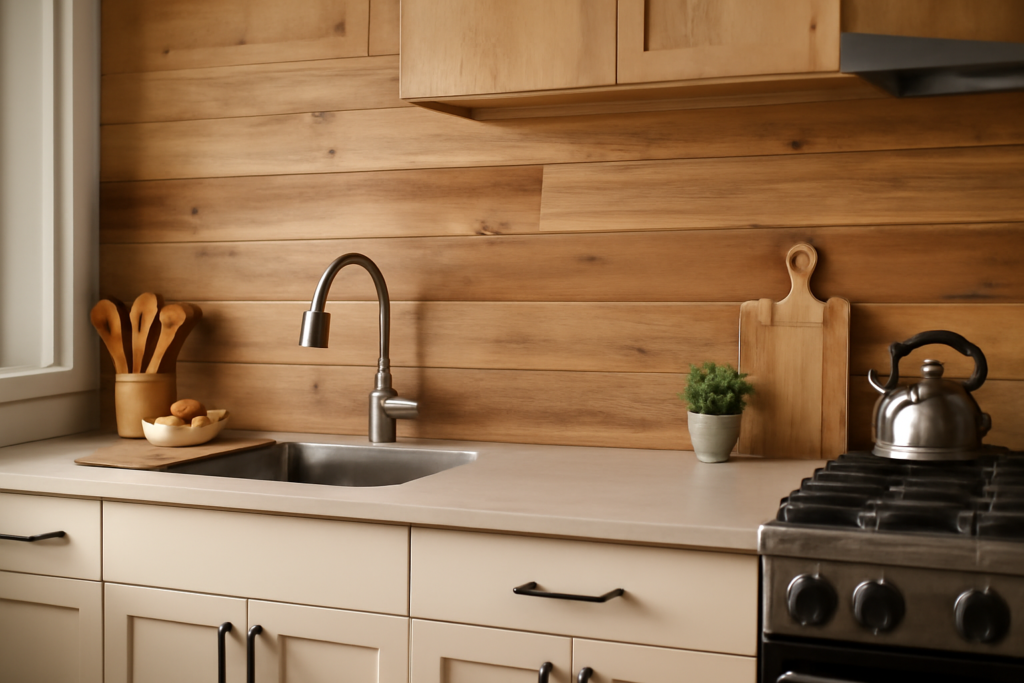
Tile and glass dominate most kitchens, which is exactly why a wood backsplash stands out the moment you walk in. Wood brings warmth, grain, and a hand-built feel that ceramic simply cannot match. But wood in a kitchen also sits inches from water, grease, and heat, so it needs the right material, the right finish, and a little common sense around the range. Done correctly, a wood backsplash can last for decades and read as a deliberate design choice rather than a compromise.
- Why Choose Wood for a Backsplash
- Best Wood Species and Products
- Heat Safety Near the Range
- Sealing and Finishing Wood Backsplash
- How to Install a Wood Backsplash
- Cost and Maintenance Expectations
- Design Ideas and Layout Patterns
- Wood Backsplash vs Tile and Other Materials
- Common Mistakes to Avoid
- Final Thoughts
Why Choose Wood for a Backsplash
Designers reach for wood when a kitchen feels cold or overly uniform. A run of reclaimed boards, shiplap, or end-grain butcher-block paneling softens stainless appliances and quartz counters. It also costs less than many premium tile installations if you handle the labor yourself. Beyond looks, wood is forgiving to cut and install with basic tools, which makes it a realistic weekend project for confident DIYers.
The tradeoff is maintenance. Wood is porous and moves with humidity, so it asks for sealing and the occasional touch-up that tile never will. If you cook heavily and rarely wipe down surfaces, weigh that honestly before committing.
Best Wood Species and Products
Not every board belongs behind a sink. Stable, dense, or naturally water-resistant species perform best. Common choices include:
- Reclaimed barn wood or pallet planks for a rustic, textured look
- Teak and white oak for moisture resistance and tight grain
- Shiplap and tongue-and-groove pine for an affordable farmhouse style
- Engineered wood paneling and peel-and-stick wood tiles for stability and easy installation
- End-grain butcher block panels for a rich, blocky pattern
Engineered and peel-and-stick options resist warping better than solid planks because they are built from cross-layered or thin veneers. If your kitchen sees big humidity swings, those are the safer bet.
Heat Safety Near the Range
This is the single most important rule: keep raw wood away from open flame and direct high heat. Gas burners and the area immediately behind a cooktop can scorch or, in rare cases, char wood over time. To stay safe, install a panel of glass, stainless steel, or tile directly behind the cooktop and let the wood frame around it. Maintain several inches of clearance between any wood and a heat source, and never run wood behind a gas range without a noncombustible barrier. Check your local building code, since some jurisdictions specify minimum clearances behind cooktops.
Sealing and Finishing Wood Backsplash
Sealing is what separates a backsplash that lasts from one that stains and swells within a year. After sanding the boards smooth, apply a protective finish that resists moisture and is easy to wipe clean. Good options include polyurethane (water-based dries clearer and lower-odor), spar urethane for extra moisture tolerance, or a food-safe penetrating oil if the wood sits near food prep. Plan on at least two to three coats, sanding lightly between each.
Pay special attention to the bottom edge where the backsplash meets the counter. Seal that joint and caulk it with a flexible, mildew-resistant silicone so water cannot wick up behind the boards. Re-coat high-use areas every couple of years.
How to Install a Wood Backsplash
Most DIYers can handle the install in a day. The basic sequence:
- Measure the wall and calculate square footage, adding about 10 percent for cuts and waste.
- Acclimate the wood in the kitchen for a few days so it adjusts to indoor humidity.
- Seal all sides of each board before installation for full protection.
- Mark studs, then attach boards with construction adhesive plus finish nails, or use peel-and-stick backing for lightweight panels.
- Cut around outlets with a jigsaw, and install non-combustible material behind the cooktop.
- Caulk the counter seam and any gaps, then apply a final protective topcoat.
Cost and Maintenance Expectations
Material costs vary widely. Peel-and-stick wood tiles often run a low single-digit to low double-digit dollar amount per square foot, reclaimed planks can climb higher depending on sourcing, and basic pine shiplap is among the cheapest options. A typical kitchen backsplash covers roughly 25 to 40 square feet, so most homeowners spend a few hundred dollars in materials for a DIY job.
Upkeep is straightforward: wipe spills promptly, avoid harsh abrasive cleaners that strip the finish, and re-seal when water stops beading on the surface. With routine care, a wood backsplash holds up well and ages into a feature you will be glad you chose.
Design Ideas and Layout Patterns
The way you arrange the boards changes the entire feel of the wall. Horizontal planks make a narrow kitchen feel wider and lean modern or farmhouse. Vertical boards draw the eye up and suit a room with lower ceilings. A herringbone or chevron layout turns the backsplash into a true focal point but takes more cutting and planning. For a bolder statement, mix board widths or alternate stained and natural tones. If you want subtle warmth rather than a centerpiece, choose a uniform species and a single low-sheen finish so the wood reads as a quiet texture against your cabinets.
Wood Backsplash vs Tile and Other Materials
It helps to weigh wood honestly against the alternatives. Tile and glass are fully waterproof, heatproof, and nearly maintenance-free, but they lack the organic warmth of real wood. Stainless steel is durable and modern but cold. Wood lands in the middle: unmatched warmth and character, lower cost for a DIY install, but more ongoing care and real limitations near heat and water. A popular compromise is to use wood on the bulk of the backsplash for warmth and a noncombustible material behind the cooktop for safety, getting the best of both.
Common Mistakes to Avoid
A few errors trip up first-timers. Skipping acclimation leads to gaps and buckling as the wood adjusts to the kitchen later. Failing to seal the back and edges of each board lets moisture sneak in from behind. Caulking the counter seam with a non-mildew-resistant product invites mold. And running raw wood right behind a gas burner is both a maintenance and a safety problem. Slow down on prep and protection, and the install itself is the easy part.
Final Thoughts
A wood backsplash rewards homeowners who want character and are willing to seal and maintain it. Pick a stable species, protect the wood near heat and water, and finish it properly. If you are nervous about waterproofing or local code around the cooktop, bring in a contractor for the layout and handle the cosmetic work yourself.