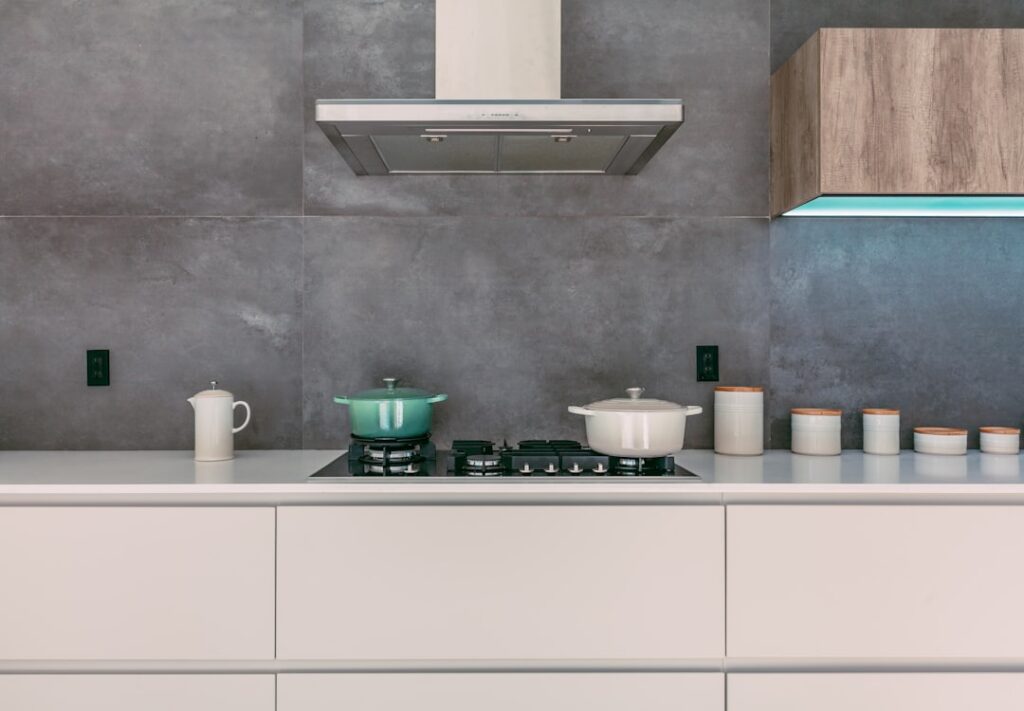
Not every kitchen can punch a duct through an exterior wall or roof, which is where a ductless option earns its place. A ventless range hood pulls cooking air through a grease filter and a charcoal filter, then pushes the cleaned air back into the room instead of exhausting it outside. For apartments, interior island cooktops, and remodels where running ductwork is impractical, it is often the only workable choice.
Part of our Kitchen Remodeling guide — explore the full guide →
A ventless range hood will not match a ducted hood for removing heat and moisture, but modern units do a respectable job of capturing grease and odors. This guide explains how they work, their real strengths and limits, filter maintenance, and how to choose one that actually clears the air.
How a Ventless Hood Works
A ductless hood uses the same fan and capture hood as a ducted model, but instead of sending air outdoors, it recirculates it. Air is drawn up through an aluminum or stainless mesh baffle that traps grease, then through an activated charcoal filter that absorbs odors and some smoke, before the fan blows the filtered air back into the kitchen.
Because nothing goes outside, there is no duct, no roof or wall penetration, and no makeup-air concern. The trade-off is that the charcoal filter can only absorb so much, and it does nothing to remove heat or humidity from the room.
Ventless vs Ducted: The Honest Comparison
Understanding what you give up helps set expectations:
- Grease removal: Both capture grease well through the metal baffle; this is a strength of ventless too.
- Odor removal: Ducted wins by sending odors outside; ventless relies on charcoal that saturates over time.
- Heat and humidity: Ducted removes both; ventless removes neither, so the kitchen stays warmer and steamier.
- Installation: Ventless is far simpler with no ductwork; ducted requires a vent path.
- Ongoing cost: Ventless needs replacement charcoal filters every few months.
If you cook heavily with high heat, frying, or lots of steam, ducted is genuinely better. For lighter cooking or where ducting is impossible, ventless is a reasonable compromise.
When a Ventless Hood Makes Sense
There are clear situations where ductless is the right call:
- Apartments and condos where you cannot alter the building envelope
- Interior kitchens with no nearby exterior wall
- Island cooktops where running a duct through the ceiling is costly or impossible
- Rental units and temporary setups
- Budget remodels where duct installation would blow the budget
Many hoods are convertible, shipping ducted but including a recirculation kit. That flexibility is worth looking for, since it lets you duct it later if your layout changes.
Choosing the Right CFM and Size
Airflow is measured in cubic feet per minute, or CFM. Because ventless hoods recirculate, their effective CFM is somewhat reduced by the filters, so buy a bit more capacity than you think you need. A general guideline for a standard electric range is 100 CFM per linear foot of cooktop, so a 30-inch cooktop wants roughly 250 to 300 CFM.
Match the hood width to your cooktop; a 30-inch cooktop pairs with a 30-inch hood, and larger ranges benefit from a 36-inch hood. Mount the hood 24 to 30 inches above an electric cooktop, following the manufacturer’s spec, for the best capture.
Filter Maintenance Is Everything
A ventless hood is only as good as its filters, and neglecting them is the top reason people complain about lingering odors. There are two filters to manage:
- Grease filter: The metal mesh baffle. Wash it in hot soapy water or the dishwasher every 2 to 4 weeks, more often if you fry.
- Charcoal filter: The odor absorber. Replace it every 3 to 6 months, since it cannot be washed and loses effectiveness as it saturates.
Budget $15 to $40 per set of replacement charcoal filters. Set a phone reminder, because a saturated charcoal filter quietly stops working while you assume the hood still is.
Cost and Installation
Ventless hoods span a wide price range depending on style and finish.
- Under-cabinet ventless hood: $80 to $300
- Wall-mount chimney-style: $200 to $700
- Island ventless hood: $300 to $1,000
- Replacement charcoal filters: $15 to $40 per set, a few times a year
Installation is straightforward since there is no ductwork. Most under-cabinet models mount with a few screws and plug into a standard outlet or hardwire to an existing circuit. A capable DIYer can install one in an hour or two, though island and hardwired units may warrant an electrician.
Styles and Mounting Options
Ventless hoods come in the same body styles as ducted models, so you can match the look of your kitchen. Under-cabinet models are the most common and affordable, tucking beneath the upper cabinets above the range. Wall-mount chimney hoods make a design statement with a tapered stainless canopy and a decorative flue cover, ideal when there is no cabinet above the range.
For island cooktops, a ceiling-mounted island hood recirculates without the enormous expense of ducting through the roof. There are also microwave-hood combinations that include a ventless recirculating fan, though their capture and airflow are weaker than a dedicated hood. Insert or power-pack units let you build a custom hood surround and drop the working guts inside. Whichever style you pick, make sure it is wide enough to cover the full cooktop, since undersized hoods let smoke and grease escape around the edges.
Improving Kitchen Air Quality Overall
Because a ventless hood does not exhaust air outside, it helps to support it with other habits and equipment to keep your kitchen air clean. Cooking generates fine particulates, moisture, and odors that a recirculating hood only partially removes, so a layered approach works best. Cracking a nearby window during heavy cooking gives steam and heat somewhere to go, which the hood cannot handle on its own.
A standalone air purifier with a HEPA and activated-carbon filter placed near the kitchen captures the fine particles and lingering odors that slip past the hood. If your bathroom or hallway has a whole-house exhaust fan, running it during and after cooking helps clear the air too. And simply using pot lids, cooking at moderate temperatures, and wiping up spills promptly reduces the smoke and grease load the hood has to deal with. These small steps make a real difference in a kitchen that relies on recirculation rather than true outside venting, keeping the space fresher and your cabinets cleaner.
Getting the Most From a Ventless Hood
To maximize performance, turn the hood on before you start cooking and leave it running 10 to 15 minutes after. Keep the metal filter clean and the charcoal filter fresh. Use lids on simmering pots to cut steam, and crack a window during heavy cooking since the hood will not remove humidity. Managed well, a ventless range hood keeps grease off your cabinets and knocks down everyday cooking odors, which for many kitchens is exactly the practical, duct-free solution they need.
Set your expectations honestly and a ventless hood will serve you well within its limits. It excels at capturing airborne grease before it films your cabinets and at knocking down everyday cooking odors, and it installs in a fraction of the time and cost of a ducted system. What it cannot do is remove heat and humidity or vent heavy smoke outdoors, so a household that sears, fries, and cooks at high heat daily will always be better served by ducting if the layout allows it.
For apartments, interior kitchens, islands, and budget-conscious remodels where running a duct is impractical or impossible, the recirculating design is often the only realistic option, and modern units do the job respectably. Buy a hood sized to your cooktop with a bit of extra CFM to offset the filters, keep the metal baffle clean and the charcoal filter fresh, and support it with a cracked window or an air purifier during heavy cooking. Managed that way, a ventless range hood keeps your kitchen noticeably cleaner and fresher, proving that even without a duct to the outdoors, you can still control grease and odor effectively.