Bathrooms and water go together, which means your flooring choice needs to handle moisture without flinching. Vinyl plank flooring has rapidly become the preferred bathroom flooring option for homeowners who want the warmth of wood-look planks with the waterproof performance that wet spaces demand.
- Why Vinyl Plank Works in Bathrooms
- Best Vinyl Plank Products for Bathrooms
- Best Overall: COREtec Pro Plus
- Best Budget: LifeProof (Home Depot Exclusive)
- Best Premium: Shaw Floorte Pro
- Best for Small Bathrooms: Mohawk SolidTech
- Installation Tips for Bathroom Vinyl Plank
- Subfloor Preparation
- Floating vs. Glue-Down
- Expansion Gaps
- Sealing the Perimeter
- Toilet Removal and Reinstallation
- Working Around Vanities
- Design Ideas for Bathroom Vinyl Plank
- Light Oak for Spa Vibes
- Grey Weathered Wood for Modern Style
- Wide Plank for Spacious Feel
- Herringbone Pattern
- Vinyl Plank vs. Tile in Bathrooms
- Common Mistakes to Avoid
- Final Thoughts
This guide covers the best vinyl plank products for bathroom use, installation specifics for wet environments, and design ideas that transform a functional space into something that looks like it belongs in a magazine.
Why Vinyl Plank Works in Bathrooms
Waterproof Construction
Luxury vinyl plank with an SPC or WPC core is 100 percent waterproof at the plank level. Water from showers, baths, sink splashes, and toilet overflows sits harmlessly on the surface or between planks without damaging the core material. This is a fundamental advantage over laminate and hardwood, both of which swell and warp from bathroom moisture.
Warm and Comfortable
Vinyl is noticeably warmer underfoot than ceramic tile or natural stone. On a cold morning, stepping onto vinyl rather than cold porcelain makes a real difference in comfort. Products with attached cork backing add even more thermal insulation and cushion.
Slip Resistance
Textured vinyl plank surfaces provide better traction when wet than polished tile or glossy stone. Most LVP products are rated for slip resistance appropriate for residential wet areas, though adding a bath mat near the shower or tub is still good practice.
Easy Maintenance
No sealing, no grout scrubbing, no waxing. Vinyl plank in a bathroom requires only regular sweeping and occasional mopping with a vinyl-safe cleaner. The waterproof surface makes cleanup after splashes and spills completely stress-free.
Best Vinyl Plank Products for Bathrooms
Best Overall: COREtec Pro Plus
COREtec pioneered the SPC vinyl plank category and their Pro Plus line remains a top choice for bathrooms. The patented core is 100 percent waterproof with zero organic materials that could encourage mold. The attached cork underlayment adds comfort and sound absorption. Wide planks in realistic wood tones create a designer look.
Cost: $3.50 to $5.50 per square foot.
Best Budget: LifeProof (Home Depot Exclusive)
LifeProof offers solid SPC-core vinyl plank at a price point that is hard to beat. The rigid core handles bathroom moisture without issue, and the selection of wood-look and stone-look options covers most design preferences. The click-lock system is DIY-friendly, keeping installation costs low.
Cost: $2.50 to $3.50 per square foot.
Best Premium: Shaw Floorte Pro
Shaw’s Floorte Pro series features some of the most realistic wood-look printing in the vinyl plank market. The SPC core is completely waterproof, and Shaw backs it with a lifetime residential warranty. The wear layer options go up to 30 mil, providing commercial-grade durability for homeowners who want long-term performance.
Cost: $4.00 to $6.50 per square foot.
Best for Small Bathrooms: Mohawk SolidTech
Mohawk’s SolidTech planks come in narrower widths that suit smaller powder rooms and half baths where wide planks can look disproportionate. The GreenGuard Gold certification confirms low VOC emissions, which matters in small, enclosed spaces with limited ventilation.
Cost: $3.00 to $5.00 per square foot.
Installation Tips for Bathroom Vinyl Plank
Subfloor Preparation
Bathroom subfloors must be smooth, flat, and dry before vinyl plank installation. Check for any soft spots or water damage from previous flooring failures and repair before proceeding. Over concrete, ensure moisture levels are within the manufacturer’s specifications.
Floating vs. Glue-Down
Floating click-lock installation is the standard for bathroom vinyl plank. It is faster, allows for easier replacement of individual planks, and does not require adhesive. However, in bathrooms where significant water exposure is expected, such as rooms with open showers or curbless designs, glue-down installation provides better protection against water migration beneath the floor.
Expansion Gaps
Leave a quarter-inch expansion gap around the entire perimeter of the room, including around the toilet flange, vanity bases, and bathtub edges. This gap allows the vinyl to expand and contract with temperature changes without buckling. Cover the gaps with shoe molding or quarter-round trim.
Sealing the Perimeter
Apply a bead of 100 percent silicone caulk along the base of the bathtub, shower curb, and toilet base where they meet the vinyl plank. This prevents water from wicking beneath the flooring through the expansion gap. Use clear or color-matched caulk for a clean appearance.
Toilet Removal and Reinstallation
Always remove the toilet before installing vinyl plank in a bathroom. Installing around the toilet base creates an obvious, unprofessional cutout and makes future toilet replacement or repair difficult. Shut off the water supply, drain the tank and bowl, remove the mounting bolts, and set the toilet aside. Install the vinyl plank, cut a hole for the toilet flange, and reinstall with a new wax ring.
Working Around Vanities
If your vanity is a freestanding piece, remove it, install the flooring wall to wall, and replace the vanity on top. If the vanity is built-in or too heavy to move, install the vinyl plank up to the vanity base with appropriate expansion gaps and cover with trim or caulk.
Design Ideas for Bathroom Vinyl Plank
Light Oak for Spa Vibes
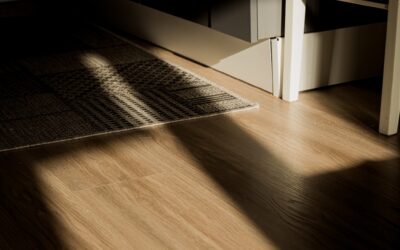
Light natural oak tones paired with white walls, a freestanding bathtub, and green plants create a serene spa-like atmosphere. The warm wood look softens the typically hard surfaces in a bathroom.
Grey Weathered Wood for Modern Style
Cool grey planks with a weathered or driftwood texture suit modern and coastal bathroom designs. Pair with matte black fixtures and white subway tile for a contemporary look.
Wide Plank for Spacious Feel
Wide planks of 7 inches or more make small bathrooms feel larger by reducing the number of visible seams. Run them lengthwise from the doorway to the back wall to elongate the space visually.
Herringbone Pattern
Some vinyl plank products are designed for herringbone installation, creating a classic pattern that elevates the entire bathroom. This works best in larger master bathrooms where the pattern has room to develop.
Vinyl Plank vs. Tile in Bathrooms
Tile has been the bathroom standard for centuries, and it remains an excellent choice. But vinyl plank offers genuine advantages. It is warmer underfoot, more forgiving to dropped items, easier and faster to install, and significantly less expensive. There are no grout lines to clean and seal, and the waterproof core performs just as well as glazed tile at the surface level.
Where tile still wins is in shower floors and walls where constant direct water exposure exceeds what vinyl plank is designed for. Vinyl plank is an excellent bathroom floor material, but it should not replace tile inside the shower enclosure itself. The combination of tile in the shower and vinyl plank on the main bathroom floor is a popular and practical approach.
Common Mistakes to Avoid
Using flexible vinyl rather than rigid-core vinyl is a common error. Flexible LVP can curl at the edges and telegraph subfloor imperfections over time. Always choose SPC or WPC core products for bathroom applications.
Skipping the silicone caulk at wet transitions is another mistake. Without caulk, water enters the expansion gap and pools beneath the vinyl, creating conditions for mold and mildew growth on the subfloor.
Installing waterproof vinyl over a damaged or moldy subfloor does not solve the problem. It hides it. Address any existing water damage or mold before installing new flooring.
Final Thoughts
Vinyl plank flooring for bathrooms is a practical, beautiful, and budget-friendly choice that has rightly overtaken tile as the default option for many homeowners. Choose an SPC-core product from a reputable brand, seal your perimeter edges with silicone, and enjoy a bathroom floor that looks like wood, handles water like tile, and costs less than either.
Prefer to explore on your own?
See how new flooring looks in your actual room in seconds — free, no signup.
Try the free Floor Studio →