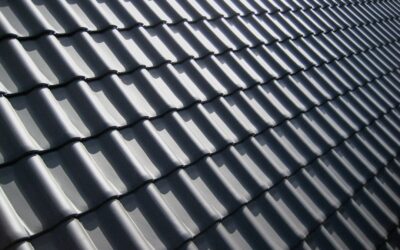
Walk the roofing aisle of any home center and you will find stacks of wavy plastic sheets that most people walk right past, yet they solve dozens of everyday projects cheaply and fast. Corrugated vinyl panels are lightweight PVC sheets molded into a ribbed profile, prized because they are inexpensive, easy to cut with ordinary tools, and shrug off moisture and rot. Homeowners reach for them to roof patio covers, side sheds, line garage walls, build greenhouses, and add durable wainscot to workshops and mudrooms. Knowing the panel types, how they install, and where they belong keeps you from buying the wrong sheet for the job.
Here is the practical guide to choosing and installing corrugated vinyl panels without the guesswork.
- What Corrugated Vinyl Panels Are
- Vinyl (PVC) Versus Polycarbonate
- Common Sizes and Profiles
- Where Corrugated Vinyl Panels Work Best
- How to Install Corrugated Vinyl Panels
- Cost and Longevity
- Corrugated Vinyl vs. Metal and Solid Roofing
- Common Installation Mistakes to Avoid
- A Quick Buying Checklist
- Choosing the Right Thickness and Profile
- Cutting and Working Safely
- Final Thoughts
What Corrugated Vinyl Panels Are
These panels are made from polyvinyl chloride formed into a repeating wave, or corrugation, that gives a thin sheet real rigidity and strength. The ribs let the panel span rafters and purlins while staying light enough for one person to carry. Because they are plastic, they will not rust, rot, or corrode, and many are formulated to resist yellowing and UV breakdown outdoors.
You will see them sold in clear, translucent, and opaque finishes. Clear and translucent panels pass daylight, which is why they dominate greenhouse and patio-cover projects, while opaque white and colored panels suit walls and privacy applications. Familiar brand names include Suntuf, Palruf, and Tuftex.
Vinyl (PVC) Versus Polycarbonate
Shoppers often confuse the two clear panel types, and the difference matters.
PVC (vinyl) panels
Standard corrugated PVC is the budget choice, running roughly $1 to $2.50 per square foot. It handles light-duty roofing and walls well and cuts easily, but it can become brittle over years of intense sun and impact.
Polycarbonate panels
Polycarbonate costs more, around $2 to $4 per square foot, but it is far more impact-resistant, handles hail and heavy sun better, and lasts longer. For a permanent patio roof in a harsh climate, the polycarbonate upgrade is usually worth it.
For temporary structures, sheds, and interior use, PVC vinyl is the economical and sensible pick. Save polycarbonate for exposed roofs that must survive years of weather.
Common Sizes and Profiles
Panels come in standard dimensions that make planning simple. Widths are typically 26 inches, with an effective coverage around 24 inches after the sidelap overlap. Lengths run 8, 10, and 12 feet, and some lines offer longer. The corrugation profile, often a round wave with a 2.67-inch pitch, must match your closure strips and any existing panels, so buy panels and matching foam or plastic closure strips from the same system.
For interior wainscot and wall applications, shorter panels are cut to the desired height, commonly 32 to 48 inches, and capped with trim.
Where Corrugated Vinyl Panels Work Best
These panels earn their keep across a range of projects.
- Patio and carport roofs: Translucent panels shed rain while letting light through.
- Sheds and outbuildings: Quick, weatherproof roofing and siding.
- Greenhouses: Diffused light and moisture resistance in one lightweight sheet.
- Garage and workshop walls: Washable, durable wall lining that resists dents and moisture.
- Interior wainscot: A rugged, wipeable lower-wall surface for mudrooms, laundry rooms, and barns.
- Privacy screens and fencing: Opaque panels block sight lines and wind.
How to Install Corrugated Vinyl Panels
Installation is genuinely DIY-friendly with basic tools. Cut panels with a fine-tooth circular saw blade, a jigsaw, or even tin snips for thin PVC, going slow to avoid cracking.
- Frame with proper support: Space purlins or furring per the manufacturer, often every 24 inches for roofing.
- Install closure strips: Foam or plastic closures matched to the profile seal the gaps at the top and bottom.
- Fasten through the ridge: Drive screws with sealing washers through the top of the corrugation, never the valley, so water sheds away from the hole.
- Overlap correctly: Lap side seams by one full corrugation and end seams by 6 to 8 inches, running laps away from prevailing wind.
- Do not overtighten: Leave the panel room to expand and contract with temperature; crushed ribs crack and leak.
Pre-drilling fastener holes slightly oversized allows for thermal movement, which is the most common detail first-timers miss.
Cost and Longevity
A single 26-inch by 8-foot PVC panel runs roughly $12 to $25, so a small patio roof or shed can be covered for a couple hundred dollars in materials. Add closure strips, screws with washers, and any ridge caps to the budget. Well-installed PVC panels last 10 to 15 years outdoors, while polycarbonate can push 20 or more. Indoors, protected from UV, corrugated vinyl lasts far longer and stays looking clean with a simple wipe-down.
Corrugated Vinyl vs. Metal and Solid Roofing
Before committing to corrugated vinyl, it helps to see where it beats and loses to the alternatives. Against corrugated metal, vinyl and polycarbonate win on light transmission and quiet operation, since metal is opaque and drums loudly in rain, but metal lasts longer and shrugs off hail that can crack a thin PVC sheet. Against solid roofing like shingles or a poured patio cover, corrugated panels are dramatically cheaper, lighter, and faster to install, and they let daylight through, though they offer less insulation and a shorter lifespan. Glass delivers the best clarity for a sunroom but costs many times more, weighs far more, and shatters, while polycarbonate gives you most of the light at a fraction of the weight and risk. For a budget patio cover or greenhouse where daylight and low cost matter most, corrugated vinyl is hard to beat; for a primary house roof or a structure that must carry heavy snow loads, choose a stronger, more durable material.
Common Installation Mistakes to Avoid
A few recurring errors cause most corrugated-panel problems. Fastening through the valley instead of the crest of the corrugation is the classic mistake, because it puts the screw hole in the path of running water and invites leaks; always screw through the raised crest with a neoprene-washered fastener. Overtightening those screws is nearly as common, and it dimples or cracks the panel around the hole, so drive them just snug. Skipping oversized pilot holes ignores thermal movement, and a PVC sheet that cannot expand on a hot afternoon will buckle or split. Under-supporting the span is another culprit; purlins spaced wider than the panel’s rating let the sheet sag and pond water. Finally, forgetting foam closure strips at the eaves and ridge leaves gaps that wind-driven rain, insects, and birds exploit. Support the framing correctly, pre-drill, fasten through the crests without overtightening, and close the ends, and the roof will stay tight and leak-free for its full service life.
A Quick Buying Checklist
Before you head to the store, run through a short checklist so you buy right the first time. Decide whether daylight or privacy matters more, which sets clear versus tinted or opaque panels. Confirm the profile matches any existing sheets so the ribs nest correctly. Count panels by coverage width rather than overall width, then add one extra sheet for overlaps and waste. Choose UV-stabilized PVC for economical projects or polycarbonate where hail, heavy sun, or a long service life are concerns. Finally, budget for the hidden extras such as closure strips, sealing washers, and enough fasteners spaced per the span rating, since skimping on hardware is the fastest route to leaks and wind damage.
Choosing the Right Thickness and Profile
Panel thickness and profile decide how much load and wind a structure can take. Thicker panels span farther between supports and resist sagging, snow, and foot pressure during installation. For a simple patio cover in a mild climate, a standard 0.8 to 1.0 mm PVC panel on purlins 24 inches apart is adequate. In regions with real snow or wind, step up to a heavier panel and tighten purlin spacing to 16 to 18 inches, or switch to polycarbonate for its superior strength. Profile matters too: taller, wider corrugations shed water faster and stiffen the panel, while low-profile ribs suit vertical wall cladding and fencing where drainage is not a concern. Always match new panels to the profile of any existing sheeting so the ribs nest and overlap correctly.
Cutting and Working Safely
These panels are easy to cut but demand a few precautions. Thin PVC scores and snaps with a utility knife, while thicker sheets and polycarbonate cut cleanly with a fine-tooth circular or jigsaw blade run slowly to avoid melting or chipping. Always wear safety glasses and gloves, since cut edges are sharp and plastic chips fly. Support the panel fully on both sides of the cut so it does not crack. Work on a calm day, because a wide panel acts like a sail and becomes dangerous to carry in gusty wind. When drilling fastener holes, back the panel with scrap wood and use a bit slightly larger than the screw shank so the panel can expand freely without splitting around the fastener.
Final Thoughts
Corrugated vinyl panels are one of the most versatile, budget-friendly materials a homeowner can keep in mind, covering everything from patio roofs and greenhouses to washable garage walls and rugged interior wainscot. Match the panel type to the job, stepping up to polycarbonate for exposed roofing and sticking with economical PVC for sheds and indoor use, and follow the ridge-fastening and overlap rules so water sheds cleanly. Handle those basics and these humble ribbed sheets deliver years of weatherproof, low-maintenance service for a fraction of what heavier materials would cost.
Prefer to explore on your own?
See how new flooring looks in your actual room in seconds — free, no signup.
Try the free Floor Studio →