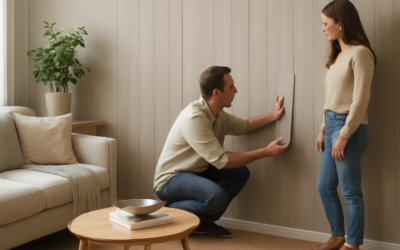
Vinyl panels have become one of the most popular materials in home renovation because they combine the look of natural wood, stone, or tile with toughness, water resistance, and a price that undercuts the real thing. Whether you are covering a floor, refreshing a wall, or finishing a basement, vinyl gives you a durable surface that stands up to moisture and daily wear.
This guide explains the main types of vinyl panels, what they cost, how they go in, and how to keep them looking sharp, so you can decide if they are the right fit for your project.
What Are Vinyl Panels?
Vinyl panels are rigid or semi-rigid pieces made primarily from PVC, manufactured in plank or panel form with a printed design layer and a clear protective wear layer on top. That design layer can convincingly mimic oak, slate, marble, or ceramic tile, while the construction underneath delivers the durability vinyl is known for.
Most panels use a click-lock edge that snaps together without glue, letting them float over the subfloor or attach to a wall. The result is a surface that resists scratches, dents, and water far better than the materials it imitates, which is why vinyl shows up everywhere from kitchens and bathrooms to retail floors.
The Main Types of Vinyl Panels
Not all vinyl is built the same, and the category you choose affects feel, durability, and where you can install it.
- Luxury vinyl plank (LVP): wood-look planks, flexible or rigid, prized for realistic grain and comfort underfoot.
- Luxury vinyl tile (LVT): the same technology in tile shapes that imitate stone and ceramic, often with groutable options.
- SPC (stone plastic composite): a rigid core packed with stone powder; extremely stable, dent-resistant, and good over imperfect subfloors.
- WPC (wood plastic composite): a rigid core with a softer, warmer feel and slight cushioning.
- Vinyl wall panels: lightweight decorative or waterproof panels for backsplashes, shower surrounds, and accent walls.
For high-moisture areas like bathrooms and basements, rigid-core SPC is the safest bet because it barely expands or contracts with temperature swings. For comfort in living spaces, WPC’s softer core feels easier on the feet.
Why Homeowners Choose Vinyl
The popularity of vinyl is not just about price. It addresses several pain points that plague other materials at once.
- Waterproof: most modern vinyl is 100 percent waterproof, making it usable in kitchens, baths, laundry rooms, and below grade.
- Durable: a tough wear layer shrugs off scratches, scuffs, and heavy foot traffic, and many carry strong residential warranties.
- Comfortable and quiet: softer and warmer underfoot than tile or stone, with less noise.
- Easy to install: click-lock systems are DIY-friendly and can often go over existing flooring.
- Affordable: typically far cheaper than the hardwood or stone it replicates.
The main limitation worth knowing is that vinyl is a synthetic product and does not add the resale cachet of genuine hardwood. It can also be damaged by very sharp objects and may fade under intense, prolonged direct sunlight.
What Vinyl Panels Cost
Pricing varies with quality, thickness, and the realism of the finish, so treat these as general ranges rather than quotes. Budget vinyl flooring often starts around $2 to $3 per square foot, mid-range luxury vinyl runs roughly $3 to $7 per square foot, and premium rigid-core products can reach $7 to $12 or more.
Professional installation typically adds a couple of dollars per square foot on top of materials, though the click-lock systems make this one of the more approachable DIY projects. A thicker wear layer, often measured in mils, costs more but lasts longer and resists wear better, which matters in busy households.
Installing Vinyl Panels
The exact steps depend on the product, but a floating click-lock install follows a reliable pattern. Always read the manufacturer’s instructions first, since acclimation times and underlayment rules differ.
- Prep the subfloor: it must be clean, dry, and flat; rigid SPC tolerates minor imperfections, but high spots should be ground down and low spots filled.
- Acclimate the panels: let them sit in the room for the recommended time, often 24 to 48 hours, so they adjust to temperature and humidity.
- Add underlayment if needed: some panels include attached padding; others call for a thin foam layer.
- Leave an expansion gap: keep about 1/4 inch around the perimeter so the floor can move without buckling.
- Click and lock: work row by row, staggering the seams, tapping joints snug with a tapping block.
For wall panels, the surface must be clean and sometimes furred out; many use adhesive plus a click or tongue-and-groove edge. In wet areas, seal the seams as directed to keep the wall truly waterproof.
Cleaning and Maintenance
One of vinyl’s quiet advantages is how little upkeep it needs. Sweep or vacuum regularly to remove grit that can dull the wear layer, and damp-mop with a pH-neutral cleaner or a mild soap-and-water solution. Avoid abrasive pads, harsh solvents, and wax polishes, which can damage or cloud the finish.
Protect the surface with felt pads under furniture legs and mats at entryways, and wipe spills promptly even though the material is waterproof. With basic care, quality vinyl panels can look good for 15 to 20 years or more.
Common Installation Mistakes to Avoid
Vinyl is forgiving, but a handful of errors cause most failures, and nearly all of them happen before the first panel locks in. Skipping acclimation tops the list: install planks straight from a cold truck and they can expand after the room warms, buckling the floor or popping seams apart. Give them the full 24 to 48 hours the manufacturer specifies.
Poor subfloor prep is the next culprit. Even rigid SPC will telegraph debris, ridges, or dips over time, so vacuum thoroughly and check flatness, most makers want no more than about 3/16 inch of variation over a 10-foot span. Eliminating the expansion gap is another frequent slip; without that 1/4-inch perimeter space, a floating floor has nowhere to move and will lift in warm weather.
Watch heat and weight, too. Large sun-drenched rooms or floors over radiant heat may need a product rated for those conditions, and heavy cabinets or kitchen islands should sit on the subfloor, not trap a floating floor beneath them. Finally, stagger your end seams by at least 6 to 8 inches row to row; a repeating, lined-up pattern looks cheap and weakens the lock.
Final Thoughts
For homeowners who want the look of wood or stone without the cost, fragility, or maintenance, vinyl panels are hard to beat. Choose rigid SPC for wet or uneven spaces, WPC for comfort, and a thicker wear layer for busy rooms. Prep the subfloor properly, respect the expansion gap, and clean with gentle products. Do that, and you get a waterproof, durable, attractive surface that delivers years of low-fuss performance for a fraction of the price of the real thing.
Prefer to explore on your own?
See how new flooring looks in your actual room in seconds — free, no signup.
Try the free Floor Studio →