Most problems with a wall mounted electric fireplace have nothing to do with the flame effect. They come from a unit that is too wide for the wall, a bracket screwed into drywall alone, or a cord stretched to an outlet three feet away. Get the size, the anchoring and the power right, and a wall-hung unit is one of the easiest heat-and-ambiance upgrades in a house: no venting, no chimney, and a finished look in an afternoon.
The short answer for most rooms: choose a unit whose width is roughly one-third to one-half of the wall it hangs on, fasten the bracket into at least two studs, place the bottom edge 40 to 50 inches off the floor for seated viewing, and plug it into a dedicated outlet hidden directly behind the unit. Standard 120-volt models put out about 5,000 BTU, enough to supplement heat in roughly 400 square feet. If you want true zone heating in a larger room, look at a 240-volt hardwired model and bring in an electrician.
- Choosing a Wall Mounted Electric Fireplace for Your Room
- Recessed Versus Surface Mount
- Tools and Materials
- Step-by-Step Surface Installation
- Power and Wiring Requirements
- Structural and Clearance Considerations
- Troubleshooting Common Problems
- Cost Ranges
- When to Call a Licensed Professional
- Frequently Asked Questions
Choosing a Wall Mounted Electric Fireplace for Your Room
Start with the wall, not the catalog. Measure the full width of the wall and note any windows, doors, vents or a TV location. A wall mounted electric fireplace looks balanced when it fills about a third of an open wall, and it starts to look crowded once it passes about two-thirds. On a 12-foot living room wall, that points you toward a 42 to 60 inch unit. In a bedroom with a 10-foot wall, a 34 to 42 inch flat electric fireplace usually reads better than a long bar.
Depth matters as much as width. Ultra thin electric fireplace models run 4 to 6 inches deep, which keeps them from feeling bulky in hallways and small bedrooms. Thicker surface units, often 6 to 9 inches, tend to have larger heater cavities and more realistic ember beds. Check the hanging weight too. Most wall hung fireplace units weigh 30 to 80 pounds, and big glass-front models can run past 100 pounds, which affects how you anchor them.
Heat Output Versus Room Size
Nearly every plug-in model uses a 1,500-watt heater, which works out to about 5,100 BTU. That is a supplemental heat source, not a furnace replacement. Use these rough guidelines:
- Up to 400 sq ft: a 120-volt, 1,500-watt unit handles chill-taking duty well in a moderately insulated room.
- 400 to 800 sq ft: consider a 240-volt model rated in the 8,000 to 10,000 BTU range, or plan on the fireplace as ambiance plus partial heat.
- Drafty rooms, high ceilings, or basements: step up one size class, since heat stratifies and escapes faster.
Many owners run the flame effect without heat for most of the year. A unit with independent flame and heater controls lets you do that, and the flame-only draw is usually just 30 to 100 watts.
Recessed Versus Surface Mount
You have two basic installation styles. A surface mount hangs on a bracket fastened to the face of the wall, with the full depth of the unit projecting into the room. A recessed install sets most or all of the unit into the wall cavity so only the glass and trim sit proud of the drywall.
Surface mounting is the classic DIY route. It needs no framing changes, takes two to three hours, and lets you take the unit with you when you move. The tradeoff is projection: a 6-inch-deep unit sticks out 6 inches plus the bracket gap, and the cord has to reach an outlet.
Recessed mounting gives the clean, built-in look you see in design magazines. A standard 2×4 wall has only about 3.5 inches of cavity depth, so a recessed install either uses a slim unit designed for in-wall mounting or requires a framed bump-out to add depth. It also means cutting drywall, possibly relocating insulation, and finishing the opening. Plan for a full weekend or a half day of carpenter time. Some models are marketed as wall mountable fireplace or recessed-capable units and include both brackets, which is worth paying for if you are undecided.
Tools and Materials
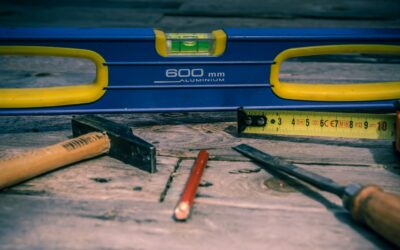
- Stud finder and a 4-foot level
- Tape measure, pencil and painter’s tape to mock up the outline
- Drill/driver with bits for pilot holes
- Lag screws or structural screws sized per the bracket instructions (often 2.5 to 3 inch)
- Non-contact voltage tester
- Recessed outlet box kit if you plan to hide the plug behind the unit (installed by an electrician if it means new wiring)
- For recessed installs: drywall saw, 2×4 lumber, drywall, joint compound and paint
- A helper for lifting the unit onto the bracket
Step-by-Step Surface Installation
- Mock up the location. Tape the outline of the unit on the wall. Sit on the couch and look at it. The center of the flame should sit at roughly seated eye level, which usually puts the bottom edge 40 to 50 inches off the floor. If a TV goes over it, leave at least 12 inches between the top of the fireplace and the TV, or whatever the manual specifies.
- Find the studs. Mark stud centers with a stud finder and confirm with a small finish nail in a spot the unit will hide. Studs normally fall 16 inches on center.
- Check for hidden hazards. Before drilling, think about what is in the wall. Outlets and switches nearby often mean cables running horizontally. If you have any doubt, turn off the breaker for that wall, confirm power is off with a non-contact voltage tester, and drill shallow pilot holes first.
- Level and fasten the bracket. Hold the bracket in position, level it, and drive the supplied lag screws or structural screws into at least two studs. Do not rely on drywall anchors alone for a heated unit that weighs 40 pounds or more and gets bumped during cleaning.
- Route the power. The cleanest result is a recessed outlet directly behind the unit. If an outlet already sits within reach of the cord, use it, but never add an extension cord or power strip.
- Hang the unit. With a helper, lift the fireplace onto the bracket hooks, then install the bottom safety screws that lock it in place.
- Test the functions. Plug in, run the flame effect first, then the heater on low, then high. Listen for rattles and feel that warm air exits freely from the vent.
Power and Wiring Requirements
A 1,500-watt heater draws about 12.5 amps. That is a heavy, continuous load for a standard 15-amp general-purpose circuit that is also running lamps, a TV and a game console. Most manufacturers recommend a dedicated 15 or 20 amp circuit for this reason, and nuisance breaker trips are the number one complaint from owners who skip it. Plug the cord directly into a wall outlet. Extension cords and power strips can overheat under a sustained heater load.
Hardwired and 240-volt models are a different job. They connect to a junction box rather than a plug and need a dedicated double-pole breaker. Adding a new circuit, a new outlet behind the unit, or a hardwired connection is work for a licensed electrician, and most jurisdictions require a permit for it. If you do anything at an existing box, turn off the breaker and confirm power is off with a non-contact voltage tester before you touch a wire, and never work on wiring that is still powered.
Keep the outlet and cord clear of the heater discharge. Many units blow warm air from the bottom or top edge, and a cord draped across that path ages quickly.
Structural and Clearance Considerations
Hanging a fireplace is a structural task as well as a decorative one. Plaster-and-lath walls in older homes can crack under concentrated loads, so pre-drill carefully and still hit the framing behind the lath. On masonry or concrete walls, use sleeve anchors or concrete screws rated well past the unit’s weight. Metal studs need toggle-style fasteners rated for the load, or add wood blocking during a recessed install.
Respect the clearances in the manual. Typical guidance is to keep curtains, furniture and decor at least 3 feet from the front of the heater, keep the vent unobstructed, and avoid mounting directly over baseboard heaters or under shelves that could trap heat. If you plan a TV or floating shelf nearby, confirm the maximum temperature at that height before committing.
Troubleshooting Common Problems
- Breaker trips when the heater kicks on: the circuit is overloaded. Move other loads off it or have an electrician add a dedicated circuit.
- Unit leans forward or sags: the bracket missed a stud or the safety screws were never installed. Remove it and re-anchor.
- Burning smell the first few hours: normal for a new heater element as manufacturing oils burn off. A persistent smell, discolored outlet or warm plug is not normal; unplug and inspect.
- Heater runs but the room stays cold: the unit is undersized for the space or the thermostat setting is low. Wall hanging electric fires are supplemental by design.
- Flame effect flickers or goes dark: check the remote batteries, then the LED strip connection according to the manual. Many brands sell replacement light boards.
Cost Ranges
Basic wall-hung units usually run a few hundred dollars, while premium models with multicolor flames, thin profiles and wider glass climb to roughly $800 to $2,000. A DIY surface mount costs little beyond fasteners. Hiring a handyman for a surface install is often in the low hundreds. Adding a dedicated circuit and a recessed outlet commonly runs a few hundred dollars more, and a fully recessed install with a framed bump-out, drywall and paint can add $1,000 or more depending on finishes and local labor rates.
When to Call a Licensed Professional
Bring in a licensed electrician for any new circuit, new outlet, hardwired or 240-volt connection, or panel work, and pull permits where your local building department requires them. Call a carpenter or contractor when a recessed install means cutting into a load-bearing wall, relocating plumbing or ductwork, or framing a large bump-out. If your wall is masonry, plaster in poor condition, or you simply cannot locate solid framing, a pro can anchor the unit safely in far less time than troubleshooting a sagging bracket later.
Frequently Asked Questions
How high should a wall mounted electric fireplace be hung?
For seated viewing, place the bottom edge about 40 to 50 inches off the floor so the flame sits near eye level. Hang it higher only when a TV or mantel arrangement calls for it, and check the manual for minimum clearances.
Can I mount an electric fireplace on drywall without studs?
It is not recommended. The bracket should fasten into at least two studs or solid blocking. Drywall anchors alone can loosen over time from the weight, vibration and heat cycling of the unit.
Does a wall hung fireplace need a dedicated circuit?
Most manufacturers recommend one because the heater draws about 12.5 amps. Sharing a busy circuit often leads to tripped breakers. A licensed electrician can add a dedicated circuit and a recessed outlet behind the unit.
How much heat does a wall mounted electric fire produce?
Standard 120-volt models produce about 5,000 BTU, enough to supplement heat in roughly 400 square feet. Hardwired 240-volt units can reach 8,000 to 10,000 BTU for larger rooms.
Can I put a TV over a wall mounted electric fireplace?
Yes, as long as you follow the clearance in the fireplace manual, usually around 12 inches between the top of the unit and the bottom of the TV. Units that vent heat from the bottom or front are better choices under a TV.