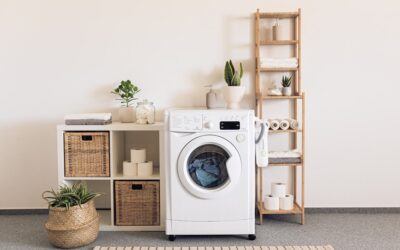
The laundry room is one of the most under-planned spaces in the house, usually a tight closet or a narrow strip beside the garage door, yet it holds detergents, baskets, cleaning supplies, and the endless pile of things without a home. Smart wall shelves for laundry room storage reclaim the vertical space most people ignore, turning bare walls above and around the machines into organized, functional storage. Whether you have a full dedicated room or a stacked unit in a hallway, the right shelving makes laundry day faster and the whole space feel less like a dumping ground.
- Why Go Vertical in the Laundry Room
- Types of Wall Shelves That Work Best
- Best Placement for Function
- Materials That Survive Humidity
- How to Mount Shelves Securely
- Organizing What Goes on the Shelves
- Budget and DIY Considerations
- Design Ideas to Finish the Space
- Shelves for Small or Closet Laundry Spaces
- Adding a Folding Counter or Drying Solution
- Frequently Asked Questions
Why Go Vertical in the Laundry Room
Floor space in a laundry area is almost always taken by the washer, dryer, and maybe a basket or two. The walls, though, are usually empty. Mounting shelves puts detergent, softener, stain remover, and dryer sheets within arm’s reach while keeping them off the machines where they vibrate and fall. Vertical storage also keeps hazardous products up and away from small children and pets, and it frees the floor so the room feels open and stays easy to clean. Even a single well-placed shelf above the machines can hold a week’s worth of supplies.
Types of Wall Shelves That Work Best
Not every shelf suits a humid, high-traffic laundry space. Here are the styles that hold up and earn their spot.
- Floating shelves — clean-looking, bracket-free shelves for a modern feel; great for a few pretty jars of detergent and dryer balls.
- Bracket shelves — the most affordable and adjustable; heavy-duty L-brackets hold real weight for bulk supplies.
- Wire (ventilated) shelving — the workhorse of laundry rooms; air circulates freely, water can’t pool, and it’s cheap and easy to install.
- Over-the-machine shelving — a single deep shelf or a unit spanning above the washer and dryer, the highest-value spot in the room.
- Cube and cubby units — wall-mounted cubbies for baskets, one per family member, ideal for sorting.
Best Placement for Function
Where you hang shelves matters as much as what you hang. The prime real estate is the wall directly above the washer and dryer, mount the lowest shelf 16 to 24 inches above the machines so you can still open lids and reach controls, then stack additional shelves above at 12- to 16-inch spacing. Pair a shelf with a hanging rod underneath for drip-drying and air-drying clothes; this combo is the single most useful upgrade in most laundry rooms. Keep frequently used items at eye level and heavy or rarely used bulk supplies higher up or lower down.
Materials That Survive Humidity
Laundry rooms get warm and damp, so material choice affects how long your shelves last.
- Coated wire or epoxy-coated steel — resists rust and moisture, and the ventilation prevents trapped humidity. A durable, budget-friendly pick.
- Solid wood or plywood — attractive and strong, but seal or paint it well so moisture doesn’t warp or swell the wood.
- Melamine or laminate — wipe-clean and affordable, though the edges can swell if water gets into an exposed seam.
- Stainless or powder-coated metal — the most durable and easy to clean, ideal for a heavy-use family laundry room.
Avoid raw MDF in a humid laundry space, it drinks up moisture and sags over time.
How to Mount Shelves Securely
Loaded shelves are heavy, a gallon of detergent alone can weigh 10 pounds, so anchoring matters. Always find the studs with a stud finder and drive screws into framing wherever possible. Where a bracket falls between studs, use heavy-duty toggle bolts or self-drilling drywall anchors rated for the load, never plastic push-in anchors for anything holding weight. Level each shelf before final tightening, and for long spans add a center bracket to prevent sagging. If you’re mounting into tile or masonry near a utility sink, switch to masonry anchors and a hammer drill. As a rule of thumb, mount for at least double the weight you expect to store.
Organizing What Goes on the Shelves
Shelves only help if what’s on them is organized. A few systems keep the room tidy:
- Decant detergent and powders into matching labeled containers, they look cleaner and you can see when you’re running low.
- Use small bins or baskets on the shelves to corral loose items like clothespins, lint rollers, and mesh bags.
- Dedicate one shelf to a “lost and found” bin for pocket change, stray socks, and buttons.
- Add hooks under a shelf for a hand brush, measuring scoop, or drying rack.
- Keep a small trash bin or wall-mounted bag for lint and dryer sheets within reach.
Budget and DIY Considerations
Laundry shelving is one of the cheapest impactful upgrades in the home. A basic wire shelf kit runs $15 to $40, floating shelves cost $20 to $60 each, and a full over-the-machine shelving unit ranges from $50 to $200. Most installs are a genuine one-hour DIY project needing only a drill, a level, a stud finder, and the right anchors. If you want a built-in look, a run of open wood shelves on cleats spanning the whole wall costs under $150 in lumber and delivers a custom result. For renters, tension-mounted or over-the-door options avoid drilling entirely.
Design Ideas to Finish the Space
Function comes first, but the laundry room can look good too. Paint the wall behind open shelves a fresh color to make the space feel intentional. Mix closed baskets with a few open, styled items, a plant, a jar of wooden clothespins, folded towels, so it reads as designed rather than utilitarian. Adding under-shelf lighting brightens a dim closet laundry, and a small counter or folding surface below the shelves completes a compact, efficient workstation. With a weekend and a modest budget, wall shelves turn the most neglected room in the house into one of the most organized.
Shelves for Small or Closet Laundry Spaces
Not everyone has a dedicated room, and a stacked washer-dryer in a closet or a hallway alcove needs a different approach. In tight spaces, go tall and narrow: a single column of shelves above the machines uses the full height without crowding. Over-the-door racks and the back of a bifold door add storage without touching the walls. For stacked units, the wall beside the tower is prime real estate for a slim shelf tower or a pegboard. Pull-out or fold-down shelves that tuck away when not in use keep a cramped space workable, and a rolling cart that slides between or beside the machines turns dead space into mobile storage. The goal in a small laundry area is to get everything off the floor and off the machine tops so the space feels usable rather than cramped.
Adding a Folding Counter or Drying Solution
Shelves become far more useful paired with a work surface and a place to dry. A simple counter mounted at 36 inches, either spanning above a front-loading washer and dryer or as a wall-mounted fold-down, gives you a spot to sort and fold instead of hauling laundry to a bed. Beneath your lowest shelf, add a retractable or wall-mounted drying rack and a hanging rod for air-drying delicates straight out of the machine. This shelf-plus-rod-plus-counter combination is the layout professional organizers reach for again and again, because it creates a complete workstation in a few linear feet of wall.
Frequently Asked Questions
How high should shelves be above the washer and dryer?
Mount the lowest shelf 16 to 24 inches above the machines so you can still open top-loading lids and reach the controls, then space additional shelves 12 to 16 inches apart. Keep everyday items at eye level and heavy bulk supplies lower.
What’s the best shelf material for a humid laundry room?
Coated wire or epoxy-coated steel is the top pick, it resists rust, lets air circulate, and won’t trap moisture. Sealed or painted solid wood also works, but avoid raw MDF, which swells and sags in damp conditions.