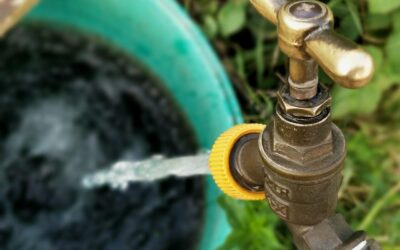
Finding a puddle under your water heater is unsettling, but if the drip traces back to the spigot near the bottom of the tank, you may have caught a minor problem before it becomes a major one. A water heater leaking from drain valve is one of the more common and more fixable water heater complaints, and in many cases you can stop it yourself in under an hour with a few dollars in parts. This guide explains why the drain valve leaks, how to diagnose it, the fixes that work, and when the smarter call is to replace the valve or the whole tank.
What the Drain Valve Does
The drain valve is the faucet-like fitting near the base of the tank. Its job is to let you drain the heater for flushing out sediment or for replacing the unit. Most standard valves look like a small hose bib with a handle; some are plastic, some brass, and better units use a full-port brass ball valve.
Because the valve sits at the lowest point of a tank full of hot, pressurized, mineral-laden water, it endures constant stress. Over years of heating cycles and sediment exposure, seals wear, plastic grows brittle, and the seat where the valve closes can no longer make a watertight seal. That is when the drip starts.
Common Causes of a Leaking Drain Valve
Not every leak means the valve is failing. Pin down the cause before you start swapping parts, because the fix depends entirely on why it is leaking.
- Loose or partially open handle: The valve isn’t fully closed, or the handle got bumped
- Debris on the seat: Sediment lodged in the valve prevents a tight seal
- Worn washer or seal: Internal gasket has degraded with age and heat
- Cracked plastic valve: Brittle plastic bodies split, especially after being opened once
- Loose connection at the tank: The threaded joint between valve and tank has loosened
Plastic valves are the usual culprits on builder-grade heaters. They tend to fail after they have been opened for a flush, because the act of turning a long-untouched plastic valve can crack it or dislodge the seal so it never seats fully again.
How to Diagnose the Leak
Start by confirming the water is actually coming from the valve and not from the temperature-and-pressure (T&P) relief valve above it or from a corroded tank. Dry the area completely, then watch where the fresh moisture appears. A drip forming at the spout or the body of the drain valve points squarely at the valve.
Next, check the simplest cause. Make sure the handle is fully closed; a quarter-turn ball valve should be perpendicular to the pipe when open and parallel when closed. If the valve has a cap or a hose thread, a little water can weep past a worn seat even when closed, which shows up as a slow drip at the outlet rather than the body.
Quick Fixes to Try First
Before replacing anything, work through the low-effort fixes. Many drips stop with nothing more than a cap or a gentle nudge, saving you a full valve swap.
- Fully close the handle: Confirm it is all the way shut, not just mostly.
- Flush out debris: Open the valve briefly into a bucket to blow out sediment, then close it firmly; sometimes a bit of grit was holding the seat open.
- Add a hose cap: Thread a brass garden-hose cap with a rubber washer onto the outlet. This seals a valve that weeps at the spout and is a legitimate long-term fix for a slow drip.
- Snug the connection: If water seeps where the valve meets the tank, carefully tighten the fitting a bit, but do not overtighten a plastic valve.
The hose-cap trick is worth emphasizing. If the valve body is sound and only the outlet weeps, a $3 brass cap with a good washer often ends the problem permanently, no draining or plumbing required.
Replacing the Drain Valve
If the valve body is cracked or the seat is shot, replacement is the real fix. Upgrading a flimsy plastic valve to a brass ball valve is a worthwhile improvement while you are at it. This is a moderate DIY job, but it requires draining the tank, so give yourself time.
- Turn off the power (breaker for electric, gas control to “pilot” for gas)
- Shut off the cold-water supply to the heater
- Connect a hose to the drain valve and run it to a floor drain or outside
- Open a hot tap and the T&P valve to vent, then drain the tank fully
- Unthread the old valve and wrap the new valve’s threads with plumber’s tape
- Thread in the new brass valve, refill the tank, and check for leaks before restoring power
A crucial safety note: never restore power to an electric heater until the tank is completely refilled, because energizing dry elements burns them out instantly. Let a hot tap run until water flows steadily and all air is purged before flipping the breaker back on.
When to Call a Plumber or Replace the Tank
Some situations call for professional help or a new heater rather than a valve repair. If the tank itself is leaking, from a corroded seam, a rusted-through bottom, or around the base rather than at the valve, the tank has failed and no valve fix will help.
- Rusty water or a leak from the tank body, not the valve, means the tank is failing
- The heater is more than 10 to 12 years old and leaking anywhere
- You are uncomfortable working with gas connections or draining the tank
- The valve threads are corroded onto the tank and won’t budge
Age is the deciding factor. A drain valve leak on a five-year-old heater is worth fixing, but the same leak on a twelve-year-old tank is often a sign the unit is near the end of its life, and money spent on a valve is better put toward replacement. Catching a water heater leaking from drain valve early gives you the luxury of choosing calmly rather than reacting to a burst tank and a flooded floor.
Preventing Future Drain Valve Leaks
Most drain valve failures trace back to sediment and neglect, both of which you can manage. Flushing your water heater once or twice a year clears the mineral sediment that settles at the bottom of the tank, which is the same sediment that fouls the valve seat and causes leaks. In hard-water areas, more frequent flushing pays off in both valve life and overall efficiency.
When you do flush, handle the valve gently. A brittle plastic valve is most likely to crack the moment you operate it, so open and close it slowly and fully. If your heater still has the original plastic valve, consider proactively swapping it for a brass ball valve during your next flush, before it fails, so you are not dealing with a leak and a repair at the same time.
Choosing a Replacement Valve
Not all drain valves are equal, and upgrading is worth it when you replace one. The plastic valves that come on budget heaters are the least durable and the most leak-prone. A brass hose-bib valve is a solid step up, and a full-port brass ball valve is the best of the group, offering a positive shutoff, a longer service life, and faster draining when you flush.
- Plastic valve: Cheapest, most failure-prone, brittle with age
- Brass hose-bib valve: More durable, standard replacement
- Full-port brass ball valve: Best longevity and flow, ideal upgrade
Match the thread size and length to your tank so the new valve seats fully into the fitting. Wrap the threads with plumber’s tape for a clean seal, and hand-tighten before a final snug turn with a wrench. Over-torquing risks cracking the fitting, so stop as soon as it is firm.
What a Leak Can Cost You If Ignored
A slow drip from the drain valve seems minor, but ignoring it invites bigger problems. Constant moisture around the base of the tank corrodes the metal, rusts nearby fittings, and can damage flooring and drywall. In a finished space, an unnoticed leak leads to mold and water damage that costs far more to remediate than a $15 valve would have.
There is also an efficiency angle. A valve that weeps is letting heated water escape, however slowly, which the heater then has to reheat, nudging up your energy bill. Catching and fixing a drain valve leak early is one of the cheapest, highest-value maintenance tasks a homeowner can do, and it often buys years of trouble-free service from an otherwise sound water heater.