Of every component on your water heater, one small brass fitting is the difference between a normal appliance and a potential bomb. The water heater relief valve, formally the temperature and pressure relief valve or T&P valve, is engineered to open and release water if the tank ever exceeds safe limits. A water heater is a sealed pressure vessel holding 40 to 80 gallons, and if the thermostat fails and the water superheats, pressure can build to catastrophic levels. This valve is the last line of defense. Understanding how it works, why it drips, and when to replace it can save your home and possibly your life.
How the T&P Valve Works
The valve responds to two conditions, hence the name. It’s factory-set to open when water temperature reaches 210°F or when internal pressure hits 150 psi, whichever comes first. Inside is a spring-loaded seat holding back the tank’s contents. When temperature or pressure crosses the threshold, the spring compresses and the valve pops open, dumping hot water down the discharge tube until conditions return to safe levels. Then it snaps shut. It’s a purely mechanical device with no electronics, which is exactly why it’s trusted as a fail-safe.
Anatomy and the Critical Discharge Tube
The valve sits threaded into the top or upper side of the tank, and a rigid pipe, the discharge tube, runs from its outlet down to within about 6 inches of the floor. That tube is not optional and its length is not arbitrary. If the valve ever blasts open, scalding 200-degree water needs to be directed safely downward, not sprayed across the room at face level. Code requires the discharge line to run downhill, terminate near the floor, use the same diameter as the valve outlet, and never have a cap, threads, or a shutoff on the end. A capped discharge tube defeats the entire safety system.
Why Your Relief Valve Is Leaking
A dripping T&P valve is the most common complaint, and it’s a symptom, not always a defect. Track down the cause before you assume the valve is bad.
- Excess system pressure: if your home’s water pressure exceeds 80 psi, the valve does its job and weeps. A pressure gauge on a hose bibb tells you. The fix is a pressure-reducing valve on the main line.
- Thermal expansion: in a closed plumbing system, heated water expands with nowhere to go, spiking pressure. The correct fix is a thermal expansion tank, not a new valve.
- Temperature set too high: a thermostat cranked above 130°F can push the water toward the valve’s temperature trip point.
- A worn or sediment-fouled valve: after years of service, mineral buildup keeps the seat from sealing and it dribbles constantly.
The rule of thumb: an occasional drip during a heating cycle can be normal expansion; a steady leak or a valve that won’t reseat needs attention now.
How to Test the Valve Safely
Manufacturers recommend testing your T&P valve about once a year, and it takes two minutes.
- Place a bucket under the end of the discharge tube, or make sure it drains to a floor drain.
- Stand to the side, not over the valve, since the water is scalding hot.
- Lift the valve’s test lever partway and let some water flush out for a couple of seconds.
- Release the lever and let it snap fully closed.
- Watch for a few minutes. It should stop dripping and reseal completely.
If the valve keeps dripping after the test, the seat is worn and it’s time for replacement. One caution: on a very old valve that has never been tested, exercising it can sometimes prevent it from resealing. If you’re not prepared to replace it that day, and the heater is decades old, weigh whether to test or just replace.
When to Replace It
Replace the valve if it drips continuously after testing, if it’s corroded or crusted with mineral deposits, if it fails to open when tested (a serious safety failure), or simply as preventive maintenance every five years or whenever you install a new heater. These valves are inexpensive, typically $12 to $25, making replacement one of the cheapest safety investments in the whole house.
Replacing the Valve Step by Step
- Turn off power to the heater (gas to pilot, or electric breaker off) and shut the cold water supply.
- Relieve tank pressure by opening a hot tap in the house.
- Drain a few gallons from the tank via the bottom drain valve to lower the water below the T&P valve.
- Disconnect the discharge tube from the old valve.
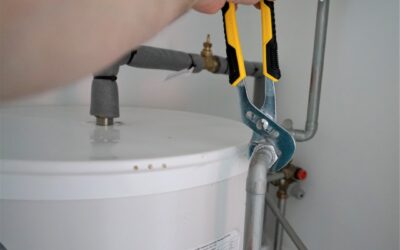
- Unthread the old valve with a pipe wrench. Expect some water.
- Wrap the new valve’s threads with plumber’s tape, thread it in, and tighten snugly.
- Reattach the discharge tube, restore water and power, and check for leaks.
What Never to Do
Never cap, plug, or install a shutoff on the discharge line. Never replace a leaking valve with one rated for higher pressure to stop the drip, since that masks a real overpressure problem. And never ignore a valve that discharges frequently. It’s telling you the tank is running too hot or too high on pressure, and that underlying condition is the actual danger. The water heater relief valve only opens when something is wrong, so treat its activation as a message, diagnose the root cause, and keep this small brass guardian in perfect working order.