If your gas water heater keeps losing its pilot light or refuses to stay lit, the culprit is often a small, inexpensive part called the water heater thermocouple. This copper-and-metal probe is a safety device, and when it wears out it shuts the gas off to protect your home. The good news for American homeowners is that a thermocouple costs about $10 and is one of the most approachable gas-appliance repairs you can tackle yourself. This guide explains what it does, how to spot a bad one, and how to swap it safely.
- What a Thermocouple Actually Does
- Signs Your Thermocouple Is Failing
- Tools and Parts You Will Need
- How to Test a Thermocouple
- Step-by-Step Replacement
- Relighting and Verifying the Repair
- Common Mistakes to Avoid
- Thermocouple Versus Thermopile
- How Long a Thermocouple Lasts
- When to Call a Professional
What a Thermocouple Actually Does
A thermocouple is a heat-sensing safety valve. It sits directly in the pilot flame, with its tip glowing in the fire and its threaded end screwed into the gas control valve. When the pilot flame heats the tip, the two dissimilar metals inside generate a tiny electrical current, roughly 20 to 30 millivolts. That small voltage holds an electromagnet open inside the gas valve, which allows gas to keep flowing to the burner and pilot.
The safety logic is simple and elegant. If the pilot flame goes out, the tip cools, the voltage drops, the electromagnet releases, and the gas valve slams shut. That is what prevents raw gas from filling your basement when the flame fails. A thermocouple is therefore both the reason your heater runs and the reason it shuts down when something is wrong.
Signs Your Thermocouple Is Failing
Thermocouples wear out from years of heating and cooling cycles. The metal fatigues, the tip corrodes, or soot builds up and insulates the probe from the flame. Watch for these symptoms:
- The pilot lights but goes out the moment you release the control knob.
- The pilot stays lit for a few minutes, then dies on its own.
- You relight the pilot repeatedly and it will not hold.
- The burner never fires even though the pilot is burning.
Before blaming the thermocouple, rule out a dirty pilot orifice or a draft blowing the flame around. A weak, yellow, or flickering pilot flame that does not fully envelop the thermocouple tip can mimic a bad part.
Tools and Parts You Will Need
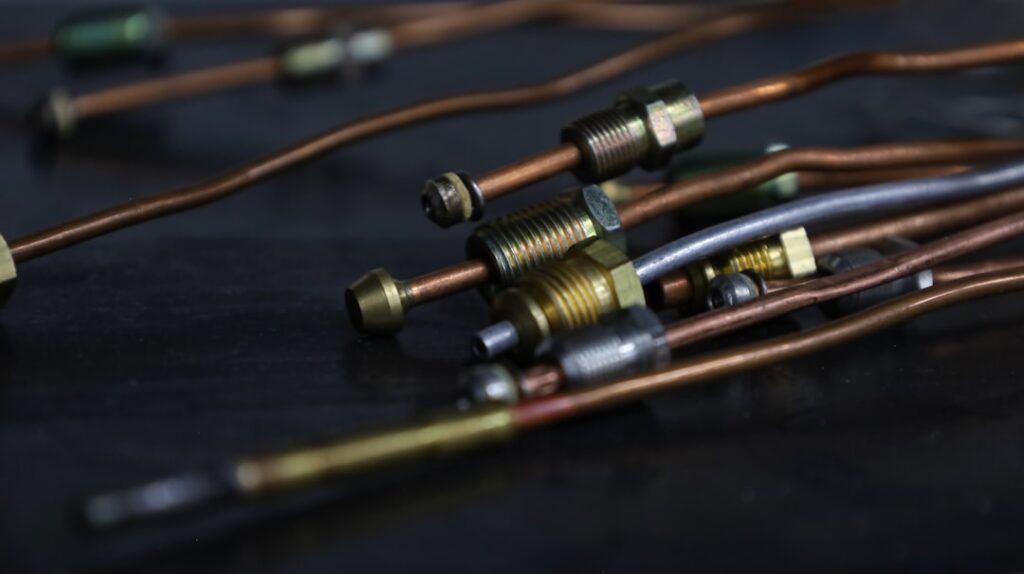
This is a low-cost repair. Pick up a universal thermocouple kit, which usually includes several lengths so you can cut or coil to fit. You will also want basic hand tools.
- Universal thermocouple (typically 15 to 36 inches), $8 to $20.
- Open-end wrenches, usually 3/8 inch and 7/16 inch.
- An adjustable wrench as a backup.
- Steel wool or fine sandpaper to clean the pilot assembly.
- A flashlight and a long-reach grill lighter.
How to Test a Thermocouple
If you own a multimeter, you can confirm the diagnosis before buying parts. Disconnect the thermocouple from the gas valve, set the meter to the low DC millivolt range, and clip the leads to the tip end and the copper sheath. Hold a flame to the tip. A healthy thermocouple reads between 20 and 30 millivolts under heat. Anything below about 18 millivolts means the part is too weak to hold the valve open and should be replaced.
No multimeter? The trial-and-error method works too. Because the part is so cheap, many homeowners simply replace it when the pilot will not stay lit and the flame looks healthy.
Step-by-Step Replacement
Safety first. Turn the gas control knob to OFF and shut the gas supply valve on the line feeding the heater. Give the assembly several minutes to cool. Then follow these steps:
- Locate the three connections at the gas valve: the thermocouple nut, the pilot tube, and the burner supply tube. Loosen all three with a wrench.
- Slide the burner assembly out of the combustion chamber. It usually pulls straight out.
- Unclip the old thermocouple from its bracket near the pilot. It is often held by a friction clip.
- Snap the new thermocouple into the same bracket so the tip sits in the same spot the old one occupied, fully in the pilot flame path.
- Route the new lead back to the gas valve and hand-tighten the nut, then snug it just a quarter turn more with a wrench. Do not overtighten; these fittings strip easily.
- Reinstall the burner assembly and reconnect the pilot and burner tubes.
Relighting and Verifying the Repair
Restore the gas supply and follow the lighting instructions printed on the heater. Typically you push in the control knob to the pilot position, hold it, and light the pilot with a long lighter. Keep the knob pressed for a full 30 to 60 seconds so the new thermocouple heats up and generates voltage. Release the knob; the pilot should stay lit. Turn the knob to ON and set your desired temperature, usually 120 degrees Fahrenheit for safety and efficiency.
If the pilot dies again, recheck that the tip is truly inside the flame and that the connection nut is tight but not crushed. A slightly loose nut is a common reason a fresh thermocouple still fails.
Common Mistakes to Avoid
Over-tightening the connection nut is the number one error; it can crack the fitting and cause the same no-hold symptom. Positioning the tip too far from the flame is a close second. Also avoid kinking the copper tube sharply when routing it, since a crimp can affect performance. Finally, never skip cleaning a sooty pilot orifice while you have the burner out, because a starved flame will kill even a brand-new thermocouple.
Thermocouple Versus Thermopile
It helps to understand a related part you may encounter, especially on newer heaters. A standard thermocouple generates around 25 to 30 millivolts, just enough to hold the pilot valve open. A thermopile is essentially a bundle of many thermocouples wired together, producing a much larger 500 to 750 millivolts. That extra voltage is enough to power an entire millivolt gas valve and even a small control board, so heaters with electronic pilot controls often use a thermopile instead of a simple thermocouple.
If your water heater has a piezo igniter button and a status light that blinks diagnostic codes, it likely uses a thermopile. The replacement process is nearly identical, but you must buy the correct part, since a thermocouple cannot substitute for a thermopile. Check your owner’s manual or the part number stamped on the old component to be sure you order the right one.
How Long a Thermocouple Lasts
A quality thermocouple typically lasts anywhere from a few years to well over a decade, depending on how hard the heater works and the quality of the pilot flame. Several factors shorten its life. A dirty or partially clogged pilot orifice produces a weak, sooty flame that both starves and coats the thermocouple, wearing it out early. Frequent pilot outages from drafts or backdrafting cause repeated heating and cooling cycles that fatigue the metal. Hard water areas and dusty mechanical rooms also contribute to buildup on the tip.
You can extend thermocouple life by keeping the burner compartment clean, ensuring the heater has adequate combustion air, and vacuuming dust away from the intake. When you do replace the part, take a minute to clean the pilot assembly and confirm the flame burns a strong blue and fully wraps the new tip, which is the best insurance against a repeat failure.
When to Call a Professional
Replacing a thermocouple is DIY-friendly, but call a licensed plumber or gas technician if you smell gas that will not clear, if the gas valve itself is corroded or leaking, or if your heater uses an electronic ignition and thermopile system rather than a standing pilot. Newer sealed-combustion and power-vent units are more complex, and their control modules should be diagnosed with manufacturer tools. For a standard atmospheric-vent tank heater, though, a new water heater thermocouple is a $10 fix that can spare you a service call and restore hot water in under an hour.