The whirlpool 24″ built in dishwasher is the workhorse of American kitchens, and for good reason: it drops into the standard cabinet cutout, cleans a full family’s dishes, and costs a fraction of the European premium brands. If you’re replacing an old unit or spec’ing a remodel, this guide covers the exact dimensions, the models worth your money, and the rough-in details that trip people up on install day.
Before anything else, know that “24-inch” refers to the width, and every major brand builds to that standard so units are interchangeable in the cabinet opening. What actually varies is tub material, cycle count, and how quiet the thing runs.
Exact Dimensions and Rough-In
Every Whirlpool 24″ model is engineered to fit a standard cabinet cutout, but you should measure before you buy. Here are the numbers that matter:
- Cabinet cutout: 24″ wide, 24″ deep, 34.5″ high — the opening between your cabinets and under the countertop.
- Actual unit width: 23-7/8″ so it slides in with clearance on each side.
- Height: adjustable from about 33-1/2″ to 34-1/2″ on the leveling legs to meet your counter.
- Depth with door closed: roughly 24-1/2″, and plan for the door to swing out about 21″ more when open.
The utilities enter through a notch in the left-rear or center of the cabinet floor: a hot-water supply line, a drain hose to the disposer or air gap, and a dedicated 120V/15-amp circuit. Leave a 3-inch clearance channel at the rear for the hose loop so you don’t kink it when you push the unit home.
The Models Worth Knowing
Whirlpool’s lineup runs from a bare-bones plastic-tub unit to a fingerprint-resistant stainless model that whispers. The naming follows a pattern: WDF is the entry line, WDT is the mid and upper range.
- WDF341PAP — entry model, around $500. Plastic tub, 12 place settings, 55 dBA, front controls. Fine for a rental or a light-use kitchen.
- WDT540HAM — mid-range, about $700. Stainless tub, third rack, 50 dBA, fingerprint-resistant finish. The sweet spot for most families.
- WDT730PAH — upper-mid, roughly $750. Adjustable middle rack, boosted dry, 47 dBA.
- WDT750SAK — top tier, around $850. Stainless tub, 3rd rack, sensor cycle, 47 dBA, and the quietest of the group.
If you can stretch the budget, the jump from a plastic tub to stainless is the upgrade that matters most. Stainless holds heat for better drying and won’t stain or hold odors the way plastic does over a decade of use.
Tub Material: Stainless vs Plastic
A plastic (polypropylene) tub costs less and dampens sound reasonably well, but it discolors, and its lower heat retention means dishes come out damper. Stainless tubs cost $150 to $200 more up front and pay it back with faster drying, better sound insulation, and a tub that still looks new when you sell the house. For a unit you’ll keep 10 years, stainless is the call unless you’re outfitting a low-use space.
Features That Actually Matter
Ignore the marketing and focus on the handful of features you’ll use every day:
- Third rack: a shallow top tray for utensils and small items. It frees up the lower rack and is worth seeking out.
- Adjustable middle rack: raise or lower it to fit tall stemware or big pots.
- Sensor / soil cycle: the machine reads how dirty the water is and adjusts time and temperature, saving water on light loads.
- Sound rating: 47 to 50 dBA is genuinely quiet in an open-concept kitchen; 55 dBA is noticeable during a movie.
- Boosted dry / heated dry: matters most if you run plastics that never seem to dry.
Installation Basics
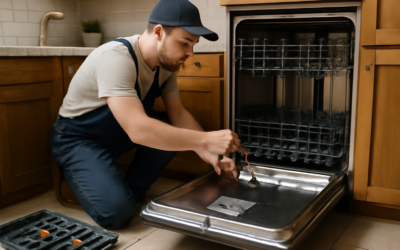
Swapping a 24″ unit is a two-hour job if the rough-in is already there. Shut the power at the breaker and close the hot-water valve under the sink first. Disconnect the old unit’s supply line, drain hose, and electrical, then unscrew the two mounting brackets under the countertop lip and slide it out.
The new unit reverses that: connect the 3/8″ supply line with a 90-degree brass elbow at the inlet valve, run the drain hose in a high loop up to the disposer or air gap, wire the junction box (black to black, white to white, ground to green screw), then level the unit on its front legs and secure the top brackets to the underside of the counter. Granite countertops don’t take screws, so use the side-mount brackets to the adjacent cabinets instead.
Cycles and Cleaning Performance
Every Whirlpool 24″ unit ships with a core set of cycles, and the count climbs as you move up the line. The entry WDF gives you Normal, Heavy, and a 1-Hour wash. Mid and upper models add a Sensor cycle that reads soil load, a Sani Rinse that hits 155°F to kill bacteria (NSF-certified on the WDT730 and up), and a Top Rack option for a light load of glasses.
Cleaning power comes from spray-arm design and water temperature, not the cycle name. The upper models use a third spray zone feeding the top rack, so tall items get hit from three levels instead of two. For everyday loads the Sensor or Normal cycle is all you’ll touch; save Heavy for baked-on pans and skip the temptation to run everything on the 1-Hour setting, which trades thoroughness for speed.
Energy and Water Use
A current Whirlpool 24″ built-in is an Energy Star unit that sips water compared to the old machines they replace. Expect about 3 to 5 gallons per Normal cycle and an annual energy cost near $35 to $45 on the mid-range models. That’s a fraction of what hand-washing a full load uses, and the sensor cycles trim it further on light loads by shortening the wash and using less water.
Run the machine full rather than half-empty, use the Sensor cycle for mixed loads, and skip the heated-dry option in favor of rinse aid and a cracked-door air dry when you can. Those three habits shave real money off the yearly operating cost without any hit to how clean the dishes come out.
Common Problems and Quick Fixes
Even a well-built 24″ unit throws the occasional fault. The three you’ll meet most:
- Won’t drain: clean the filter and check for a disposer knockout plug that was never punched out during install.
- Won’t start: the door latch has to fully engage the switch, and the control lock may be on — hold the lock button 3 seconds to clear it.
- Poor drying: add rinse aid, and confirm the water heater delivers 120°F at the tap so the final rinse runs hot.
Cut power and water before any repair, and keep the tech sheet behind the toe-kick panel for the fault-code reference.
Loading for Best Results
A 24″ Whirlpool holds 12 to 15 place settings depending on the model, but only if you load it the way the racks were designed. Face plates and bowls toward the center spray arm, angled down so the water reaches the dirty side. Keep tall items along the edges where they won’t block the spray tower feeding the upper rack.
Put cups and glasses between the tines on the top rack, not over them, so water drains off instead of pooling. Load silverware handles-down for cleaning, but mix spoons and forks in each basket slot so they don’t nest together and shield each other. Leave the third rack for measuring spoons, lids, and long utensils. Overpacking is the single most common reason a perfectly good machine leaves dishes dirty, so resist the urge to cram one more plate in.
Warranty and Lifespan
Whirlpool backs the 24″ built-in line with a one-year limited warranty on parts and labor, with longer coverage on select components like the nylon racks and the electronic controls on upper models. Register the unit online at purchase so a claim goes smoothly, and keep the receipt with the model and serial number, which live on a sticker along the left inner door edge.
Expect 9 to 12 years of service from a well-maintained unit. You stretch that by running a monthly cleaning cycle with a dishwasher cleaner, keeping the filter clear, and not slamming the door on the latch. When something does fail, the common parts — pump, valve, door latch — are $30 to $70 and swap out in under an hour, so a mid-life fault rarely means a new machine.
What to Buy
For most kitchens, a mid-range stainless-tub whirlpool 24″ built in dishwasher like the WDT540HAM hits the mark: it fits the standard cutout, runs at 50 dBA, includes a third rack, and lands around $700. Spend up to the WDT750 only if a sub-47 dBA quiet rating and sensor cycles matter to you. Whatever you pick, confirm your cutout is a true 24″ x 24″ x 34.5″ before the delivery truck shows up, and you’ll have a clean, level install by dinner.