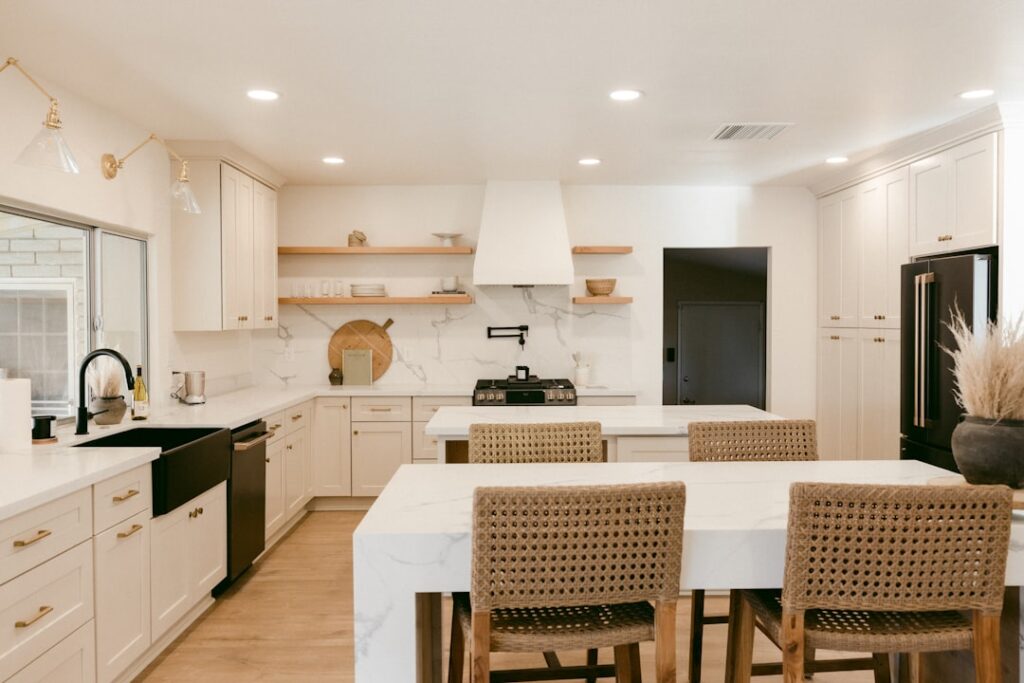
Few combinations feel as clean and current as white kitchen cabinets with black handles. That crisp white-on-white box, broken by dark hardware, reads high-end without demanding a full remodel. I’ve hung hundreds of pulls and knobs over the years, and the difference between a kitchen that looks styled and one that looks like an afterthought almost always comes down to hardware choice, sizing, and placement. This guide walks through every decision so your finished kitchen looks like a designer touched it.
- Why Black Hardware Works on White Cabinets
- Choosing the Right Black Finish
- Knobs vs. Pulls: What Goes Where
- Placement Rules That Make It Look Professional
- Pairing With Countertops, Backsplash, and Floors
- What It Costs
- Common Mistakes to Avoid
- Frequently Asked Questions
- Do black handles show fingerprints?
- Should the faucet match the black handles?
- Are white cabinets with black handles going out of style?
- Can I use black handles on off-white or cream cabinets?
- How many pieces of hardware do I need?
- Final Thoughts
Why Black Hardware Works on White Cabinets
Contrast is the whole point. White cabinetry can drift toward flat or sterile, especially under bright LED lighting. Black hardware adds visual weight and definition, giving your eye a place to land on each door and drawer. It’s the same reason a white shirt looks sharper with a dark watch than with nothing at all.
Black also plays well with nearly everything else in a kitchen. Stainless appliances, brass faucets, wood floors, marble-look quartz, and matte black plumbing fixtures all coexist happily when black cabinet hardware ties the room together. That flexibility is why the look has stayed popular for more than a decade rather than fading like some trends do. It bridges modern, farmhouse, transitional, and industrial styles with equal ease.
Choosing the Right Black Finish
Not all black hardware is the same, and the finish changes the mood of the whole room. Here are the three you’ll actually shop for:
- Matte black: The most popular by far. Flat, non-reflective, and forgiving of fingerprints. It reads modern and pairs beautifully with matte or satin-finish faucets.
- Oil-rubbed bronze: A near-black with warm brown undertones and lighter high points on the edges. Better for farmhouse and traditional kitchens than crisp contemporary ones.
- Flat black (powder-coated): A true, uniform black with a slight texture. Extremely durable and budget-friendly, common on mass-market pulls.
My advice: pick one black finish and repeat it on your faucet, cabinet hardware, and any open shelving brackets. Mixing three different blacks in one kitchen is the fastest way to make an expensive space look pieced-together.
Knobs vs. Pulls: What Goes Where
The classic rule still holds up. Use knobs on doors and pulls on drawers. Knobs suit the smaller motion of swinging a door open, while pulls give you leverage to slide a heavy, dish-loaded drawer. That said, plenty of modern kitchens now run pulls on everything for a uniform, linear look, and it works.
Whatever you choose, stay consistent within a category. Every base cabinet door gets the same knob; every drawer gets the same pull style scaled to width. Inconsistency here is jarring even if most people can’t name why.
Sizing Your Pulls to the Drawer
Pull length should feel proportional to the drawer face. A common contractor guideline is to size the pull at roughly one-third the width of the drawer. Rough targets:
- Drawers up to 15 inches wide: 3 to 4 inch center-to-center pulls
- Drawers 15 to 24 inches wide: 5 to 6 inch pulls
- Drawers 24 to 36 inches wide: 8 to 10 inch pulls
- Wide pot-and-pan drawers over 36 inches: 12 inch pulls, or two smaller pulls mounted symmetrically
For knobs, 1.25 inch to 1.5 inch diameter covers almost every standard door. Go a touch larger on oversized pantry doors so the knob doesn’t look lost.
Placement Rules That Make It Look Professional
Hardware placement is where DIY jobs go wrong. Use these standards:
- Door knobs: Mount 2.5 to 3 inches from the corner of the door, positioned at the bottom corner on upper cabinets and the top corner on lower cabinets.
- Door pulls: Center vertically on the stile, again bottom of uppers and top of lowers, 2.5 to 3 inches from the edge.
- Drawer pulls: Center horizontally and vertically on the drawer face. On very tall drawer fronts, mount slightly above center so it aligns with the eye.
Buy or make a simple hardware jig before you drill a single hole. A $15 jig guarantees every pull lands in the exact same spot, and it turns a nerve-wracking job into a fast, repeatable one. Mark, punch a pilot with an awl, then drill from the front with the door faced up on a scrap board to prevent blow-out on the back.
Pairing With Countertops, Backsplash, and Floors
Black handles anchor a palette, so build the rest of the room around them. White or gray quartz with subtle veining is the default and always looks clean. If you want more drama, a honed black granite or soapstone counter echoes the hardware and reads sophisticated.
For backsplash, white subway tile with dark grout is a natural match; the grout lines pick up the black hardware and stitch the look together. On floors, warm wood tones or wide-plank luxury vinyl keep the space from feeling cold. Add greenery, a wood cutting board, or woven barstools so the black-and-white scheme has some organic warmth.
What It Costs
Hardware is one of the cheapest high-impact upgrades in a kitchen. Expect these ranges per piece:
- Budget matte black knobs: $2 to $5 each
- Mid-range pulls: $4 to $10 each
- Designer or solid-brass-with-black-finish pulls: $12 to $30 each
A typical 10-by-10 kitchen has around 30 to 40 pieces of hardware. Even at the mid-range, you’re looking at roughly $150 to $350 in hardware plus a few dollars in longer machine screws if your drawer fronts are thick. Installing it yourself over a weekend saves the $200 to $400 a handyman would charge.
Common Mistakes to Avoid
Skipping a template and eyeballing holes is the number one regret I hear. So is buying screws that are too short for shaker-style thick fronts, which leaves the pull loose no matter how hard you tighten. Order 1-inch and 1.25-inch machine screws as backups. Finally, don’t over-scale. Chunky industrial pulls on delicate cabinet doors overwhelm the design; match the visual weight of the hardware to the cabinets.
Frequently Asked Questions
Do black handles show fingerprints?
Matte black hides prints better than glossy black or stainless. You’ll occasionally wipe them, but they stay looking clean far longer than chrome. A dry microfiber cloth handles most smudges.
Should the faucet match the black handles?
Matching a matte black faucet to matte black hardware is the cleanest choice, but a stainless or brass faucet also works if you repeat that metal somewhere else, like a pot filler or light fixtures. The key is intentional repetition rather than random mixing.
Are white cabinets with black handles going out of style?
This pairing has held strong for over a decade and shows no sign of dating quickly because it’s built on classic contrast rather than a fleeting color trend. If you ever tire of it, swapping hardware is a cheap afternoon fix.
Can I use black handles on off-white or cream cabinets?
Absolutely. On warmer whites and creams, oil-rubbed bronze or a softer matte black looks more natural than a stark, cool black. Hold samples against your doors in daylight before committing.
How many pieces of hardware do I need?
Count every door and every drawer, then add a few spares. A standard 10-by-10 kitchen usually lands between 30 and 40 pieces once you tally uppers, lowers, and drawer banks. Buy two or three extra so a single lost or damaged pull doesn’t force a whole reorder from a discontinued line later.
Final Thoughts
White kitchen cabinets with black handles deliver designer-level contrast for very little money, and the whole upgrade is within reach for a confident DIYer. Pick one consistent black finish, size your knobs and pulls to each cabinet, use a jig for perfect placement, and tie the palette together with your faucet and backsplash. Get those basics right and the result looks intentional, timeless, and worth far more than you spent.