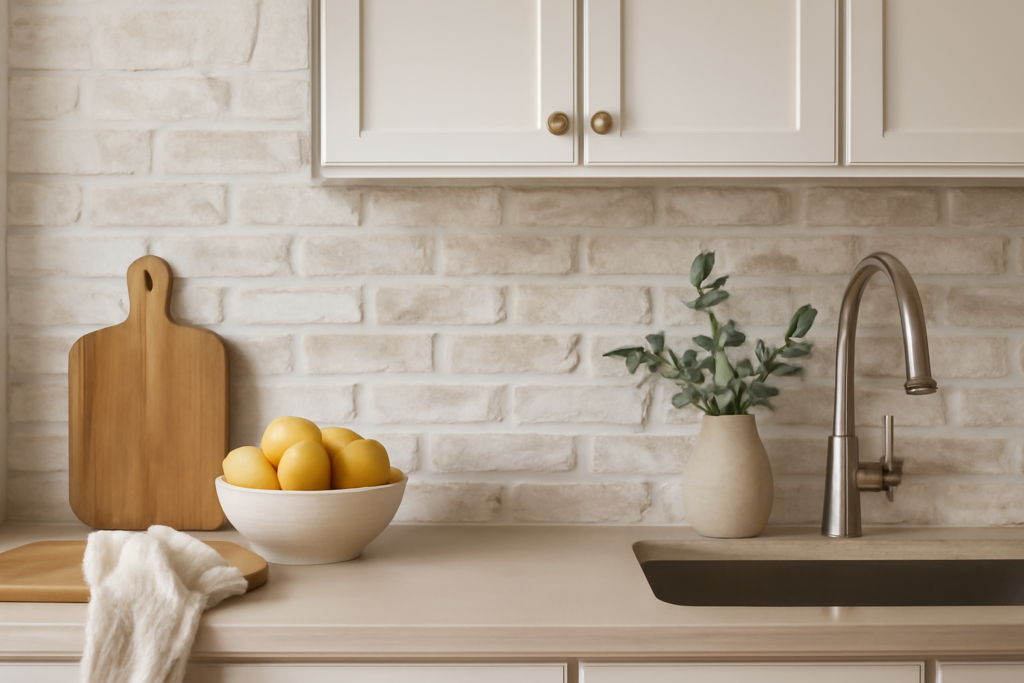
Raw brick in a kitchen is a commitment — the rust-and-umber palette dominates a room, darkens small spaces, and locks your color scheme to whatever the kiln decided decades ago. Whitewashing is the escape hatch that keeps everything good about brick and releases everything difficult. A whitewashed brick backsplash kitchen keeps the texture, the shadow lines, the handmade irregularity — and trades the heavy terracotta color for a soft, chalky, light-bouncing veil that flatters almost any cabinet color. I have whitewashed brick veneer walls, real brick chimneys exposed during remodels, and more than one previous owner’s regrettable orange-brick splash zone, and the technique rewards a little knowledge disproportionately. This piece is specifically about the whitewash treatment — the material choices, the dilution math, and the sealing that a kitchen splash zone demands. (The broader farmhouse brick backsplash look is its own subject; here we are talking about the wash.)
Part of our Kitchen Remodeling guide — explore the full guide →
What Whitewash Actually Is — and What It Is Not
True whitewash is diluted paint or lime applied so thin that the brick color and texture read through it. That translucency is the entire aesthetic: a whitewashed wall is brick wearing a veil, not brick wearing a coat. The moment the coating goes opaque you have painted brick — a legitimate look, but a different one, and importantly a less reversible one. Three treatments get conflated constantly, so let me separate them:
- Whitewash (diluted paint method): latex or mineral paint cut with water — anywhere from 1:1 to 1:3 paint-to-water — brushed on and often wiped back. Translucent, controllable, the standard modern method. This is what most tutorials and most of this article mean.
- Limewash: the historic material — slaked lime (calcium hydroxide) in water, sold ready-made by Romabio and others ($40 to $70 a gallon). It calcifies into the masonry surface rather than filming over it, stays fully breathable, ages with a beautiful mottled patina, and is partially removable within days if applied to bare brick. The most authentic finish and my favorite on real brick, with one kitchen-specific caveat we will get to: it is chalky and needs the right sealer in a splash zone.
- German schmear: mortar smeared over brick and partially wiped — heavier, more textural, more cottage. Related, but a masonry technique rather than a wash.
Design: Why the Wash Works in Kitchens
The design logic is simple: texture without color dominance. An 18-inch band of whitewashed brick between counter and uppers gives a kitchen more visual interest per square foot than nearly any tile, because every brick catches light differently and the mortar joints add a grid of natural shadow — yet the whole field reads as a soft neutral, so it plays nicely with white shaker cabinets, sage green, navy, black, and natural wood alike. Control lives in the dilution: a heavy 1:1 wash leaves ghostly hints of terracotta (brightest, most modern), a thin 1:3 wash keeps obvious brick color showing through (warmest, most rustic), and wiping the wet wash back with a rag lets you tune each brick individually. My standing advice: mix thin and build up. You can always add a second pass; taking pigment off cured brick means a wire brush and regret.
The Substrate Question: Real Brick or Veneer
Most whitewashed brick backsplashes are not old walls — they are new thin brick veneer, and that is good news for cost and control. Your options:
- Exposed existing brick: if your kitchen wall hides a chimney or original masonry, exposure plus whitewash is the jackpot. Budget for cleaning (efflorescence, soot), repointing crumbly joints ($8 to $25 per square foot for a mason), and accept the irregularity as the charm.
- Thin brick veneer: half-inch kiln-fired brick slips, installed like tile in thinset over cement board — $6 to $15 per square foot in material, $10 to $25 installed. Choose tumbled or reclaimed-style faces; crisp new brick under whitewash can look like a theater set. Panelized systems and even quality faux-brick panels exist below that price, and a heavy wash is actually the great equalizer for faux products — the paint layer hides the plastic tells.
- Already-painted brick: you cannot whitewash over opaque paint and get translucency, since there is no brick color left to show through. The honest options are stripping (messy, $2 to $5 per square foot in stripper and considerable labor) or a faux-wash technique — sponging two or three brick tones back on, then washing white over it. It works better than it sounds, but it is scenic painting, not whitewashing.
The Technique, Step by Step (Diluted-Paint Method)
- Clean hard. Kitchen brick wears invisible grease. Scrub with TSP substitute or degreaser and a stiff nylon brush, rinse, and let the brick dry fully — a day or two, since masonry holds water. Wash over grease and the finish sheds in patches later.
- Repair first. Rake and repoint failing mortar; the wash will highlight, not hide, bad joints. New mortar should cure per the bag before coating.
- Mix the wash. Flat or matte latex (or a mineral paint) plus water — start at 1 part paint to 2 parts water, in a bucket with a stir stick, mixed thoroughly and re-stirred often since dilute washes separate. Warm whites (think soft chalky whites, not blue-brights) flatter brick enormously; stark white over orange brick goes pink-ish in afternoon light more often than people expect. Test on a cardboard-mounted spare brick or a low corner.
- Work small and wet. Brush the wash into a 2-3 square foot section — masonry brushes hold the runny mix better than rollers, and get into mortar joints — then immediately rag-wipe or dab to pull the veil back to taste. Runny drips are part of the process; catch them with the rag as you go. Keep a wet edge and vary your wiping pressure so the wall mottles naturally rather than banding.
- Build to depth. Let the first pass dry (an hour or two), assess in daylight, and add a second pass where you want more veil. Two thin passes beat one heavy one every time.
- Cure, then seal. Give the wash several days before sealing — and in a kitchen, sealing is not optional.
Sealing: The Kitchen-Specific Step Everyone Skips
On a living-room fireplace, whitewash can live bare forever. A backsplash is different: grease mist, tomato splatter, and the wipe-down rag will stain and slowly erode an unsealed chalky wash, and unsealed brick-and-mortar is a scrubbing nightmare. The fix is a clear, matte, water-based masonry sealer or polyurethane — matte is critical, because a satin or gloss film over whitewash instantly reads as plastic and kills the chalky charm. Two coats of a flat waterborne sealer ($25 to $50 a quart covers a typical backsplash twice) make the wall wipeable while staying visually dead-flat. For limewash, use a breathable mineral-appropriate sealer or a dedicated flat masonry protectant rather than a standard poly film. Directly behind a range, brick and cured washes handle the heat fine — brick is kiln-born, after all — but that zone collects the most grease, so give it a third sealer coat and expect to refresh sealer there every few years. Code-wise, maintain your range manufacturer’s clearances as with any combustible-adjacent finish; the brick itself is the least flammable thing in the room.
Budget Snapshot
| Scenario (30 sq ft backsplash) | Typical Cost |
|---|---|
| Whitewash existing brick, DIY (paint, brushes, sealer) | $60–$150 |
| Limewash kit approach, DIY | $100–$200 |
| New thin brick veneer + DIY whitewash | $300–$700 |
| Veneer installed + finished professionally | $600–$1,500 |
Living With It
Sealed whitewashed brick asks very little: dust the ledges occasionally (brick texture catches flour dust like a shelf), wipe splatter with warm soapy water and a soft brush for the mortar lines, and skip abrasive pads that can burnish the sealer. Expect the finish to evolve — small wear spots and darkened joints near the range read as patina on this material rather than damage, which is precisely why people choose it over tile. Touch-ups are trivially easy: keep a jar of your exact wash mix (labeled with the dilution ratio), dab, feather, re-seal the spot. And if you tire of it someday, a whitewashed wall is the friendliest possible base for a change: wash it heavier toward opaque, limewash over it in a new tone, or paint it solid.
The honest summary from someone who has done this wall several times: whitewashing is the rare finish where the amateur’s hand is an asset — the slightly uneven, hand-wiped veil is the look — and where the total materials bill can stay under a hundred dollars while transforming the most-photographed sightline in the house. Mix it thinner than you think, wipe more than you brush, stop one pass earlier than you are tempted to, and seal it flat. The brick does the rest.