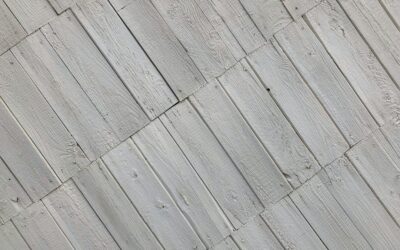
Dated golden oak is one of the most common reasons people repaint a kitchen, yet many homeowners do not actually want solid white paint that hides every bit of wood. Whitewashed cabinets split the difference: a thin, translucent white finish lets the grain show through while lightening the overall color, giving a soft, airy, slightly rustic look. You can get there with a white wood stain or with paint thinned with water, and both methods work on oak and pine as long as the old finish is properly removed or scuffed first.
Part of our Kitchen Remodeling guide — explore the full guide →
The basic recipe is to clean and degloss the doors, sand to raw or nearly raw wood, apply a white stain or thinned paint, wipe back the excess to reveal grain, and protect everything with a clear water-based topcoat that will not yellow. Oak, with its open grain, grabs the white pigment dramatically. Pine takes a softer, more even wash but can blotch without a conditioner. Plan on a long weekend for a small kitchen.
- What Whitewashed Cabinets Look Like
- White Stain vs Thinned Paint
- Tools and Materials
- Step by Step: Whitewashing Oak or Pine Cabinets
- Oak vs Pine: What to Expect
- Safety With Strippers, Stains and Finishes
- Costs: DIY vs Professional
- Troubleshooting Blotchy or Uneven Results
- Styling and Maintenance Tips
- When to Call a Pro
- Frequently Asked Questions
What Whitewashed Cabinets Look Like
A whitewash, sometimes called a pickled finish, is a semi-transparent white layer that sits in and on the wood. The effect ranges from a faint frosting that barely cools the wood tone to a heavy, chalky white where only the strongest grain lines peek through. On oak cabinets, white pigment settles into the deep pores and creates a striped, textured look that reads coastal or farmhouse. On pine, the wash softens knots and the yellow tone into a Scandinavian, cottage-style finish.
The look is different from glazing, where a darker tint sits in the recesses of painted doors, and different from a limed finish, where a waxy white paste is packed only into the grain. A white wash cabinet finish covers the whole surface lightly, so you see both the pale color and the figure of the wood.
White Stain vs Thinned Paint
Both approaches produce white washed wood cabinets, but they behave differently while you work and after they dry.
White wood stain
A pigmented white stain, either oil-based or water-based, is made to soak in and wipe off. It gives the most natural result, with the grain clearly visible, and it is very forgiving because you control opacity by how much you wipe back. Water-based versions dry quickly and stay whiter under the topcoat. Oil-based versions give more working time but can drift toward cream over the years, especially under an oil-based clear coat.
Thinned latex paint
Mixing white latex or acrylic paint with water, commonly 1 part paint to 1 part water for a medium wash, or 1 to 2 for a lighter one, creates a homemade wash. It is inexpensive and you can tint it any shade of off-white, but it dries fast, so work one panel at a time. Thinned paint also sits more on the surface than in it, which can look slightly chalky. A clear coat is not optional with this method.
For most kitchen cabinets, a white stain is easier to get even on large doors, while thinned paint gives you more control over a heavy, opaque look. Test both on the back of a door or a spare drawer front before deciding.
Tools and Materials
- Screwdriver or drill, painter’s tape and labels for doors and hinges
- Degreasing cleaner or a trisodium phosphate substitute
- Chemical stripper (optional, for heavy finishes) and plastic scrapers
- Random orbital sander with 120, 150 and 180 grit discs, plus sanding sponges for profiles
- Pre-stain wood conditioner for pine
- White wood stain or white latex paint and a mixing container
- Foam brushes, synthetic bristle brushes and lint-free rags
- Water-based polyurethane or polycrylic in satin or matte
- Gloves, safety glasses, a respirator rated for the products used and fans for ventilation
Step by Step: Whitewashing Oak or Pine Cabinets
- Remove doors and hardware. Number each door and its opening with tape so they go back in the same place. Bag hinges and screws by location.
- Clean thoroughly. Kitchen cabinets carry grease that blocks stain. Scrub with a degreaser, rinse with clean water and let everything dry fully.
- Remove the old finish. Whitewash must reach bare wood to soak in. Sand flat panels with 120 grit, then 150. If the existing finish is thick or the profiles are detailed, a chemical stripper saves time. For a quicker, less transparent look over existing finish, scuff well with 180 grit and use the thinned paint method, accepting that the grain will show less.
- Open the oak grain. On oak, run a stiff brass or nylon brush along the grain after sanding to clear dust from the pores. That helps the white settle in for a stronger pickled effect.
- Condition pine. Softwood absorbs unevenly. Apply a pre-stain conditioner per the label, usually within 2 hours of staining, to reduce blotching.
- Apply the white. Brush on stain or wash generously in the direction of the grain, working one door panel or frame section at a time.
- Wipe back. After a few minutes (follow the label for stain), wipe with a clean rag along the grain. Wipe harder for more wood, lighter for more white. Keep the timing consistent from door to door.
- Build if needed. Let the first coat dry, then add a second for a whiter result. Lightly scuff with a fine sanding sponge between coats.
- Seal. Apply 2 to 3 thin coats of water-based polyurethane or polycrylic, sanding lightly with 220 grit between coats. Avoid oil-based clear coats, which tend to yellow and turn the white toward amber.
- Cure and reinstall. Let the finish cure as the can directs, often several days before heavy use, then rehang doors and hardware.
Oak vs Pine: What to Expect
Red oak has very open pores and pronounced cathedral grain, so whitewashed oak cabinets show bold white streaks. The pink undertone of red oak can peek through, giving a slightly warm white. White oak has tighter grain and a cooler, grayer base, which many people prefer for a modern pickled look. If your oak has a strong orange cast from aging, a wash with a hint of gray or greige can neutralize it better than pure white.
Pine is softer and lighter to begin with. It takes the wash more evenly in color but can soak up pigment in blotchy patches around knots and end grain without conditioning. Knots may bleed resin through water-based products, so spot-prime problem knots with a shellac-based sealer before the final topcoat if they start yellowing. Pine also dents easily, which suits a relaxed, lived-in style.
Safety With Strippers, Stains and Finishes
Many cabinet finishing products give off vapors, and some strippers are strong chemicals. Work in a well-ventilated area with windows open and a fan pulling air outside. Wear chemical-resistant gloves and eye protection, and use a respirator with the cartridge type listed on the product label. Never mix stripping chemicals or cleaners with each other. Keep solvent-based stains, strippers and rags away from pilot lights, furnaces and water heaters, since vapors can ignite.
Oil-soaked rags can self-heat and catch fire as they dry. Lay them flat outdoors to dry or store them in a sealed, water-filled metal container until disposal. If your cabinets were built before 1978 and carry old paint, test for lead before sanding or stripping, and follow lead-safe work practices if it is present.
Costs: DIY vs Professional
DIY whitewashing is one of the cheaper cabinet makeovers. For a typical kitchen, stain or paint, conditioner, topcoat, sandpaper and supplies usually land in the range of about $100 to $300, plus any tool purchases like a sander. Your main cost is time, often 3 to 5 days counting dry and cure times.
Hiring a cabinet refinisher for the same work generally costs more than painting because stripping to bare wood is labor-heavy. Expect a broad range of a few thousand dollars for an average kitchen, depending on the number of doors, the condition of the existing finish and your region. That is still well below the cost of new cabinets.
Troubleshooting Blotchy or Uneven Results
- Patchy white: old finish was left behind in spots. Sand those areas back to bare wood and reapply.
- Too white or opaque: wipe sooner and harder, or dilute the wash further. On dried stain, a light sanding can bring back some grain.
- Not white enough: add another coat after the first dries, or switch to a more pigmented stain.
- Yellow tint after sealing: usually an oil-based topcoat or knots bleeding through. Use a water-based clear finish and spot-seal knots.
- Lap marks: keep a wet edge and finish each panel completely before moving on.
- Raised grain: water-based products lift fibers. Sand lightly with 220 grit before the next coat.
Styling and Maintenance Tips
Whitewashed cabinets pair well with matte black, brushed brass or warm bronze hardware, white or soft gray quartz counters and a simple subway or zellige-style backsplash. Clean with a mild soap and water solution and a soft cloth, and avoid abrasive pads that can cut through the clear coat. Touch up worn edges near the sink and trash pull-out with a little of the same stain, then a dab of topcoat. Keep a labeled jar of your wash mix for future repairs.
When to Call a Pro
Call a cabinet refinishing professional if your cabinets have thick, multi-layer paint, a factory conversion varnish that resists stripping, laminate or thermofoil doors (which cannot be whitewashed), or suspected lead paint. A pro is also worth it if you want a sprayed, furniture-grade topcoat or simply do not have a ventilated space to strip and finish dozens of doors.
Frequently Asked Questions
Can you whitewash cabinets without sanding?
You can scuff sand and use a thinned paint wash over the existing finish, but the white will sit on top and hide more grain. For a true translucent look, sand or strip to bare wood.
Is whitewash the same as pickling?
They are very similar. Pickling traditionally refers to white pigment settled into open-grain woods like oak, while whitewash is a broader term for any translucent white finish.
Do whitewashed cabinets need a topcoat?
Yes. Kitchen cabinets get handled and splashed daily, so a water-based clear coat in satin or matte protects the finish without yellowing.
Does whitewash work on pine cabinets?
Yes. Use a pre-stain conditioner to prevent blotching and seal knots that bleed. Pine gives a softer, more even white than oak.
Can you whitewash laminate or thermofoil cabinets?
No. Those surfaces have no wood grain to absorb stain. Painting with a bonding primer is the better option for them.