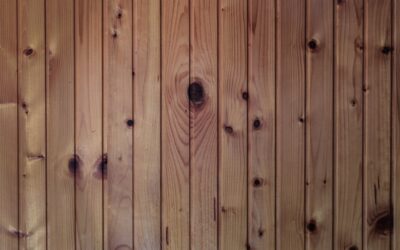
Paint changes a room, but wood transforms it. A single wall clad in real or engineered wood turns a flat, forgettable bedroom into a space that feels intentional and calm. A wood accent wall bedroom project delivers more visual impact per dollar than almost any other weekend upgrade, and most homeowners can complete one in a day or two without professional help. This guide walks through design directions, material choices, real costs, and the step-by-step method to build a wall that looks custom.
Why Wood Works Behind the Bed
The wall behind your headboard is the natural focal point of a bedroom—it is the first thing you see walking in and the backdrop for the largest piece of furniture in the room. Wood grain adds warmth and texture that paint cannot replicate, softening a space that otherwise feels sterile. In a bedroom, where the goal is rest, that organic warmth matters.
Wood also plays well with nearly every design style. Reclaimed barn wood suits farmhouse and rustic rooms, thin vertical slats read modern and Scandinavian, and stained shiplap fits transitional interiors. Because you are treating only one wall, you get the drama of wood without the heaviness or cost of paneling an entire room. It is a controlled statement, not a commitment to a log-cabin look.
Popular Design Directions
Before buying material, decide on the feeling you want. The same species of wood can read rustic or refined depending on orientation, finish, and spacing.
- Vertical slat wall: Evenly spaced 1×2 slats mounted over a dark backer board. Clean, modern, and adds a sense of height—ideal for rooms with lower ceilings.
- Horizontal shiplap: Overlapping boards with a subtle shadow line. Classic and calming, great in white, gray, or natural stain.
- Reclaimed or weathered wood: Mixed tones and rough texture for a rustic, lived-in feel. Peel-and-stick reclaimed panels make this easy.
- Herringbone or geometric: Angled boards in a chevron or diamond pattern for a bold, high-effort statement.
- Board and batten: Flat panels divided by vertical strips, painted a moody color for a tailored, architectural look.
Vertical slat walls have become the runaway favorite because they are forgiving to install, hide wall imperfections, and photograph beautifully. If this is your first accent wall, start there.
Material Options and Costs
Your budget hinges almost entirely on the material. Solid wood costs the most and demands the most finishing work; engineered products cost less and install faster. Expect to cover a typical 10-foot bedroom wall for the ranges below.
- Peel-and-stick wood planks: $1.50 to $4 per square foot. Fast, renter-friendly, no nails. Around $150 to $400 for a wall.
- Pine slats or common boards: $2 to $4 per square foot in raw lumber. Cheap and paintable, roughly $200 to $350 with fasteners and finish.
- Shiplap boards: $2.50 to $6 per square foot depending on species. Expect $250 to $500 installed for a wall.
- Reclaimed barn wood: $5 to $12 per square foot for authentic material. The priciest route at $500 to $1,000-plus per wall.
Add roughly $40 to $80 for construction adhesive, finish nails, wood filler, stain or paint, and a poly topcoat. Even at the high end, a wood accent wall bedroom upgrade costs a fraction of a headboard-and-furniture refresh while making a bigger impact.
Tools You Will Need
Most of this project uses tools a casual DIYer already owns or can rent cheaply. A miter saw speeds cutting dramatically, but a circular saw or even a hand saw with a miter box works for straight cuts.
- Miter saw or circular saw
- Brad nailer with 1-1/2 to 2-inch nails, or hammer and finish nails
- Stud finder and a 4-foot level
- Tape measure, pencil, and construction adhesive
- Wood filler, sandpaper, and your chosen stain or paint
Step-by-Step Installation
Plan for a full weekend if you are staining, since finish coats need drying time. Work methodically and the wall goes up faster than you expect.
1. Prep and mark the wall
Clear the wall, remove outlet covers, and locate every stud with a stud finder, marking each with a light pencil line from floor to ceiling. Nailing into studs gives the strongest hold, especially for heavier solid wood.
2. Prime or paint the backer
For a slat wall, paint the drywall a dark color first (black or charcoal) so the gaps between slats disappear into shadow. For shiplap, no backer prep is needed. Let paint fully dry before mounting anything.
3. Pre-finish your boards
Stain or paint the boards before hanging them. Finishing flat on sawhorses is faster and cleaner than reaching into installed corners, and you avoid missing spots between tightly spaced slats.
4. Start level and work up or across
Snap or draw a level reference line. Run a bead of construction adhesive on the back of each board, press it to the wall, and drive two brad nails into each stud crossing. Check level every few boards—small errors compound fast.
5. Maintain consistent spacing
For a slat wall, cut a spacer block equal to your gap width (a 1×2 offcut is common) and use it between every slat so the reveals stay perfectly even.
6. Fill, caulk, and topcoat
Fill nail holes with matching wood filler, sand smooth, and touch up the finish. Caulk the edges where the wall meets adjacent walls and trim for a seamless look. A satin polyurethane topcoat protects natural wood and makes it wipeable.
Design Tips for a Cohesive Bedroom
An accent wall should feel connected to the rest of the room, not bolted on. Pull one tone from the wood into your bedding, a throw, or a piece of art so the eye reads the space as a whole. Warm wood tones pair beautifully with cream, sage green, and muted blues; darker walnut or black-stained walls look striking against crisp white linens.
Mind the lighting, too. A textured wood wall comes alive with light raking across it—position a bedside lamp or a slim picture light to graze the surface and emphasize the grain. Avoid flat, head-on lighting that washes out the texture you worked to create. If your ceilings are standard 8-foot, a vertical slat pattern will make the room feel taller.
Choosing the Right Wood Tone and Finish
The stain color you pick sets the entire mood of the room, so choose it against your existing furniture and flooring rather than in isolation. Light natural tones like white oak and blonde ash read airy and Scandinavian, work well in smaller bedrooms, and keep the space feeling open. Medium walnut and honey tones bring classic warmth that suits most furniture. Deep espresso and black-stained wood create drama and sophistication but can shrink a room, so reserve them for spaces with good light and lighter bedding to balance the weight.
Finish sheen matters as much as color. A matte or satin topcoat looks natural and hides fingerprints, which is ideal behind a bed where hands and pillows rub the surface. High-gloss finishes reflect light and feel more formal but show every imperfection. For a raw, organic look, a hardwax oil or a clear matte polyurethane preserves the wood’s natural character while still protecting it. Always test your stain on a scrap piece of the actual boards first, because the same stain looks dramatically different on pine versus oak versus poplar.
Avoiding Common Mistakes
A few missteps trip up first-time accent wall builders. The most common is skipping the stud-finding step and relying on adhesive alone—construction adhesive holds well, but nails into studs are what keep heavier boards from pulling away over time as the adhesive cures and the house settles. Another frequent error is inconsistent spacing on a slat wall; without a spacer block, gaps drift and the eye catches every variation. Cut one spacer and use it religiously.
Uneven wall surfaces cause trouble too. Old plaster and bowed drywall make boards sit unevenly, leaving gaps at the ends of horizontal runs. Check your wall with a level before starting, and use a bit of extra adhesive or a shim to bring low spots forward. Finally, do not forget to acclimate your wood. Solid boards brought straight from a cold warehouse into a warm bedroom will shrink after installation, opening gaps between shiplap joints. Let the material sit in the room for three to five days before hanging so it adjusts to your home’s humidity first.
Renter-Friendly Alternatives
If you cannot nail into the wall, peel-and-stick wood planks and removable adhesive panels deliver most of the look with none of the damage. Use a high-quality removable mounting tape rated for the panel weight, press firmly, and keep the wall to a modest height for security. When you move out, warm the adhesive with a hair dryer and peel slowly to protect the paint.
A wood accent wall bedroom is one of the rare upgrades that is genuinely achievable for beginners, budget-friendly, and dramatic in result. Pick a pattern that matches your style, buy a little extra material for miscuts, take your time with level lines and finishing, and you will end up with a focal wall that makes the whole room feel designed rather than decorated.