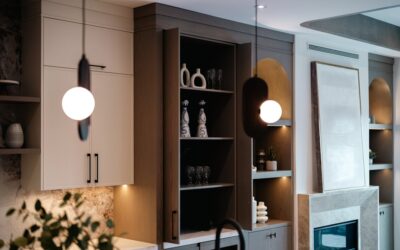
Painting kitchen cabinets is the single highest-return weekend project in most homes, turning a dated oak kitchen into something that looks freshly remodeled for a few hundred dollars in materials. But the wrong wood cabinet paint or a rushed prep job produces a finish that chips at every fingernail and shows brush strokes under the morning light. The good news is that a durable, smooth result is entirely achievable with the right products and a patient process. Here is what actually works.
Part of our Kitchen Remodeling guide — explore the full guide →
- Why Cabinet Paint Is Different
- Best Types of Cabinet Paint
- Primer: The Step You Cannot Skip
- The Prep Process That Guarantees Adhesion
- Application: Brush, Roll, or Spray
- Coats, Cure Time, and Patience
- Color and Sheen Choices
- How Long the Whole Project Takes
- Mistakes That Ruin a Cabinet Job
- Making the Finish Last
Why Cabinet Paint Is Different
Cabinets take more abuse than any wall in the house. They get grabbed with greasy hands, splashed with water, bumped by pots, and wiped down constantly. Ordinary wall paint cannot handle that, so cabinet-grade coatings are formulated to cure hard, resist blocking (where two painted surfaces stick together when they touch), and level out to hide brush marks. The category has improved dramatically, and today you have several genuinely good options that a homeowner can apply by brush and roller.
Best Types of Cabinet Paint
The market breaks into a few clear categories, each with a place depending on your tools and tolerance for fumes.
- Waterborne alkyd (hybrid enamel): The sweet spot for most DIYers. Products like Benjamin Moore Advance and Sherwin-Williams ProClassic Waterbased Alkyd combine the hard, self-leveling finish of oil paint with soap-and-water cleanup and low odor. They dry slowly, which is a feature here, because the extra open time lets brush strokes flow out flat.
- Acrylic enamel: Fast-drying and durable, easier to recoat the same day, with products like Sherwin-Williams Emerald Urethane Trim Enamel leading the pack. Slightly less self-leveling than hybrid alkyds but very tough once cured.
- Traditional oil-based enamel: The old-school hardest finish, but high VOCs, strong fumes, yellowing over time on light colors, and mineral-spirit cleanup have pushed most people away from it.
- Cabinet-specific kits: All-in-one systems marketed for cabinets bundle a bonding primer and topcoat. Convenient, though results vary and they often cost more per square foot than buying quality components separately.
Primer: The Step You Cannot Skip
The reason most home cabinet-painting jobs fail is inadequate priming. Bare or previously finished wood needs a bonding primer that grips the slick old surface and gives the topcoat something to hold. A quality bonding primer such as an oil or shellac-based product like Zinsser B-I-N also seals in wood tannins that would otherwise bleed yellow through light-colored paint, a common problem on oak and mahogany.
For heavily grained oak, priming also lets you decide whether to fill the grain. If you want a glass-smooth modern look, skim the grain with a grain filler or spackle before priming and sand it flat. If you like a bit of wood character showing through, prime and paint over the open grain as-is.
The Prep Process That Guarantees Adhesion
Prep is 80 percent of a good cabinet job. Rush it and nothing else you do matters. Follow this order:
- Label and remove doors and drawers. Number each door and its hinge location with tape so everything goes back where it came from. Remove all hardware.
- Degrease thoroughly. Kitchen cabinets are coated in invisible cooking grease. Scrub every surface with a degreaser or TSP substitute, then rinse. Paint will not stick to grease.
- Sand to dull the finish. Scuff-sand all surfaces with 150 to 220 grit until the sheen is gone. You are not stripping, just creating tooth. Wipe off all dust with a tack cloth.
- Fill and repair. Fill dents, old hardware holes you are relocating, and any gaps with wood filler, then sand smooth.
- Clean again. A final wipe-down removes every speck of dust before primer goes on.
Application: Brush, Roll, or Spray
Your tools shape the finish as much as the paint does. Here is how the methods compare for a homeowner.
- Brush and mini-roller: The accessible method. Use a quality angled synthetic brush for edges and detail, and a foam or microfiber mini-roller for flat panels. Roll on, then lightly tip off with the brush to knock down roller texture. With a self-leveling hybrid alkyd, this produces a smooth finish that looks near-sprayed.
- Foam brush and additive: Adding a leveling additive like Floetrol to waterborne paint extends open time and helps strokes disappear.
- Spraying: An HVLP or airless sprayer gives the smoothest, most factory-like result and is worth renting if you have a large kitchen. It requires masking, ventilation, and practice to avoid runs, so weigh the learning curve.
Coats, Cure Time, and Patience
Plan on primer plus two topcoats, sanding lightly with 320 grit between each coat once dry. Thin coats beat thick ones every time, since a heavy coat sags, traps brush marks, and takes forever to cure. Two thin coats always outperform one thick one.
The most important and most ignored fact about cabinet paint is cure time versus dry time. A hybrid alkyd may feel dry to the touch in a few hours but takes days to weeks to fully cure to its final hardness. Rehang doors after the recommended dry time, but treat them gently and avoid slamming or stacking items against them for the first two weeks. Rushing this is why some jobs show early wear.
Color and Sheen Choices
Sheen affects both looks and durability. Satin and semi-gloss are the standards for cabinets because they clean easily and resist moisture, with semi-gloss being the most scrubbable and satin offering a softer, more forgiving look that hides minor imperfections. Flat and matte finishes look elegant but are harder to keep clean on a working kitchen surface.
For color, timeless neutrals dominate for good reason. Soft whites, warm greiges, deep navy on lower cabinets, and sage greens all age well and appeal to future buyers. Bold colors can look stunning but consider testing a sample on a single door first, since a full kitchen amplifies a color far beyond what a paint chip suggests.
How Long the Whole Project Takes
Set realistic expectations before you start, because the biggest source of frustration is underestimating the timeline. A full kitchen of cabinets is not a one-day job. Plan roughly this schedule for an average kitchen:
- Day 1: Remove doors and drawers, label everything, remove hardware, and degrease all surfaces.
- Day 2: Sand every surface, fill and repair, and do the final dust cleanup.
- Day 3: Prime all boxes, doors, and drawer fronts, then let the primer cure.
- Days 4-5: Apply two topcoats with light sanding and full dry time between each.
- Day 6 onward: Rehang doors after the recommended dry time, but handle gently through the multi-week cure.
Working on the cabinet boxes in place while doors and drawers dry flat on sawhorses in a garage or spare room keeps the project moving. Painting doors flat rather than vertical is a small trick that makes a big difference, since the paint levels better and runs are far less likely.
Mistakes That Ruin a Cabinet Job
A handful of errors account for most failed cabinet paint jobs. Skipping the degrease step leaves invisible cooking grease that paint cannot grip, so it peels within weeks. Using regular wall paint instead of a cabinet-grade enamel produces a soft finish that never fully hardens and chips at every touch. Applying coats too thick traps brush marks and sags. Rehanging doors before the paint has cured, not just dried, leads to the doors sticking to the frames or the paint imprinting where they touch. And rushing without a bonding primer on slick factory finishes is the classic recipe for a finish that scratches off in sheets. Avoid these five and your results will look professional.
Making the Finish Last
Once cured, painted cabinets hold up well for years with basic care. Wipe spills promptly, clean with a damp cloth and mild soap rather than abrasive or ammonia-heavy cleaners, and touch up chips early before they spread. Soft-close bumpers on doors and drawers reduce the impact that eventually wears edges.
Approached with the right paint, honest prep, and a little patience through the cure, painting your own cabinets delivers a transformation that rivals a professional refinish at a fraction of the cost. The materials for an average kitchen run $150 to $350, and the payoff, both in daily enjoyment and resale appeal, is hard to match with any other single-weekend project.