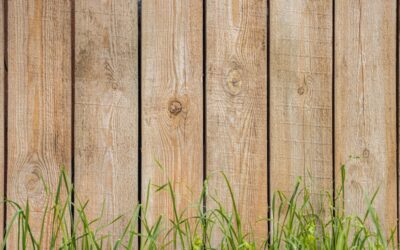
Prebuilt fence panels have quietly become the default choice for homeowners fencing a yard, and it is easy to see why: a wood panel fence goes up in a fraction of the time of a board-by-board build while delivering the same classic look. A wood panel fence uses pre-assembled 6- or 8-foot sections that drop between posts, cutting labor dramatically and giving a more consistent finished appearance. This guide covers the popular styles, the best wood species, honest costs per foot, and the installation and maintenance details that determine whether your fence lasts 10 years or 25.
Part of our Decks & Outdoor guide — explore the full guide →
- Panels vs. Stick-Built: What’s the Difference
- Popular Wood Panel Fence Styles
- Choosing the Right Wood
- Real-World Costs
- Installation Overview
- Handling Sloped Ground
- Maintenance for a Long Life
- Adding Gates to a Panel Fence
- Permits, Property Lines, and Neighbors
- Is a Wood Panel Fence Right for You?
- Metal Posts vs. Wood Posts
- Wood Panels vs. Vinyl and Composite
Panels vs. Stick-Built: What’s the Difference
Understanding this distinction shapes your whole project. Panel fencing uses factory- or shop-assembled sections, typically 6 or 8 feet wide, that you hang between posts. Stick-built, or board-on-rail, fencing means installing rails between posts and then nailing each picket individually on site.
- Panels: faster to install, more uniform, easier for DIYers, slightly less flexible on sloped ground.
- Stick-built: more labor, better for uneven terrain and custom heights, easier to repair one board at a time.
For a flat or gently sloping yard where speed matters, panels win. On steep or irregular ground, stick-built lets you follow the grade more precisely.
Popular Wood Panel Fence Styles
Panels come in a range of designs, each with a different balance of privacy, airflow, and cost.
- Dog-ear privacy: the most common, with pickets trimmed at 45-degree corners, offering full privacy.
- Flat-top privacy: a cleaner, more modern square-top look.
- Shadowbox: boards alternate on both sides of the rail, giving privacy while allowing airflow and looking finished from both sides.
- Board-on-board: overlapping pickets that eliminate gaps even as the wood shrinks.
- Lattice-top: a privacy panel with decorative open lattice across the top for a softer look.
Shadowbox and board-on-board cost more because they use more lumber, but they look good from both sides, which matters if you and a neighbor share the view.
Choosing the Right Wood
The species you pick drives both the price and how long the fence survives the weather.
Pressure-Treated Pine
The budget standard and the most common choice nationwide. Chemically treated to resist rot and insects, it runs the lowest cost per foot but can warp or check if not sealed, and it needs staining to look its best.
Western Red Cedar
Naturally rot- and insect-resistant thanks to its oils, cedar is dimensionally stable, resists warping, and ages to a handsome silver-gray if left unsealed. It costs more than pine but lasts longer and looks better doing it.
Redwood
Premium, beautiful, and naturally durable, redwood is the high end for wood fencing, most common in the western U.S. where it is more available and affordable.
Real-World Costs
Wood panel fencing is priced by the linear foot, materials plus labor. Expect these ranges in 2026.
- Pressure-treated pine panels: $15 to $30 per linear foot installed.
- Cedar panels: $25 to $45 per linear foot installed.
- Redwood panels: $35 to $60 per linear foot installed.
- DIY materials only: often half the installed price.
For a typical 150-foot backyard perimeter, budget roughly $3,000 to $6,000 installed for cedar. Gates, difficult terrain, and old-fence removal add to the total.
Installation Overview
Panel installation is very DIY-friendly, with the posts being the make-or-break step. Set the posts wrong and the whole fence suffers.
- Locate utilities. Call 811 before digging so you do not hit a buried line.
- Set the corner and end posts first, then run a string line between them as your guide.
- Dig post holes one-third the post height plus 6 inches for gravel, typically 24 to 30 inches deep.
- Add gravel at the bottom of each hole for drainage, set the 4×4 post, plumb it, and pour fast-setting concrete.
- Space posts to match your panel width, usually 8 feet on center, measuring precisely so panels fit.
- Hang the panels between the cured posts with fence brackets or by screwing the rails to the posts.
- Add post caps to shed water off the end grain and finish the look.
Let the concrete cure a day or two before hanging panels so posts do not shift under the weight.
Handling Sloped Ground
Panels are designed for level runs, so a slope forces a choice between two methods. Stepping keeps each panel level and lets the fence descend in stair-step increments, leaving triangular gaps at the bottom that you can fill with a kickboard. Racking, possible only with panels built to flex, lets the panel skew to follow the grade with no gaps, but not all prebuilt panels rack. If your yard slopes noticeably, ask specifically whether the panels are rackable before buying.
Maintenance for a Long Life
A wood fence is an investment that pays off only with basic upkeep. The single most important habit is sealing or staining every two to three years to keep water out of the wood.
- Clean the fence with a stiff brush or a gentle pressure wash before sealing.
- Apply a penetrating semi-transparent stain or a water-repellent sealer on a dry day.
- Keep the bottom of pickets off direct soil contact to prevent wicking and rot.
- Trim vegetation away so the wood can dry between rains.
Owners who seal on schedule regularly get 20-plus years from cedar and 15 from pine, while a neglected fence can gray, warp, and rot in under a decade.
Adding Gates to a Panel Fence
Every fence needs at least one gate, and gates are where most fences eventually fail because they carry moving weight the rest of the fence never sees. Build or buy the gate to match your panel style, but reinforce it beyond a standard panel. A gate frame should have a diagonal brace running from the bottom hinge corner up to the top latch corner, which transfers the sagging load back to the hinge post.
- Use three heavy-duty hinges on any gate over 4 feet tall, not two.
- Set the hinge post in extra concrete, since it bears the entire swinging weight.
- Leave the right clearance, about a half inch on the latch side, so the gate does not bind as wood swells.
- Add an anti-sag cable kit from the start on wide gates.
Spending a little more on gate hardware up front saves you the number one fence-repair headache down the road.
Permits, Property Lines, and Neighbors
Before a single post goes in the ground, handle the paperwork and courtesy that prevent expensive disputes. Most municipalities require a permit for a fence over a certain height, commonly 6 feet, and many have setback rules and height limits that differ between front and back yards. Your HOA may have additional restrictions on style and color.
Confirm your exact property line with a survey rather than guessing, because a fence built even a few inches over the line can force a costly removal later. Talk to your neighbors before building, especially if the fence sits on a shared boundary, since some jurisdictions require shared-cost arrangements and a good conversation now avoids friction later. Also call 811 to mark buried utilities before digging any post hole.
Is a Wood Panel Fence Right for You?
If you want the warm, classic look of wood, a mostly flat yard, and a project you can realistically finish over a few weekends, panel fencing is hard to beat on value and speed. Choose cedar if your budget allows for the extra longevity, set your posts carefully in concrete over gravel, and commit to staining every couple of years. Do that, and your wood panel fence will frame the yard beautifully for decades.
Metal Posts vs. Wood Posts
One decision that quietly determines how long your fence lasts is what the posts are made of, because posts fail far more often than panels. Traditional 4×4 pressure-treated wood posts are the standard and blend in visually, but they are the part most likely to rot at the ground line over time.
Steel post systems, such as galvanized posts hidden inside a wood sleeve or bracket-mounted steel posts, resist rot entirely and stay perfectly straight, though they cost more and can look industrial if left exposed. Many homeowners split the difference by using steel posts sleeved in wood so the fence looks all-wood while the structural post never rots. If you want a fence that outlasts the panels themselves, upgrading the posts is where that money is best spent.
Wood Panels vs. Vinyl and Composite
Before you commit to wood, it is worth knowing how it stacks up against the alternatives so you choose with open eyes. Wood wins on natural appearance, lower upfront cost, and easy repairability, but it demands regular sealing and eventually weathers.
- Vinyl: higher upfront cost, near-zero maintenance, but can look plasticky and cracks in extreme cold.
- Composite: the priciest, mimics wood with little upkeep, and resists rot, though color options are limited.
- Wood: best natural look and value, but requires staining every two to three years.
If you love the warmth of real wood and do not mind periodic sealing, panel fencing remains the best-value choice for most yards. If you never want to touch it again, vinyl or composite may justify their higher price over the long run.