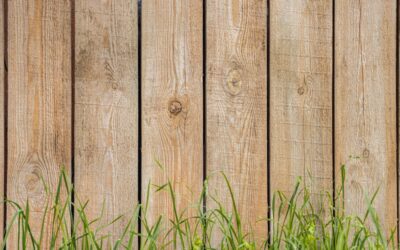
A wood privacy fence remains the most popular way to enclose a backyard because it blocks sightlines, muffles noise, and adds warmth that vinyl and metal simply cannot match. Building a lasting wood privacy fence comes down to three decisions: the lumber you choose, how deep and solid you set the posts, and how you finish and maintain the wood against weather. Get those right and your fence stands straight and handsome for two decades. This guide covers materials, styles, cost, and construction from the ground up.
Part of our Decks & Outdoor guide — explore the full guide →
Choosing the Right Lumber
The wood species sets the tone for cost, appearance, and lifespan. Three options dominate residential privacy fences, each with clear tradeoffs.
- Pressure-treated pine: the budget workhorse at $2 to $5 per linear foot in materials; resists rot and insects, takes stain well
- Western red cedar: naturally rot-resistant, dimensionally stable, beautiful grain, $8 to $15 per linear foot
- Redwood: premium appearance and durability, $12 to $20 per linear foot, less common outside the West
For most homeowners, pressure-treated pine for the posts and structure paired with cedar pickets balances longevity and cost. If budget allows, an all-cedar fence weathers gracefully and resists warping better than pine.
Privacy Fence Styles
Privacy comes from how the boards are arranged. The classic style butts vertical pickets edge to edge for a solid wall, typically six feet tall. Board-on-board, or shadowbox, overlaps boards on alternating sides of the rails, giving privacy from both sides while allowing some airflow and hiding gaps as boards shrink.
Other options include a solid panel with a decorative lattice top for a softer look, and horizontal board fences for a modern aesthetic. Standard privacy height is six feet, though many municipalities cap fences at six feet in back yards and four feet in front, so check local codes and HOA rules before you build.
What a Privacy Fence Costs
Installed cost for a wood privacy fence runs $20 to $45 per linear foot, or $3,000 to $7,000 for a typical quarter-acre backyard perimeter of around 150 feet. Materials alone, if you build it yourself, run $10 to $25 per linear foot depending on species.
Labor is roughly half the professional cost, so DIY offers real savings if you have the time and tools. Gates add $150 to $500 each depending on size and hardware. Factor in concrete, gravel, fasteners, and post caps, which add up across a long run.
Setting the Posts Right
Posts are the foundation, and a privacy fence’s tall solid panels catch wind like a sail, so the posts must be set properly. Use pressure-treated 4×4 or, better, 4×6 posts rated for ground contact, spaced eight feet on center.
- Dig holes one-third the post height deep, at least 24 to 36 inches, and below your local frost line.
- Add 6 inches of gravel at the base for drainage.
- Set the post plumb, brace it, and fill with fast-setting concrete like Quikrete, crowning the top to shed water.
- Let the concrete cure at least 24 hours before attaching rails.
Because privacy panels are heavy and windy, do not skimp on post depth or concrete. A short-set post will lean the first time a storm hits a solid six-foot panel.
Building the Fence
With posts cured, attach three horizontal rails between each pair, top, middle, and bottom, which is essential on a six-foot fence to keep pickets from bowing. Use two rails only on shorter fences. Galvanized or stainless fasteners are a must, since standard screws rust and streak the wood.
Attach pickets to the rails, checking plumb every few boards and keeping them a couple inches off the ground to prevent wicking moisture and rot. Leave a small gap for green pressure-treated lumber that will shrink as it dries, or butt cedar tight if it is already dry. A string line along the top keeps the pickets even, or you can run them long and cut the top straight afterward.
Finishing and Sealing
Bare wood left unfinished turns gray and weathers faster, so seal the fence to protect it. For pressure-treated lumber, wait until it dries out, often several weeks to a few months, before applying a stain or sealer, since fresh treated wood is too wet to accept finish.
A quality semi-transparent stain with UV protection and water repellency, like those from Ready Seal or Thompson’s, preserves the wood and enhances the grain. Reapply every two to three years for pine and every three to five for cedar. Sealing is not optional if you want the fence to reach its full lifespan; unsealed wood cracks, cups, and grays within a couple of seasons.
Maintenance and Lifespan
A well-built and maintained wood privacy fence lasts 15 to 20 years for pine and 20 to 30 for cedar or redwood. Keep it standing by inspecting posts annually, clearing vegetation and mulch away from the base so wood stays dry, and re-staining on schedule.
Replace any cracked pickets promptly before water gets behind them, and check that gates still swing true, tightening hinges as needed. With deep-set posts, galvanized fasteners, three rails on tall panels, and a stain every few years, your wood privacy fence will deliver the seclusion and curb appeal that make it the enduring favorite of American backyards.
Building the Gate Right
The gate is the part of a privacy fence that gets used constantly and fails first, so it deserves extra attention. A gate takes stress no fixed panel does, swinging on hinges and slamming shut, which racks a poorly built frame out of square within a season. The key to a lasting gate is a diagonal brace running from the bottom hinge corner up to the top latch corner, which transfers the weight down into the sturdy hinge post.
Always hang gates on oversized 4×6 or even 6×6 posts set in concrete, because a standard 4×4 flexes under the repeated swinging load. Use heavy-duty galvanized or stainless hinges rated for the gate’s weight, and three hinges rather than two on a tall privacy gate. Leave a consistent gap, about half an inch, between the gate and the latch post so it swings freely as the wood expands and contracts. A self-closing hinge and a solid latch finish the job, and building the gate strong from the start saves you from the sagging, dragging gate that plagues so many fences.
Wood Privacy Fence Versus Vinyl and Composite
Wood is the classic choice, but it helps to know how it stacks up against the alternatives before you commit. Vinyl privacy fencing costs more up front, typically $25 to $60 per linear foot installed, but never needs staining, does not rot, and cleans with a hose. The tradeoff is a synthetic appearance some homeowners dislike and the risk of cracking in extreme cold or fading over many years.
Composite fencing splits the difference, offering a wood-like look with far less maintenance at a premium price of $30 to $70 per foot. Wood wins decisively on initial cost, natural appearance, and repairability, since you can replace a single picket cheaply, but it demands the staining and upkeep the others avoid. Choose wood if you value the authentic look and lower upfront cost and do not mind maintenance; choose vinyl or composite if you want to install it once and largely forget it. For many homeowners, the warmth and affordability of a well-maintained wood fence still make it the favorite despite the upkeep.
Permits, Property Lines, and Neighbor Etiquette
Before a single post hole is dug, handle the legal and neighborly groundwork that prevents costly mistakes. Most municipalities require a permit for a privacy fence and cap heights, commonly six feet in back yards and four feet in front, so check with your local building department and any homeowners association first. Building too tall or without a permit can mean fines or an order to tear it down.
Locate your property lines precisely, ideally from a survey, and set the fence a few inches inside your line to avoid encroaching on a neighbor’s land, which can trigger disputes or forced removal. Call 811 to have underground utilities marked before digging, a free service that prevents striking a gas, water, or electric line. As a courtesy, talk with adjoining neighbors about the project, and consider which side faces out, since convention and some codes require the finished, smooth side face your neighbor. Handling permits, lines, and neighbor relations up front keeps your fence project smooth from the first post to the last picket.