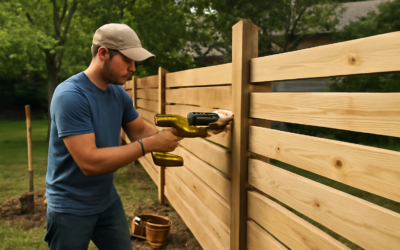
A privacy fence solves three problems at once: it blocks the neighbor’s window from your back patio, keeps the dog in the yard, and adds an instant 4% to 6% to most home values. Installing privacy fence the right way is more about planning than power tools — get the layout, posts, and permits right, and the rest is straightforward weekend work. Here’s the step-by-step process, with material costs, common mistakes, and how to make the fence stand straight for two decades.
Part of our Decks & Outdoor guide — explore the full guide →
- Material Choices and Costs Per Linear Foot
- Permits, Setbacks, and Property Lines
- Tools and Materials You Need
- Step 1: Layout and Marking
- Step 2: Digging Post Holes
- Step 3: Setting Posts in Concrete
- Step 4: Installing Rails and Pickets
- Step 5: Capping and Finishing
- Staining and Sealing for Longevity
- Common Mistakes to Avoid
- Final Thoughts
Material Choices and Costs Per Linear Foot
Privacy fences in the US come in five main material categories:
- Pressure-treated pine: $15 to $30 per linear foot installed, 15-20 year life
- Cedar: $20 to $45 per linear foot installed, 20-30 year life with stain maintenance
- Vinyl: $30 to $60 per linear foot installed, 25-30 year life, no maintenance
- Composite (Trex Fencing, Fiberon): $35 to $70 per linear foot installed, 25-year warranty
- Aluminum: $40 to $80 per linear foot installed, mostly used for ornamental rather than privacy
For a typical 150-foot backyard run, expect total costs of $2,500 (pine DIY) to $9,000+ (composite installed). DIY labor saves 40% to 50% but adds 30 to 60 hours of work for an average backyard.
Permits, Setbacks, and Property Lines
Pull permits first. Most municipalities require permits for any fence over 6 feet tall, and many require permits for any fence regardless of height. Cost is typically $50 to $200. Building without one risks fines and forced removal if your neighbor reports it.
Verify your property line. Don’t trust the assumption that the existing landscaping or driveway edge marks your boundary. Pay $400 to $800 for a licensed surveyor to set survey pins. Building 6 inches into the neighbor’s lot is a problem you’ll regret when they sell the house.
Check setback requirements — front yards typically require fences set 5-20 feet from the curb depending on local code. Back and side yards usually allow fences directly on the property line, but corner lots may have visibility triangles that restrict fence height near intersections.
Tools and Materials You Need
- Post hole digger (clamshell) or auger rental (one-man or two-man depending on soil)
- Level (4-foot minimum) and a torpedo level for posts
- Mason’s line and stakes for layout
- Concrete mix — Quikrete Fast-Setting or standard 60-lb bags
- Circular saw or miter saw
- Cordless drill (DeWalt 20V Max or Milwaukee M18) with exterior screws
- Tape measure (25-foot or longer)
- Sledgehammer for setting stakes
- Wheelbarrow and shovel for mixing concrete
Step 1: Layout and Marking
Stake the corners of the fence run with 1×2 stakes. Run mason’s line between them to mark the fence centerline. Measure the total run and divide by your panel spacing — most pre-built privacy panels are 6 feet or 8 feet wide, so post spacing centers on 6 feet or 8 feet on center.
Mark each post location along the line. Adjust as needed to ensure end posts hit corners exactly and that the run doesn’t end on an awkward partial panel. Better to adjust the run length by a few inches than build a fence with a 14-inch panel at the end.
Step 2: Digging Post Holes
Frost line depth controls post hole depth in cold climates. In the northern US, dig 36 to 48 inches deep. In the South, 24 to 30 inches is sufficient for non-load-bearing fences. Hole diameter should be 3 times the post width — for a 4×4 post, dig 10 to 12 inches wide.
For 150 feet of fence with 8-foot spacing, that’s about 20 holes. A two-man auger rental ($75 to $125 per day) saves your back and turns a two-day dig into a four-hour job.
Step 3: Setting Posts in Concrete
Add 4 to 6 inches of gravel to the bottom of each hole for drainage. Set the post and brace it plumb using two 2×4 stakes nailed to the post in two directions.
Mix concrete to a stiff oatmeal consistency. Fill the hole to 2 inches below grade. Slope the concrete away from the post on top so water sheds rather than pools. Let cure 24 to 48 hours before applying any side load.
Quikrete Fast-Setting can be poured dry into the hole and watered after — easier but less reliable in clay soils. Standard mix-and-pour is the pro choice.
Step 4: Installing Rails and Pickets
Once posts are set and cured, attach 2×4 horizontal rails — typically one near the top, one in the middle, and one near the bottom. Use galvanized or ceramic-coated exterior screws (#9 or #10 size, 2.5-inch length). Avoid drywall screws — they snap in pressure-treated lumber.
Pickets are 1×6 or 1×4 boards installed vertically. Standard spacing is butt-jointed for full privacy or 1/2-inch gaps for shadowbox styling. A picket spacer (a scrap of wood cut to your gap dimension) keeps spacing consistent.
Pre-built panels skip all the picket work — they install as a single unit between posts. The trade-off is reduced layout flexibility and slightly higher cost per linear foot.
Step 5: Capping and Finishing
Post caps protect end-grain from water intrusion. Galvanized steel caps, copper caps, or treated wood caps all work — choose based on aesthetics. A bead of exterior-grade silicone under each cap ensures water doesn’t seep into the post top.
A top cap rail (a horizontal 2×4 or 2×6 running the top of the entire run) finishes the look and adds structural rigidity. Optional but visually significant.
Staining and Sealing for Longevity
Pressure-treated pine and cedar both benefit from semi-transparent stains with UV inhibitors. Sherwin-Williams SuperDeck, Cabot’s Australian Timber Oil, and Behr Premium Solid Color Waterproofing Stain are all reliable picks.
Wait 4 to 12 weeks after install before staining new pressure-treated wood — the chemical treatment needs to dry out enough to accept finish. Cedar can be sealed within a week of install.
Common Mistakes to Avoid
- Setting posts in clay without gravel drainage — water pools and rots the post base
- Using regular nails instead of exterior screws — nails work loose in 5-7 years
- Skipping the survey — fence-on-property-line disputes are the #1 boundary lawsuit
- Cutting pressure-treated lumber and not re-treating the cut ends with copper naphthenate
- Building taller than code allows — 6 feet is the typical residential maximum without a variance
Final Thoughts
A privacy fence built right lasts decades. Take time on layout, set posts deep and plumb, use the right fasteners, and treat the wood. The DIY savings are real, and the satisfaction of watching the dog claim her new backyard makes the weekend work worth every hour.