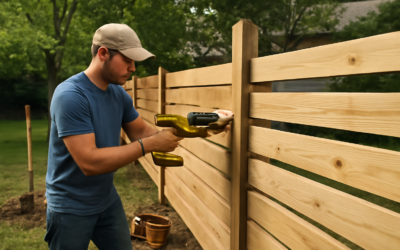
Few features say “American home” quite like a crisp white wood picket fence lining the front yard. Beyond the nostalgia, a picket fence does real work: it defines property lines, keeps small children and pets in the yard, and adds measurable curb appeal that appraisers and buyers notice. Unlike a tall privacy fence, its open, spaced design keeps the yard feeling welcoming while still marking a clear boundary.
Part of our Decks & Outdoor guide — explore the full guide →
Building or buying one well means understanding picket styles, choosing rot-resistant wood, spacing posts correctly, and committing to the maintenance that keeps the paint crisp. Get those right and a picket fence lasts 15 to 20 years and repays the effort every time you pull into the driveway.
Classic Picket Styles
The picket top is where a fence gets its character, and a handful of profiles have endured for generations.
- Dog-ear: The corners are clipped at 45 degrees. Simple, economical, and the most common.
- Gothic (French Gothic): A pointed top with subtle shoulders, a traditional and formal look.
- Flat-top: A clean square cut for a modern, minimalist appearance.
- Round-top: A gentle dome, soft and cottage-like.
- Scalloped runs: Pickets set at varying heights so the fence line dips and rises between posts for a decorative wave.
Standard pickets run about 3.5 inches wide and 3 to 4 feet tall. Front-yard picket fences typically stand 3 to 4 feet high, tall enough to contain pets but low enough to preserve the open, friendly feel that makes the style work.
Choosing the Right Wood
Your wood choice determines how long the fence survives contact with weather and, in the case of posts, soil. Three species dominate.
Cedar
Western red cedar is the premium standard. Natural oils resist rot and insects, it holds paint and stain beautifully, and it resists warping. Expect $8 to $18 per linear foot in materials.
Pressure-Treated Pine
The budget workhorse, treated pine is chemically protected against rot and cost $5 to $12 per linear foot. It’s the go-to for posts even when the pickets are cedar, since posts sit in the ground where decay resistance matters most.
Redwood
Beautiful and naturally durable, but pricey and regionally limited, redwood runs $15 to $30 per linear foot and is most common on the West Coast.
A smart, common approach uses pressure-treated posts for ground contact and cedar pickets and rails above, balancing longevity and looks.
Post Spacing and Layout
The posts carry the entire fence, so spacing and depth are not places to cut corners. Standard practice sets posts 6 to 8 feet on center. Closer spacing, around 6 feet, makes for a stiffer, longer-lasting fence, especially in windy areas.
Set posts in concrete at a depth equal to at least one-third the above-ground height, and always below your local frost line, or heaving will push them out of alignment. For a 4-foot fence, that usually means digging 24 to 30 inches deep. A 4×4 pressure-treated post in a bell-shaped concrete footing is the reliable standard.
Building a Picket Fence Step by Step
With posts set, the rest goes quickly. Here’s the proven sequence:
- Lay out the fence line with stakes and string, marking post locations at even 6-to-8-foot intervals.
- Dig post holes, add a few inches of gravel for drainage, set each post plumb, and pour concrete. Let it cure at least 24 hours.
- Attach two horizontal rails between posts, one about 8 inches from the top and one 8 inches from the bottom, using galvanized screws or brackets.
- Fasten pickets to the rails with 3 to 4 inches of spacing, using a spacer block to keep the gaps identical.
- Check picket height against a string line as you go so the tops stay level or follow your intended scallop.
Use only galvanized or stainless fasteners. Standard steel screws rust, streak the wood, and eventually fail, undoing all your careful work.
Picket Spacing and Gate Considerations
The gap between pickets is both aesthetic and practical. A 2-to-3-inch gap looks traditional and keeps most pets contained; wider gaps read airier but let small animals slip through. A common trick is to space pickets exactly one picket-width apart for a balanced, classic rhythm.
Plan your gate early. Build it with a diagonal brace running from the bottom hinge corner to the top latch corner to prevent sag, use heavy-duty hinges rated for the gate’s weight, and leave a slight gap at the bottom so it swings clear of grass and frost heave.
What a Picket Fence Costs
Total cost depends on wood, length, and whether you DIY. Rough figures:
- DIY materials: $10 to $25 per linear foot depending on wood species.
- Professional installation: $25 to $60 per linear foot installed.
- A typical 150-foot front-yard run: $1,500 to $3,500 DIY, or $4,000 to $9,000 installed.
DIY installation saves roughly half, and a picket fence is one of the more approachable fencing projects for a homeowner with a post-hole digger and a free weekend.
Factor in permits and property lines too. Many municipalities require a permit for a front-yard fence and cap the height, often at 3 or 4 feet in front yards, so check local rules before you buy materials. Confirm your exact property line, ideally from a survey, and set the fence a few inches inside it to avoid disputes with neighbors down the road.
Pre-Built Panels vs. Building Stick by Stick
You have two construction approaches, and the right one depends on your budget, tools, and how custom you want the result. Pre-assembled picket panels, sold in 6-foot and 8-foot sections at home centers, drop between your posts and screw in place, cutting labor dramatically. A homeowner can install a panel fence in a weekend, and the uniform factory spacing looks tidy.
Building stick by stick, attaching individual pickets to rails you’ve run yourself, takes far longer but gives complete control over picket spacing, height, and scalloped patterns. It also lets you match an odd post spacing or follow a sloped yard more gracefully, since you can rack individual pickets to follow the grade. For a straight, level run where speed matters, panels win. For a custom look or challenging terrain, stick-built is worth the extra hours.
Handling Slopes and Uneven Ground
Few yards are perfectly flat, and how you handle a slope defines whether the fence looks professional or improvised. There are two accepted methods:
- Stepping: Each fence section stays level, and the sections step down the slope like stairs, leaving triangular gaps at the bottom. This suits steeper grades and gives a crisp, formal look.
- Racking (raking): The rails follow the slope at an angle while the pickets stay vertical, keeping a consistent gap at the bottom. This works on gentle grades and looks more fluid.
Stick-built fences rack easily since you attach each picket individually. Pre-built rigid panels generally can’t rack, so they’re better suited to stepping. Assess your grade before choosing a construction method, because a rigid panel fence on a rolling yard will leave awkward gaps a stick-built fence would avoid.
Whichever method you use, keep the bottom of the pickets a few inches above the soil. Wood in direct ground contact wicks moisture and rots within a few years, so that small gap dramatically extends the fence’s life and makes trimming grass underneath far easier.
Finishing and Maintenance
Bare wood weathers fast, so finish the fence within a few weeks of building. Paint gives the iconic bright white look but requires repainting every 5 to 7 years and can peel if moisture gets under it. A semi-transparent stain lets the grain show, penetrates rather than films, and typically needs reapplication every 3 to 4 years but won’t peel.
Whichever you choose, keep grass and mulch from piling against the pickets, reset any post that starts to lean, and touch up chips before bare wood weathers. Maintained this way, a wood picket fence keeps its clean, storybook charm for two decades and remains one of the most rewarding curb-appeal projects you can take on.