Most failed metal railings do not break at the pickets. They loosen at the base, where a post was set into crumbling concrete or lagged into a rim board that was never meant to hold it. A solid wrought iron railing installation is really about two things: measuring the stair angle correctly so the prefab section fits, and anchoring every post into sound material so it can resist a person falling against it.
Today, what stores sell as wrought iron is usually welded steel or aluminum sections finished to look like forged iron. Prefab panels come in standard lengths with adjustable brackets for stairs. With careful measuring, a metal-cutting saw, the right anchors and a good rust-proofing routine, a handy homeowner can install them on porch steps and short stair runs in a weekend.
This guide covers measuring the rake, cutting sections to length, mounting to concrete or wood, protecting cut ends and knowing when a permit or a pro is required.
Planning a Wrought Iron Railing Installation
Start by deciding whether you are installing a guard, a handrail or both. A guard keeps people from falling off an open side of a porch, deck or stair. A handrail is the graspable rail you hold on the way up. Some prefab sections serve as both; others need a separate graspable rail added. Local building codes set required heights, the maximum opening between pickets, graspability and the load posts must resist. These rules vary by jurisdiction, so call your building department before buying and ask whether a permit is required. For new stairs, porches and decks it often is.
Next, confirm what you are attaching to. Concrete steps must be solid, not cracked or spalling near the edges. Wood framing must be structurally sound, not a thin trim board. If either is doubtful, repair it first.
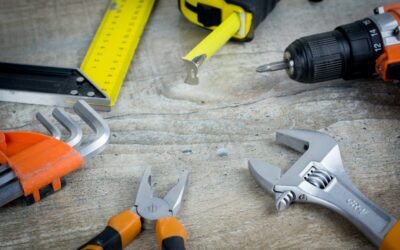
Tools and Materials
- Prefab wrought iron railing sections and matching posts, rake brackets and hardware
- Tape measure, 4-foot level, angle finder or bevel gauge, and marker
- Hammer drill with carbide masonry bits (for concrete)
- Drill/driver and wood bits (for framing)
- Angle grinder with metal cutoff wheels or a metal-cutting chop saw
- Metal file and wire brush
- Concrete anchors rated for the load, such as wedge anchors or epoxy-set threaded rod, or structural lag screws and through-bolts for wood
- Rust-inhibiting metal primer and exterior enamel or touch-up paint
- Safety glasses, hearing protection, gloves and a dust mask
Measuring the Stair Rake
On stairs, the railing must follow the angle, or rake, of the steps. Get this wrong and the pickets lean.
- Find the nosing line. Stretch a straightedge or string along the front edges (nosings) of the treads from the bottom step to the top.
- Read the angle. Set an angle finder or bevel gauge on that line. Typical residential stairs fall somewhere in the 30- to 37-degree range, but always measure your own.
- Mark post locations. Place the bottom post on the first tread or landing and the top post at the top landing. Keep posts far enough from the concrete edge that anchors do not blow out the corner; the anchor manufacturer lists a minimum edge distance.
- Measure between posts along the rake. Measure from post face to post face along the angled line, not horizontally. That is the length the rail section must be cut to.
Rake-adjustable sections have pivoting picket connections; you rack the panel until the pickets are plumb at your measured angle. Check with a level on several pickets before cutting anything.
Step-by-Step: Installing Prefab Sections
1. Dry-fit and mark
Set the posts in position and hold the section against them. Rack it to the stair angle, confirm the pickets are plumb and mark cut lines on the top and bottom rails where they meet the post brackets. Measure twice; you cannot add steel back, and a miscut is the most common setback in any wrought iron railing installation.
2. Cut to length
Clamp the section firmly. Cut the rails with a cutoff wheel or metal chop saw. Keep picket spacing even at each end so the gap next to a post does not end up larger than the others, which could exceed your local maximum opening. If one end gap grows too large, trim equally from both ends instead.
3. Deburr and rust-proof the cut ends
This is the step installers skip and later regret. Bare steel at a cut end starts rusting within days outdoors. File off burrs, wire-brush the area, wipe it clean and apply a rust-inhibiting primer to every cut face and any scratched finish. Once dry, topcoat with matching exterior enamel. Insert plastic end caps where the rail profile allows.
4. Anchor posts into concrete
Set the post base plate on the marked spot and use it as a template to mark holes. Drill with a hammer drill to the depth listed by the anchor manufacturer, blow the dust out of each hole and install the anchors. Epoxy-set threaded rod is excellent near edges and in older concrete because it does not wedge outward. Shim under the base plate only with non-corrosive shims if needed to plumb the post, then tighten to the recommended torque.
5. Or anchor posts into wood framing
On a wood deck or porch, posts must attach to structural framing such as joists, blocking or the rim with added blocking behind it, never to decking alone or trim. Surface-mount base plates need solid blocking beneath the deck boards; side-mounted posts should be through-bolted where possible. Use hot-dip galvanized or stainless fasteners, since treated lumber corrodes plain steel.
6. Attach the sections
Fit the cut section into the post brackets, set the rake, and fasten with the supplied screws or bolts. Check pickets for plumb and the top rail for a consistent height above the nosings. Tighten everything once alignment is right.
7. Add the graspable handrail if needed
If your guard section is not graspable, mount a separate handrail on brackets at the height your code requires, returning the ends to the post or wall so sleeves and bags do not catch.
8. Final load check and touch-up
Lean firmly into the rail at each post and at mid-span. Nothing should shift, flex noticeably or creak. Touch up any scratches with primer and paint.
Installing Wrought Iron Railings on Stairs vs. Flat Porches
Level porch and deck guards are simpler: sections run horizontally, and you only cut to length. Installing wrought iron railings on stairs adds the rake measurement, transition brackets where the stair rail meets a level landing rail, and more careful post placement near narrow tread edges. For a metal handrail installation along a wall, you mount brackets into studs or masonry instead of posts, keeping the rail a consistent distance from the wall for a comfortable grip.
Troubleshooting
Concrete cracks while drilling
You are too close to the edge, or the concrete is weak. Stop. Move the post inward if possible, switch to epoxy anchors or have a mason repair the step before anchoring.
Post wobbles after tightening
Anchors may be undersized, holes over-drilled or the substrate soft. Remove, inspect and re-anchor into sound material. Never rely on caulk or construction adhesive to stiffen a loose post.
Pickets are out of plumb
The rake setting shifted during fastening. Loosen the section, re-rack it and check several pickets before retightening.
Rust bleeding at joints within a season
Cut ends or drilled holes were left bare. Wire-brush, prime and repaint. Seal the base plate edge to keep water from pooling under it.
Cost Ranges
Prefab steel or aluminum sections for a short run of porch steps usually total a few hundred dollars in materials once posts, brackets, anchors and paint are included. Longer runs, ornate designs or custom-fabricated forged iron cost substantially more. Professional installation of prefab railing is often billed per linear foot or per section, while a fabricator building custom wrought iron charges considerably more because each piece is made to measure. Permit fees, where required, vary by municipality.
When to Call a Licensed Professional
Hire a licensed contractor or metal fabricator when the stairs are long, curved or elevated, when the concrete is cracked or spalling, when the wood framing is questionable, or when you are unsure what your local code requires for guard height and picket spacing. Railings are life-safety components, and an inspector may need to approve the installation. A pro also makes sense for custom forged iron that requires welding on site. Whether DIY or professional, a sound wrought iron railing installation always comes down to anchoring into solid material and meeting your local code.
Frequently Asked Questions
Can I install a wrought iron railing myself?
Yes, prefab sections on short porch steps are a manageable DIY project if you can drill concrete and cut steel. Check whether a permit is required and hire a pro for long, elevated or damaged stairs.
How do I anchor a metal railing into concrete steps?
Use anchors rated for guard loads, such as wedge anchors or epoxy-set threaded rod, installed at the depth and edge distance the manufacturer specifies. Solid, uncracked concrete is essential.
How high should my railing be?
Required heights for guards and handrails are set by your local building code and differ by jurisdiction and application. Confirm with your building department before cutting sections.
Do I need to paint the cut ends of a steel railing?
Yes. Cut steel rusts quickly outdoors. Deburr, clean and prime every cut end and scratch with a rust-inhibiting primer, then topcoat with exterior enamel.
Can a railing be mounted to a wood deck surface?
Only if the base plate fastens into solid structural blocking or framing below the decking. Screwing posts into deck boards alone will not hold a guard load.