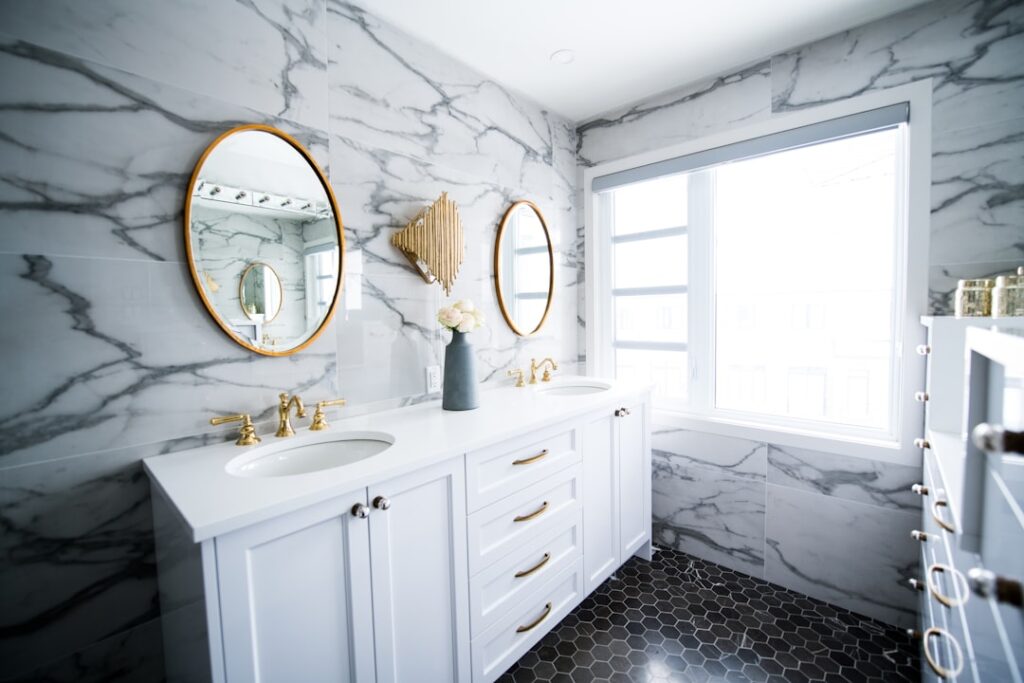
Large-format rectangles have quietly become the default choice for renovated bathrooms, and for good reason. A 12×24 tile bathroom reads as bigger and cleaner than the same room in small squares, because fewer grout lines mean fewer visual interruptions across the floor and walls. The trade-off is that these tiles are less forgiving of a wavy substrate and demand a smart layout decision up front.
- Why 12×24 Tile Suits Bathrooms
- The Best Layouts for a 12×24 Tile Bathroom
- The 33 Percent Offset Rule
- What a 12×24 Tile Bathroom Costs
- Grout Lines and Color
- Slip Resistance and Safety
- Installation Essentials
- Wall Versus Floor Considerations
- Common Mistakes With Large-Format Tile
- Maintenance Over the Long Run
- Making the Call
This guide walks through the layouts that work, the offset rule most people get wrong, realistic pricing, and the slip and installation details that separate a professional result from a lippage-riddled mess.
Why 12×24 Tile Suits Bathrooms
The proportions do real work. On a floor, running the long dimension toward the far wall stretches the room’s apparent length. On a shower wall, stacking tiles vertically draws the eye up and makes an eight-foot ceiling feel taller. Fewer grout joints also mean less grout to scrub and seal, which matters in a wet, mildew-prone space.
Porcelain in this size handles moisture beautifully, resists staining, and comes in convincing marble, concrete, and wood looks. That versatility is why a single tile size can cover the floor, the shower surround, and a feature wall in one cohesive material.
The Best Layouts for a 12×24 Tile Bathroom
Orientation and pattern change the entire feel of the room, so decide before you buy your first box.
Straight Stack (Grid)
Tiles align in clean columns and rows with continuous grout lines. This modern, architectural look suits contemporary bathrooms and makes a small room feel orderly. It is also the least forgiving of any wall that is out of plumb, since crooked lines have nowhere to hide.
One-Third Offset (Ashlar)
Each row shifts by one-third of the tile length. This is the manufacturer-recommended pattern for large-format tile and the safest structural choice, which brings us to the rule most DIYers miss.
Vertical Run
Standing the tiles upright on shower walls emphasizes height and gives a fresh, spa-like feel. Vertical stacked layouts pair especially well with a linear drain and a curbless shower.
The 33 Percent Offset Rule
Here is the detail that saves floors: never install 12×24 tile in a standard 50 percent brick offset. Large tiles have a slight bow in the center, a natural warp from firing. When you set the end of one tile against the crowned middle of the tile below, the corners sit high and you get lippage, those unpleasant raised edges you can feel with a bare foot.
Keep any offset to 33 percent or less, or go with a straight stack. Pair that with a leveling clip system and you eliminate the number one complaint about big tiles.
What a 12×24 Tile Bathroom Costs
Material and labor both swing based on tile quality and room complexity.
- Budget porcelain 12×24: $2 to $4 per square foot.
- Mid-range marble-look and wood-look porcelain: $4 to $8 per square foot.
- Premium and rectified porcelain: $8 to $15 per square foot.
- Professional installation: $10 to $18 per square foot, more for walls and showers than floors.
- Leveling clips, thinset, and grout: roughly $1.50 to $3 per square foot in materials.
A full bathroom with a tiled floor and shower surround, say 120 square feet of coverage, typically lands between $1,600 and $3,800 installed. DIY drops that substantially, though large tile is heavier and harder to cut than beginner-friendly small formats.
Grout Lines and Color
Rectified tiles have precisely cut, squared edges that allow tight 1/16-inch grout lines for a nearly seamless look. Standard (non-rectified) tiles need a wider 3/16-inch joint to absorb minor size variation. Check which you are buying, because the joint width changes the entire aesthetic.
For color, matching the grout to the tile minimizes the grid and maximizes the sense of space. A slightly darker grout on the floor hides dirt in high-traffic zones. Save high-contrast grout for a deliberate graphic statement, not a default.
Slip Resistance and Safety
Bathroom floors get wet, and large glossy tiles can be slick. Look at the tile’s DCOF (dynamic coefficient of friction) rating and choose 0.42 or higher for wet floor areas. Matte and textured finishes grip better than polished ones.
For shower floors specifically, most pros drop down to a smaller mosaic rather than 12×24, because the many grout lines add traction and let the tile pitch toward the drain. You can keep the 12×24 on the walls and pair it with a coordinating 2-inch mosaic underfoot for the best of both.
Installation Essentials
Substrate flatness is everything with large-format tile. Aim for no more than 1/8 inch of variation over 10 feet. Skim or self-level any low spots before you start.
- Use a large-format mortar (sometimes labeled medium-bed) rated for tiles over 15 inches on a side.
- Back-butter each tile in addition to troweling the substrate to reach the 80 to 95 percent coverage that wet areas require.
- Comb thinset in one direction and press tiles perpendicular to those ridges to collapse air pockets.
- Set leveling clips at every joint to hold adjacent tiles flush while the mortar cures.
- Let it cure 24 hours, then grout and seal.
Wall Versus Floor Considerations
The same tile behaves differently on a wall than underfoot, and smart bathrooms account for that. On walls, weight and slip resistance barely matter, so you can run polished, dramatic finishes and tall vertical stacks freely. The main concern is holding heavy tiles in place while the mortar sets, which is where a ledger board or leveling clips earn their keep on a vertical run.
On floors, everything inverts. Slip rating, flatness, and lippage control move to the front, and finish choices narrow toward matte and textured. A common and attractive strategy is to run a wood-look or concrete-look 12×24 across the floor for durability, carry a marble-look 12×24 up the shower walls for drama, and drop to a coordinating mosaic on the shower pan for grip and drainage. Three formats, one cohesive palette.
Common Mistakes With Large-Format Tile
A few errors show up again and again in DIY 12×24 bathrooms, and each is avoidable.
- Using a 50 percent offset: the single biggest cause of lippage with these tiles. Stay at or below one-third.
- Skimping on mortar coverage: wet areas require 80 to 95 percent contact, which means back-buttering, not just troweling.
- Ignoring substrate flatness: a floor that swings more than 1/8 inch over 10 feet will telegraph into every joint.
- Glossy floor tile in a wet zone: beautiful and dangerously slick. Check the DCOF before you buy.
- Wide grout lines on rectified tile: defeats the whole seamless look you paid extra for.
Slow, deliberate prep prevents nearly all of these. Large tile rewards planning and punishes shortcuts more than any small format does.
Maintenance Over the Long Run
Porcelain 12×24 tile is close to maintenance-free once it is down. Sweep grit so it cannot act like sandpaper underfoot, and damp-mop with a pH-neutral cleaner. The grout is the only part that needs attention, so seal it after installation and refresh the sealer every one to two years in a busy bathroom. Fewer joints mean less grout to maintain in the first place, which is one more practical argument for going large.
Making the Call
A 12×24 tile bathroom delivers a modern, spacious, low-maintenance result when you respect three things: a flat substrate, the 33 percent offset limit, and an adequate slip rating on the floor. Get those right, choose a grout that recedes rather than shouts, and you end up with a bathroom that looks like it cost far more than it did.
Prefer to explore on your own?
See how new flooring looks in your actual room in seconds — free, no signup.
Try the free Floor Studio →