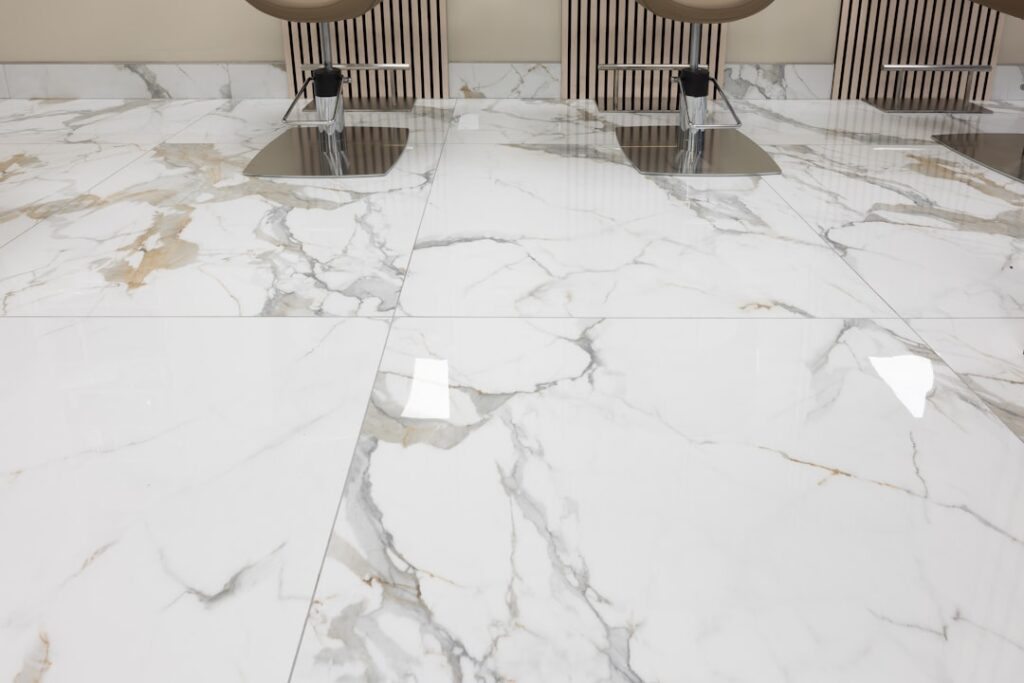
16×16 tile hits a practical sweet spot in the tile world, large enough to cover floors quickly with fewer grout lines, yet not so big that it becomes hard to handle or demands a perfectly flat subfloor the way oversized formats do. Measuring sixteen inches square, each tile covers about 1.78 square feet, which means a room comes together faster and looks cleaner than it would with small tiles. For homeowners weighing tile sizes for a floor, the 16×16 is a popular middle ground that balances modern looks, reasonable cost, and manageable installation.
Part of our Tile & Grout guide — explore the full guide →
This guide covers where 16×16 tile works best, the materials it comes in, how many you will need, layout ideas, and the installation and care considerations that come with this size.
Why Choose a 16×16 Tile
The appeal of this format comes down to coverage and proportion. Compared with common 12×12 tiles, a 16-inch square covers significantly more area per piece, so you place fewer tiles and create fewer grout lines. That makes floors look more expansive and seamless, and it cuts down on the grout you will eventually have to clean and maintain.
At the same time, the 16×16 avoids the demands of very large formats. Oversized tiles of 24 inches and up require an extremely flat substrate to avoid lippage and can be awkward to lift and cut. A 16-inch tile is large enough to feel contemporary and reduce grout lines, yet small enough for a confident do-it-yourselfer to handle and cut without specialized large-format tools. That balance is exactly why the size stays popular.
Where to Use 16×16 Tile
The size suits a range of rooms, leaning toward floors more than walls because of its weight and scale:
- Kitchens: easy-to-clean, durable flooring that covers the space quickly with fewer joints.
- Bathrooms: water-resistant flooring; works well as long as you choose a slip-resistant finish.
- Entryways and mudrooms: tough, dirt-friendly surfaces that stand up to traffic and weather.
- Living and dining areas: a clean, continuous look, especially in open floor plans.
- Basements and laundry rooms: moisture-tolerant and hardwearing over a sound slab.
The format reads best in small to medium rooms where its scale fills the space proportionally, but it also works in larger rooms. In a very tiny space like a small powder room, the tile can feel oversized relative to the floor, so consider the room’s dimensions before committing.
Material Options
16×16 tile comes in the same range of materials as other sizes, and the choice affects durability, appearance, and cost:
- Ceramic: affordable, easy to cut, and available in many looks; well suited to walls and moderate-traffic floors.
- Porcelain: denser, harder, and more water- and wear-resistant than ceramic; the top choice for high-traffic and wet areas, including realistic stone and wood looks.
- Natural stone: travertine, slate, marble, and granite offer unique character but need sealing and more care.
For floors, especially in busy or damp rooms, porcelain is usually worth the modest premium over ceramic because it resists chips, stains, and moisture better. In wet areas, prioritize a tile with a textured or matte finish for slip resistance over a slick polished surface.
Estimating How Many Tiles You Need
Each 16×16 tile covers roughly 1.78 square feet. To estimate your order, measure the room’s length and width in feet, multiply for the square footage, then divide by 1.78 to get the raw tile count. Always add about 10 to 15 percent extra for cuts, breakage, and future repairs, with the higher end for diagonal layouts or rooms with many obstacles that require more cutting.
As a quick example, a 12-by-12-foot room is 144 square feet; divided by 1.78 that is about 81 tiles, and adding 10 percent brings you to roughly 90 tiles to purchase. Buying a little extra from the same production lot protects you against future dye-lot color differences if you ever need to replace a damaged tile.
Layout Patterns
Even a single square tile size offers several layout options that change the whole feel of a floor:
- Straight grid: tiles aligned in clean rows and columns for a simple, modern look that is easiest to install.
- Diagonal: tiles turned 45 degrees, which can make a room feel larger and adds visual interest, though it requires more cuts.
- Brick or offset: each row shifted relative to the last, breaking up the grid; keep offsets modest with large tiles to avoid lippage.
- Mixed sizes: combining 16×16 with smaller tiles in a modular pattern for a custom look.
The straight grid is the most forgiving for beginners and shows off the large format’s clean lines. Diagonal and offset patterns add character but increase waste and cutting, so factor that into your tile count.
Installation Considerations
Laying 16×16 tile follows the same fundamentals as any floor tile, with a few size-specific notes. The substrate must be flat and solid; while not as demanding as oversized formats, a 16-inch tile still telegraphs dips and bumps and can rock or crack over an uneven floor. Check the surface with a straightedge and level any low or high spots first.
Use the trowel notch and thinset the tile manufacturer recommends for this size, and back-butter tiles for full mortar coverage to prevent hollow spots and cracking. Plan your layout from the room’s center so cuts at the walls are balanced, use consistent spacers for even grout lines, and check often for lippage as you go. For straight cuts a snap cutter works, while a wet saw handles notches and a high volume of cuts cleanly. Wear eye protection when cutting and follow the adhesive and grout cure times before walking on or grouting the floor.
Cost Expectations
Prices vary widely by material, quality, and region, so treat these as planning ranges rather than quotes. Basic ceramic 16×16 tile typically falls at the lower end of the per-square-foot scale, mid-grade porcelain costs more, and natural stone and designer porcelain command the highest prices. Installation labor, if you hire a pro, often adds a few dollars per square foot and more for diagonal layouts, stone, or extensive cutting.
Because the large format covers ground quickly and uses fewer pieces, it can keep both material handling and labor efficient compared with small mosaics. Budget for the extras too: thinset, grout, spacers, sealer for stone, and the 10 to 15 percent overage on tile.
Final Thoughts
A 16×16 tile is a smart default for many flooring projects because it delivers the clean, low-grout look of a large format without the handling and flatness headaches of oversized tiles. Choose porcelain for busy or wet rooms, plan your layout from the center for balanced cuts, prepare a flat substrate, and order with a comfortable overage. With the right material and careful installation, a 16×16 tile floor offers durability, easy cleaning, and a modern appearance that will serve your home well for many years.
Prefer to explore on your own?
See how new flooring looks in your actual room in seconds — free, no signup.
Try the free Floor Studio →