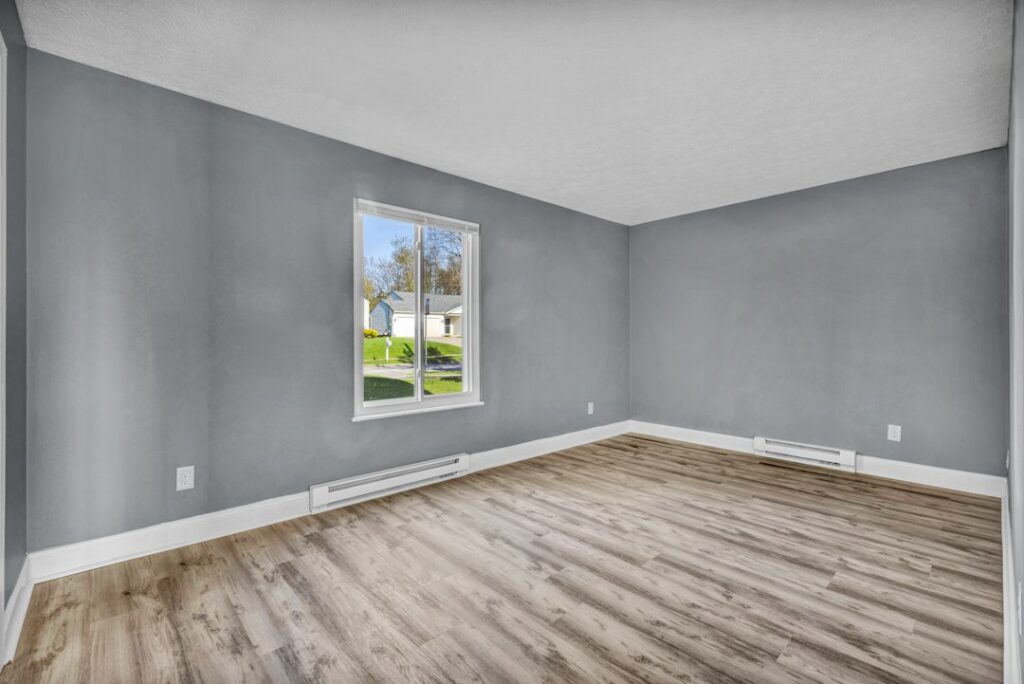
A skinny 3-1/4-inch builder baseboard can make even a new floor look unfinished. That is why so many remodelers are swapping to 1×6 baseboard trim, a taller, flatter board that gives rooms a crisp, craftsman or modern-farmhouse look for surprisingly little money. The catch is that “1×6” is a nominal size, and the material, profile, and installation method you choose determine whether it looks custom or clunky. This guide covers real dimensions, material options, design choices, costs, and a step-by-step installation process.
What 1×6 Baseboard Trim Actually Measures
Lumber names describe rough-sawn sizes before drying and planing. A board sold as a 1×6 actually measures 3/4 inch thick by 5-1/2 inches tall. Pre-primed MDF boards marketed as 1×6 usually match those dimensions, although some MDF stock comes in at 11/16 or 5/8 inch thick. Always check the label, because thickness affects how the baseboard meets door casing.
That 5-1/2-inch height is the sweet spot for rooms with 8- to 9-foot ceilings. A common rule of thumb says baseboard height should be roughly 7 percent of wall height. For an 8-foot (96-inch) wall that works out to about 6-3/4 inches, so a 1×6 with a small cap or shoe molding hits the target well. In 10-foot rooms, a 1×8 or a stacked 1×6 with a cap looks more proportional.
Material Options: Pine, Poplar, MDF, and PVC
Each material has a place. Choose based on whether you will paint or stain, and how much moisture the room sees.
Finger-Jointed Primed Pine
Short pine blocks glued end to end, then primed. It is straight, stable, and paint-ready, at around $1.25 to $2.25 per linear foot. It holds nails better than MDF and resists dents moderately. It is the go-to choice for painted trim in most living spaces.
Poplar
A hardwood that is smooth, dent-resistant, and paints beautifully. Poplar 1×6 costs around $2.50 to $4 per linear foot. It is the pro favorite for painted trim in high-traffic hallways and kids’ rooms, where vacuums and toys take a toll.
MDF
The cheapest option, about $0.90 to $1.75 per linear foot. MDF has a perfectly flat face and cuts cleanly, but it swells if water reaches an unsealed edge. Use it in dry rooms like bedrooms and dens, and seal every cut end with primer.
Clear Pine, Oak, or Other Stain-Grade Wood
For stained trim, you need knot-free clear lumber. Clear pine runs $3 to $5 per linear foot; red or white oak $4 to $7. Match the species to your doors and floors for a cohesive look.
PVC or Cellular Vinyl
Waterproof and rot-proof, PVC trim costs $2.50 to $4.50 per linear foot. It is ideal in bathrooms, laundry rooms, mudrooms, and basements. It expands with temperature more than wood, so leave small gaps at ends and use flexible caulk.
Style Ideas and Profiles
A plain square-edged 1×6 is the backbone of craftsman, farmhouse, and modern trim schemes. It pairs naturally with flat 1×4 door casings and simple head trim. From there, you can dress it up:
- Eased edge: round over the top front edge with a 1/8-inch router bit so paint does not chip on a sharp arris.
- Cap molding: add a 3/4-inch to 1-1/4-inch cap along the top for a traditional, built-up look that reaches 6-1/2 inches total.
- Shoe or quarter-round: a 1/2-inch by 3/4-inch shoe hides small gaps where the floor is not perfectly flat.
- Chamfered top: a 45-degree bevel along the top edge gives a clean modern shadow line.
- Two-piece base: stack a 1×6 with a small ogee cap to mimic expensive 7-inch colonial base for a fraction of the cost.
For a minimalist home, run the square 1×6 alone, painted the same color as the walls in a satin or semi-gloss sheen. For a classic interior, paint it bright white against a colored wall.
Cost to Install 1×6 Baseboards
Figure the room perimeter in linear feet, subtract door openings, and add 10 to 15 percent for waste and miters. A 12×14-foot bedroom has a 52-foot perimeter; minus a 3-foot door, you need about 49 feet plus waste, or roughly 56 feet of material.
DIY costs for that bedroom using primed pine land around $85 to $130 for boards, plus $30 to $50 for caulk, filler, primer, paint, and nails. Professional carpenters typically charge $3 to $8 per linear foot installed, or about $1,200 to $3,000 for a 400-linear-foot whole-house job, depending on material, number of outside corners, and whether painting is included. Removing old baseboards adds about $0.50 to $1 per linear foot.
Tools and Supplies You Will Need
- Miter saw (10- or 12-inch), ideally with a fine-tooth 80-tooth blade
- Coping saw or jigsaw with a coping blade
- 18-gauge brad nailer or 16-gauge finish nailer with 2- to 2-1/2-inch nails
- Stud finder, tape measure, pencil, and a 4-foot level
- Wood glue for scarf joints and outside miters
- Paintable acrylic latex caulk and wood filler
- Pry bar and oscillating tool for removing old trim
Step-by-Step Installation
- Prep the room. Remove old trim carefully, scrape old caulk, and mark studs 1 inch above the floor with painter’s tape. Finish the flooring first; baseboard goes on after hardwood, laminate, or vinyl.
- Prime and pre-paint. Prime all sides and ends, then apply the first finish coat before installation. Touch-ups later are much faster than cutting in against the wall and floor.
- Start with the longest wall. Cut the first board square at both ends so it butts tight into the corners. This board gets coped joints from its neighbors.
- Cope inside corners. For a square-edged 1×6, you can simply butt the adjoining board into the first. With a profiled cap, cut a 45-degree miter, then back-cut along the profile with a coping saw so it fits tightly even if the corner is not exactly 90 degrees.
- Miter outside corners. Measure the actual corner angle with an angle finder. Split the angle, cut each board, and glue the joint before nailing. Pin through the miter with 1-inch brads to hold it tight.
- Scarf long runs. Where a wall is longer than your board, join pieces with 45-degree scarf cuts over a stud, glued and nailed, rather than a butt joint that will open over time.
- Nail properly. Drive two nails at each stud, one about 1 inch from the bottom into the bottom plate and one about 1 inch from the top into the stud. Keep nails out of the floor so floating floors can expand.
- Fill and caulk. Fill nail holes, caulk the top edge to the wall, and apply the final paint coat.
Common Mistakes to Avoid
Nailing baseboard down into a floating laminate or vinyl floor is the most costly error. It pins the floor and causes buckling. Always hold the base slightly above the floor surface, using a 1/16-inch spacer if needed, and nail only into the wall framing. Leave the expansion gap under the trim alone; do not fill it with caulk on floating floors.
Another mistake: installing tall base over wavy walls without scribing. A 5-1/2-inch board shows gaps more than a short one. Push the board against the wall at studs and caulk the small hollows between, or plane the back of the board slightly where walls bulge. Finally, check how the 3/4-inch base meets your door casings. If casing is only 11/16 inch thick, the base will stand proud. Choose thicker casing, add a plinth block, or back-bevel the end of the base for a clean transition.
Where 1×6 Baseboards Work Best
Taller baseboard shines in living rooms, dining rooms, bedrooms, and open-concept spaces where it creates a strong horizontal line. In small powder rooms, a 1×6 in PVC stands up to mopping and splashing. In homes with low 7-1/2-foot ceilings, a 1×4 may look more balanced. And in stairwells, 1×6 skirt board pairs neatly with matching base on landings. Choose the right material for each room, keep the profile consistent throughout the house, and your 1×6 baseboard trim will give floors the finished frame they deserve.
Frequently Asked Questions
Is 1×6 too tall for baseboard?
No. At 5-1/2 inches actual height, it suits standard 8- to 9-foot ceilings well. It only looks oversized in very small rooms with low ceilings.
Should I use MDF or pine for 1×6 baseboards?
Use primed finger-jointed pine or poplar in busy or damp areas because it resists dents and moisture better. MDF is fine for dry rooms if you seal every cut edge.
Do I need shoe molding with 1×6 baseboard?
Only if your floor is uneven or you need to hide an expansion gap. On flat floors, a tight-fitting 1×6 without shoe gives a cleaner modern look.