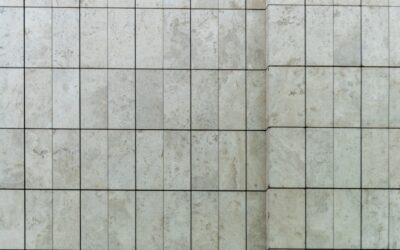
Few tiles feel as classic and adaptable as the humble 4-by-4 square. A 4×4 ceramic tile measures four inches on each side, and that compact format has anchored kitchen backsplashes, bathroom walls, and decorative accents for generations. It is affordable, easy to handle, and offered in a huge palette of colors and finishes, which makes it a favorite for both retro charm and clean modern looks.
Part of our Tile & Grout guide — explore the full guide →
What Makes 4×4 Tile So Popular
The appeal comes down to scale and versatility. At four inches square, the tile is small enough to wrap around corners and fit tight spaces, yet large enough that you are not setting hundreds of tiny mosaics. The grid of grout lines it creates reads crisp and orderly, giving walls a timeless, tailored feel.
Color choice is another draw. Because the format has been produced for decades, you can find 4×4 ceramic tile in glossy white, soft pastels, bold saturated hues, and earthy matte tones. That range lets it suit a 1950s-inspired bathroom or a contemporary kitchen equally well.
Best Uses Around the Home
While ceramic tile of this size can technically go many places, it shines in specific applications.
- Kitchen backsplashes: The classic gridded look behind a range or sink.
- Bathroom walls and showers: Durable, water-resistant coverage with a retro or clean-modern feel.
- Accent borders and insets: Mixed with larger field tile or used as a decorative stripe.
- Laundry and mudroom walls: An easy-clean surface that takes splashes and scuffs.
For floors, confirm the tile is rated for floor use, since many decorative 4×4 ceramics are designed for walls. Check the manufacturer’s PEI wear rating before putting it underfoot.
Layout Patterns That Change the Look
The same tile can feel completely different depending on how you set it. A straight stacked grid looks modern and architectural. A traditional offset, where each row shifts by half a tile, softens the look and reads more classic. Turning the squares 45 degrees creates a diamond pattern that adds energy to a backsplash or accent wall.
To plan a layout:
- Dry-lay a section on the floor first to preview the pattern and color mix.
- Find the center of your wall and work outward so cut tiles land symmetrically at the edges.
- Decide on grout line width early, since it affects how many tiles you need.
- Order 10 to 15 percent extra for cuts, breakage, and future repairs.
Grout Color and Joint Width
Grout is not an afterthought; it defines the entire look. A contrasting grout, like dark gray against white tile, emphasizes the grid for a bold graphic effect. A matching grout blends the joints and creates a smoother, more seamless field.
Joint width typically runs from 1/16 to 1/8 inch for this size. Tighter joints look refined but demand precise tile spacing, while slightly wider joints are more forgiving for a first-time installer. In wet areas, use a quality grout and consider sealing cement-based grout to resist staining and moisture.
What 4×4 Ceramic Tile Costs
Ceramic is one of the more budget-friendly tile materials. As a general estimate, basic 4×4 ceramic field tile often falls in the range of $1 to $5 per square foot for the tile itself, with decorative, hand-glazed, or specialty pieces costing more. Installation adds labor, typically several dollars per square foot depending on your area and the complexity of the layout.
Treat these as rough figures and gather local quotes. Intricate patterns, lots of cuts, and detailed borders raise labor costs compared to a simple stacked field.
Installation and Care Tips
Setting 4×4 tile is achievable for a careful DIYer on a wall, while floors and large showers are better left to a pro. A few fundamentals matter:
- Start with a clean, flat, properly prepared substrate; tile telegraphs every bump beneath it.
- Use the right trowel size and back-butter tiles in wet areas for full coverage.
- Use spacers to keep grout lines consistent across the whole field.
- Let thinset cure before grouting, then seal grout in moisture-prone spots.
Daily care is easy. Wipe glazed ceramic with a mild cleaner, and keep grout lines clean with periodic scrubbing. Reseal cement grout as needed to keep it looking fresh.
Design Ideas to Make 4×4 Tile Feel Fresh
The 4×4 format has a reputation for looking dated, but that comes from uninspired installations, not the tile itself. A few design moves keep it feeling current. Pair a classic white field with a bold contrasting grout to turn the grid into a graphic statement. Mix two or three coordinating colors in a random or gradient pattern for a custom, hand-crafted look that mass-produced tile cannot replicate.
Texture and finish add another dimension. A handmade-look glaze with subtle color variation reads artisan and warm, while a crisp gloss feels clean and modern. Consider these combinations:
- Glossy white squares set on the diagonal for a fresh take on a retro bath.
- Deep green or navy tile with a light grout for a moody, saturated backsplash.
- A gradient of blues or earth tones blended across a feature wall.
- A simple field framed by a contrasting border or pencil trim for definition.
Scale the ambition to the space. A small backsplash is a low-risk place to try a bold color or pattern, while a large bathroom wall benefits from restraint so the grid does not become busy. Thinking about layout, color, and grout together, rather than defaulting to plain white in an offset pattern, is what transforms an ordinary tile into a designed surface that feels intentional and modern.
Is It Right for Your Project?
If you want an affordable, time-tested surface with endless color and pattern options, 4×4 ceramic tile is hard to beat. It works beautifully on backsplashes and walls, adapts to retro or modern styling through layout and grout choices, and forgives a beginner more than tricky large-format slabs. Plan your pattern, pick your grout deliberately, and you will get a durable result that looks intentional for years. Before you order, calculate your square footage, add 10 to 15 percent for cuts and breakage, and confirm the tile is rated for the surface you intend, since wall tile and floor tile are not interchangeable. A dry layout on the floor beforehand reveals exactly how the pattern and any color mix will read, letting you adjust before a single tile is set in mortar.
Prefer to explore on your own?
See how new flooring looks in your actual room in seconds — free, no signup.
Try the free Floor Studio →