Bare gray concrete is a blank slate, and acid staining is how you turn it into something that looks like polished stone or aged leather without laying a single tile. An acid stain concrete floor is created through a chemical reaction, not a coat of paint, which is exactly why the results are so durable and so distinctively mottled. The stain reacts with the lime in the concrete to produce translucent, variegated color that becomes part of the slab itself, giving each floor a one-of-a-kind marbled look no two floors share.
Part of our Epoxy, Concrete & Garage Floors guide — explore the full guide →
I’ve stained garage floors, basements, and open-plan living spaces, and the payoff is a surface that’s tough, low-maintenance, and genuinely beautiful for a fraction of most flooring costs. The catch is that acid staining is unpredictable and permanent; you can’t perfectly preview the outcome, and mistakes are hard to undo. Going in with realistic expectations and solid prep is what separates a stunning floor from a splotchy disappointment.
- How Acid Staining Works
- Pros of an Acid-Stained Concrete Floor
- Cons to Consider
- Cost Per Square Foot
- Step-by-Step How-To
- Sealing and Maintenance
- Is Acid Staining Right for You?
- Tools and Materials You’ll Need
- Temperature, Timing, and Working Conditions
- Common Mistakes to Avoid
- Acid Stain Concrete FAQ
How Acid Staining Works
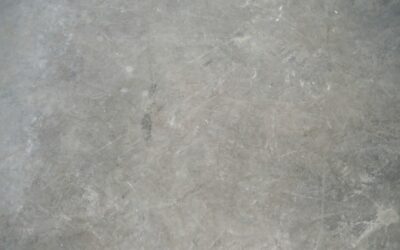
Acid stains are made of metallic salts in an acidic, water-based solution. When applied to concrete, they react chemically with the calcium hydroxide in the slab, depositing color that permanently bonds to the surface. Because the reaction depends on the concrete’s exact composition, moisture, and age, the color develops unevenly in a natural, organic way. That variability is the whole appeal, but it also means you can’t expect a uniform, predictable finish like paint.
Colors are limited compared to dyes, typically earth tones: browns, tans, ambers, and blue-greens. For brighter or more uniform color, water-based dyes are the alternative, but they don’t have the same depth and reactive character.
Pros of an Acid-Stained Concrete Floor
- Extremely durable. The color is part of the slab, so it won’t chip, peel, or fade like paint. Sealed properly, it lasts decades.
- Unique appearance. Every floor is one of a kind, with rich, marbled depth that mimics natural stone.
- Low maintenance. Just sweep and mop. No grout, no refinishing, no replacing planks.
- Affordable. Far cheaper than tile, hardwood, or stone if you already have a concrete slab.
- Works over radiant heat. Great for basements and slabs with in-floor heating.
Cons to Consider
- Unpredictable results. You can’t perfectly control or preview the color; test areas are essential.
- Permanent. Mistakes are very hard to reverse. There’s no undo on a chemical reaction.
- Hard and cold underfoot. Concrete offers no cushion and feels cold without radiant heat or rugs.
- Requires resealing. The sealer wears in high-traffic areas and needs periodic reapplication.
- Shows slab flaws. Cracks, patches, and previous stains telegraph through the translucent color.
Cost Per Square Foot
DIY acid staining runs roughly $2 to $5 per square foot in materials (stain, sealer, neutralizer, supplies). Professional installation ranges from $4 to $15 per square foot depending on prep, number of colors, and decorative techniques like scoring or stencils. Compared to $8 to $25 per square foot for tile or $6 to $12 for hardwood, a stained slab is one of the cheapest attractive floors available, especially when the concrete is already in place.
Step-by-Step How-To
- Clean and prep the slab. Strip any existing sealer, coatings, glue, or paint. The stain must reach bare, porous concrete to react. Grind or use a chemical stripper as needed, then clean thoroughly and let dry.
- Test a hidden area. Apply stain to an inconspicuous spot to preview how your specific slab reacts. This is not optional.
- Mask and protect. Cover walls, baseboards, and anything you don’t want stained. Wear gloves, goggles, and a respirator; you’re working with acid.
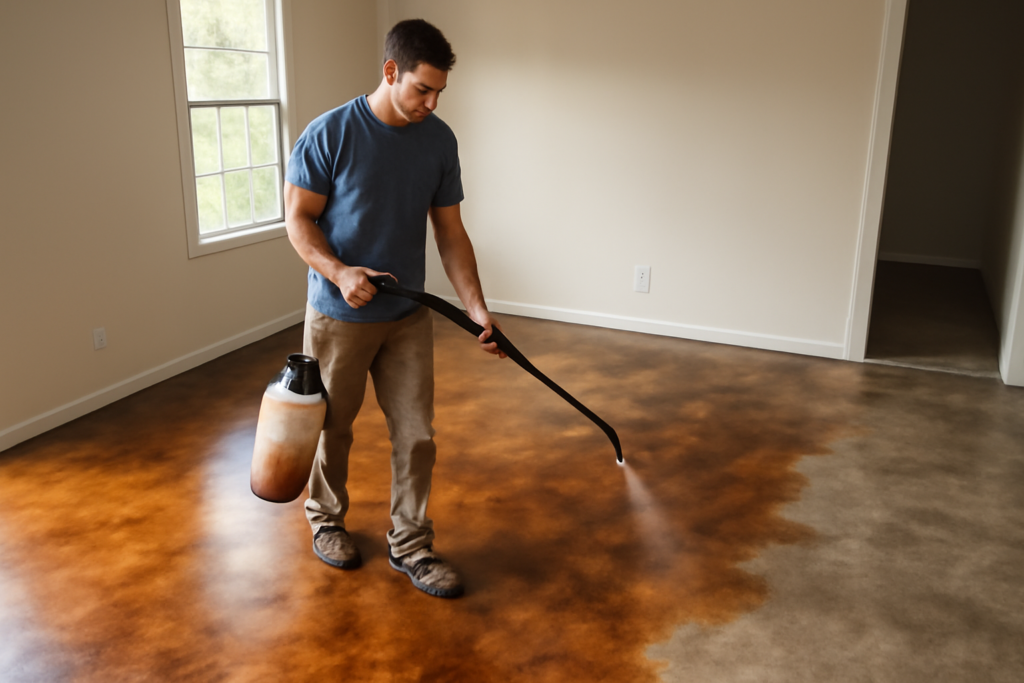
- Apply the stain. Use an acid-resistant sprayer or brush, working in circular, overlapping motions for natural variegation. Avoid hard lines and puddles unless you want them to show.
- Let it react. Allow the stain to work for the time on the label, usually several hours. The color develops as it reacts.
- Neutralize and rinse. Scrub the floor with a baking-soda or ammonia solution to neutralize the acid, then rinse thoroughly until the water runs clear. Residual acid ruins the sealer bond.
- Dry completely. Let the floor dry fully, often 24 hours, before sealing. Trapped moisture clouds the sealer.
- Seal. Apply an acrylic or polyurethane concrete sealer in thin coats. This protects the color and gives the floor its sheen. Add a floor wax on top in high-traffic areas to protect the sealer.
Sealing and Maintenance
The sealer is what makes the stain durable and easy to clean, so don’t skip it or skimp on coats. Acrylic sealers are DIY-friendly and reapply easily; solvent-based options are tougher but need more ventilation. In busy areas, a sacrificial floor wax over the sealer takes the wear and can be reapplied cheaply. Day to day, sweep or dust-mop and clean with a pH-neutral cleaner. Avoid acidic and harsh cleaners that can dull or etch the sealer. Reseal high-traffic zones every few years as the sheen wears.
Is Acid Staining Right for You?
Choose an acid stain concrete floor if you have a decent slab, love the variegated stone look, and want an affordable, ultra-durable floor you can largely maintain yourself. It shines in basements, garages-turned-living-space, patios, and modern open floor plans. Skip it if you need predictable, uniform color, want a warm, cushioned surface, or your slab is badly cracked and patched. Test first, prep obsessively, neutralize thoroughly, and seal well, and you’ll end up with a floor that turns heads and outlasts almost anything else you could put down.
Tools and Materials You’ll Need
Gather everything before you open the stain, because once the reaction starts you don’t want to be running to the store. A typical 400-square-foot room needs about a gallon of stain, and coverage runs roughly 200 to 400 square feet per gallon depending on how porous the slab is and how deep you want the color.
- Acid stain such as Kemiko Stone Tone or SureCrete EcoStain, one to two colors
- All-plastic pump sprayer (acid eats metal parts, so no metal wands or fittings)
- Concrete grinder or chemical stripper for removing old sealer and coatings
- Baking soda or ammonia plus a stiff-bristle broom for neutralizing
- Wet/dry vacuum to pull up the rinse water and residue
- Acrylic or polyurethane concrete sealer plus a wax topcoat for traffic areas
- Respirator, chemical gloves, and goggles — this is acid, not paint
Temperature, Timing, and Working Conditions
Stain reacts best between 55°F and 90°F. Below 50°F the reaction crawls and color comes out weak; above 90°F, especially in direct sun, the stain flashes off before it can react and you get pale, blotchy results. Aim for a mild, overcast day if you’re working outdoors, and shade a garage door opening if the afternoon sun is blasting in.
Budget a realistic timeline. Prep and stripping can take a full day on a dirty slab. Staining itself is a few hours, followed by a several-hour reaction, then neutralizing and a 24-hour dry before sealing. Most single-color jobs span two to three days start to finish, and rushing the dry time before sealing is the number-one cause of a cloudy, hazy floor.
Common Mistakes to Avoid
- Staining over sealer or curing compound. If water beads on the slab, the stain can’t react. Strip and grind until water soaks in.
- Skipping the test spot. Every slab reacts differently. A hidden test patch tells you the real color before you commit the whole floor.
- Leaving spray lines and puddles. Hard edges telegraph through the finish. Keep the sprayer moving in circular, overlapping passes.
- Under-neutralizing. Residual acid wrecks the sealer bond and leaves a chalky film. Scrub, rinse, and check that the water runs clear.
- Sealing too soon. Trapped moisture clouds the sealer white. Give it a full 24 hours, longer in humidity.
Acid Stain Concrete FAQ
How long does an acid-stained floor last? The color is permanent because it’s a chemical reaction in the slab, so it never chips or peels. What wears is the sealer on top, which typically needs a fresh coat every two to four years in busy areas and less often in a bedroom or low-traffic space.
Can I stain an old or exterior slab? Yes, and older concrete often takes stain beautifully because it’s fully cured. Just clean it hard, patch major cracks knowing the repairs will show, and make sure no sealer or paint is blocking the surface.
Is it slippery once sealed? A glossy sealer can get slick when wet. For bathrooms, entries, or pool decks, add a fine anti-slip grit like Shark Grip to the final sealer coat for traction without changing the look.
Prefer to explore on your own?
See how new flooring looks in your actual room in seconds — free, no signup.
Try the free Floor Studio →