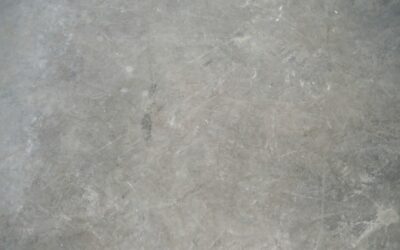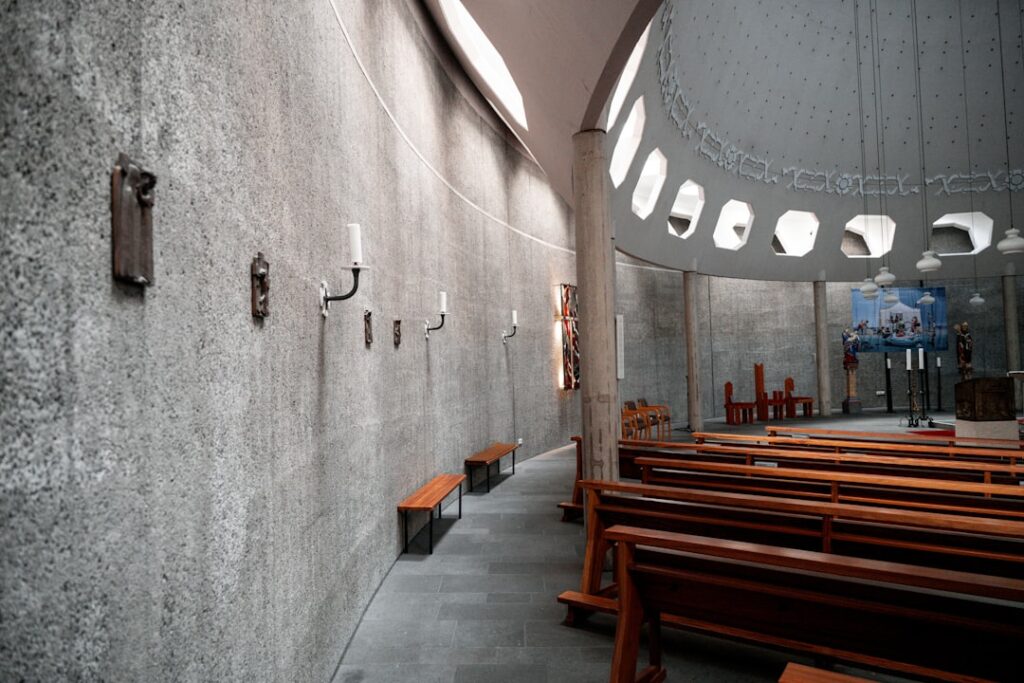
Staining concrete transforms a plain gray slab into a richly colored, decorative floor at a fraction of the cost of most flooring materials. Whether you are finishing a basement, upgrading a garage, or creating an industrial-chic living space, learning how to stain concrete opens up a world of design possibilities — from mottled earth tones with acid stain to bold, consistent colors with water-based options.
This guide covers everything about how to stain concrete — the difference between acid and water-based stains, surface preparation, step-by-step application, neutralizing and sealing, available colors, indoor vs outdoor considerations, cost, DIY difficulty, and how stained concrete compares to epoxy and paint.
- Acid Stain vs Water-Based Stain
- Available Colors
- Surface Preparation: The Most Important Step
- How to Apply Acid Stain: Step-by-Step
- How to Apply Water-Based Stain: Step-by-Step
- Sealing Stained Concrete
- Indoor vs Outdoor Concrete Staining
- Cost Breakdown
- DIY Difficulty Assessment
- Stained Concrete vs Epoxy vs Paint
- Maintenance of Stained Concrete
- Frequently Asked Questions
Acid Stain vs Water-Based Stain
The two main types of concrete stain produce dramatically different results. Understanding the difference is critical to achieving the look you want.
| Characteristic | Acid Stain | Water-Based Stain |
|---|---|---|
| Chemistry | Hydrochloric acid + metallic salts | Acrylic polymer + pigments |
| How it works | Chemical reaction with concrete minerals | Deposits pigment on/in the surface |
| Appearance | Mottled, marbled, natural variation | More uniform, consistent color |
| Color range | Limited — earth tones (tans, browns, blue-green, black) | Wide — virtually any color available |
| Predictability | Low — results vary with concrete composition | High — color is more consistent and predictable |
| Permanence | Permanent chemical change — cannot be removed | Semi-permanent — can be worn or stripped over time |
| Safety concerns | Corrosive acid — requires PPE, ventilation | Low VOC — water cleanup, minimal hazard |
| Requires neutralizing | Yes — must neutralize acid after staining | No |
| DIY difficulty | Moderate to difficult | Easy to moderate |
| Cost (material) | $0.15 – $0.40 per sq ft | $0.10 – $0.30 per sq ft |
Acid stain produces a one-of-a-kind look because it chemically reacts with the lime and minerals in the concrete. The metallic salts (typically iron, copper, or manganese compounds) in the stain penetrate the concrete surface and create permanent color through a chemical reaction. This reaction produces rich, mottled, variegated tones that mimic natural stone. No two acid-stained floors look identical, even when using the same product — the variation depends on the concrete’s composition, age, and moisture content.
Water-based stain works more like traditional paint or dye. The acrylic-polymer binder carries pigment particles into the concrete pores, where they bond to the surface. The result is more uniform and predictable than acid stain, with a much wider range of available colors. Water-based stain is easier to apply, requires no acid neutralization, cleans up with water, and produces fewer fumes — making it the more DIY-friendly option.
Available Colors
Acid Stain Colors
Acid stain colors are limited to earth tones and metallics because the color comes from chemical reactions with metallic salts, not from pigment. The core palette includes:
- Tan / Desert gold — warm sandy tones
- Cola / English red — reddish-brown, terra cotta
- Coffee brown / Antique brown — deep rich brown
- Malayan buff — warm amber-brown
- Azure blue / Turquoise — blue-green copper tones
- Black — deep charcoal to near-black
- Green patina — verdigris-like copper green
Acid stain colors can be layered and blended on the concrete surface to create custom looks. Applying a lighter color first and layering a darker color on top creates depth and complexity that is impossible with single-color application.
Water-Based Stain Colors
Water-based stains are available in virtually any color, from natural earth tones to bold primaries, pastels, and custom-mixed shades. Popular choices for concrete flooring include:
- Warm grays — the most popular choice for modern interiors
- Charcoal / Graphite — deep, sophisticated dark floors
- Terracotta / Burnt sienna — warm Mediterranean tones
- Sandstone / Buckskin — neutral warm tones
- White / Cream wash — light, coastal feel
- Custom colors — can be mixed to match any design palette
Surface Preparation: The Most Important Step
Preparation is the single most important factor in a successful concrete staining project. Stain will not penetrate properly through dirt, grease, sealers, paint, or other contaminants. Every imperfection and stain on the bare concrete will show through the finished product — there is no hiding defects under concrete stain.
Step 1: Clean Thoroughly
Remove all dirt, dust, grease, oil, and adhesive residue from the concrete surface. Use a degreaser for oil stains, a scraper for adhesive residue, and a pressure washer or heavy-duty floor scrubber for general cleaning. The concrete must be completely clean and free of contaminants.
Step 2: Repair Cracks and Damage
Fill cracks with a concrete patching compound and allow it to cure fully. Note that patched areas will absorb stain differently than the surrounding concrete, creating visible differences in the finished floor. For acid stain projects, repaired areas almost always show as lighter spots. Plan for this or use patching as a design feature.
Step 3: Remove Existing Sealers or Coatings
Stain cannot penetrate through existing sealers, paint, or coatings. These must be completely removed by grinding, chemical stripping, or shot-blasting. Water drop test: sprinkle water on the concrete — if it beads up or sits on the surface rather than absorbing within 30 seconds, there is a sealer or coating that must be removed.
Step 4: Etch the Surface (If Needed)
New or very smooth concrete may need etching to open the pores for stain penetration. Apply a concrete etching solution (phosphoric or muriatic acid diluted per directions), scrub with a stiff bristle broom, and rinse thoroughly. The surface should feel like fine sandpaper after etching. Allow to dry completely before staining.
Step 5: Protect Surrounding Areas
Mask walls, baseboards, cabinets, and any surface you do not want stained. Acid stain in particular is extremely difficult to remove from unintended surfaces. Use plastic sheeting and quality painter’s tape for thorough protection.
How to Apply Acid Stain: Step-by-Step
Safety first: Acid stain is corrosive. Wear chemical-resistant gloves, eye protection, rubber boots, and a respirator with acid-gas cartridges. Ensure adequate ventilation — open all windows and use fans for indoor applications.
Step 1: Dampen the Surface
Lightly mist the concrete with clean water. The surface should be damp but not puddled. A damp surface helps the acid stain spread evenly and prevents it from concentrating in dry spots, which creates blotchy results.
Step 2: Apply the Stain
Using a pump sprayer with acid-resistant components (not metal), apply the acid stain in a circular, overlapping motion. Work in sections, maintaining a wet edge to avoid lap marks. Apply a thin, even coat — heavy application does not deepen the color and can cause pooling and uneven results.
Step 3: Let It React
Allow the acid stain to react with the concrete for 4 to 24 hours, depending on the product and the desired color intensity. You will see the surface start to change color and develop a slight fizzing action — this is the chemical reaction occurring. Do not disturb the surface during this time.
Step 4: Neutralize the Acid
After the reaction is complete, the residual acid must be neutralized before sealing. Mix a solution of baking soda and water (1 tablespoon per gallon) or use a commercial acid neutralizer. Apply with a mop, scrub lightly, and let it fizz. Rinse thoroughly with clean water and allow to dry completely. This step is critical — unresolved acid residue will prevent sealer from bonding properly.
Step 5: Remove Residue
After neutralizing, there will be a chalky residue on the surface. Mop the floor with clean water, scrubbing gently, and vacuum or mop up the dirty water. Repeat until the rinse water runs clear. Allow the floor to dry for 24 hours before sealing.
How to Apply Water-Based Stain: Step-by-Step
Water-based stain is significantly easier to apply than acid stain. No neutralization is needed, cleanup is simple, and the process is more forgiving.
Step 1: Ensure Surface Is Clean and Dry
The concrete should be clean, dry, and free of sealers (same preparation as acid stain). Water-based stain can be applied to dry concrete — dampening is not required.
Step 2: Apply the First Coat
Using a pump sprayer, paint pad, roller, or brush, apply a thin, even coat of stain. Work in sections and maintain a wet edge. Water-based stain dries quickly, so work efficiently to avoid lap marks. Apply in two or more thin coats rather than one heavy coat for the best results.
Step 3: Allow to Dry
Let the first coat dry for 2 to 4 hours (check product label). The surface should be dry to the touch before applying additional coats.
Step 4: Apply Additional Coats
Apply a second (and if desired, third) coat in the same manner. Each coat deepens the color and improves coverage uniformity. Apply subsequent coats in different directions (perpendicular to the previous coat) for the most even results.
Step 5: Dry and Seal
Allow the final coat to dry for 24 hours, then apply sealer (see sealing section below).
Sealing Stained Concrete
Sealing is essential for both acid-stained and water-based stained concrete. Without a sealer, the stain will fade, wear, and be vulnerable to stains and moisture penetration. The sealer also provides the final sheen level — matte, satin, or high gloss.
| Sealer Type | Sheen | Durability | Best For | Cost |
|---|---|---|---|---|
| Acrylic sealer | Satin to high gloss | 1 – 3 years (reapply) | Indoor/outdoor, DIY-friendly | $0.10 – $0.30 per sq ft |
| Epoxy sealer | High gloss | 5 – 10 years | Indoor, high traffic | $0.30 – $0.80 per sq ft |
| Polyurethane sealer | Satin to high gloss | 5 – 10 years | Indoor, maximum durability | $0.30 – $0.75 per sq ft |
| Polyaspartic sealer | High gloss | 10 – 15 years | Garage, commercial | $0.50 – $1.00 per sq ft |
For most residential stained concrete floors, a water-based acrylic sealer in satin sheen is the most popular choice. It is easy to apply, low odor, dries quickly, and is easy to recoat when it wears. For higher-traffic areas or maximum durability, a polyurethane sealer provides superior abrasion resistance.
Apply sealer in two thin coats with a roller or sprayer, allowing the first coat to dry completely before applying the second. Two thin coats provide better adhesion and appearance than one thick coat.
Indoor vs Outdoor Concrete Staining
| Consideration | Indoor | Outdoor |
|---|---|---|
| Stain type | Acid or water-based both work | Acid stain preferred (more permanent) |
| UV exposure | Minimal concern | UV-stable sealer required; colors may fade over time |
| Moisture | Sealed surface protects adequately | Sealer must be UV and weather resistant |
| Slip resistance | Standard sealer is fine | Add anti-slip additive to sealer or use textured finish |
| Sealer type | Acrylic, epoxy, or polyurethane | UV-stable acrylic or polyurethane only |
| Resealing frequency | Every 2 – 5 years | Every 1 – 3 years (higher exposure) |
Outdoor concrete staining works well for patios, pool decks, walkways, and garage floors that are protected from direct rain. Acid stain is generally preferred for outdoor use because its chemical reaction creates permanent color that cannot be worn off by weather or UV exposure — though the sealer on top will need periodic renewal.
For outdoor projects, always add an anti-slip additive to the final sealer coat. Stained and sealed concrete can be extremely slippery when wet, creating a safety hazard. Fine aluminum oxide or polymer grit mixed into the sealer creates traction without significantly affecting appearance.
Cost Breakdown
Staining concrete is one of the most cost-effective flooring options available, especially when working with an existing slab.
| Cost Component | DIY Cost (per sq ft) | Professional Cost (per sq ft) |
|---|---|---|
| Concrete stain (acid) | $0.15 – $0.40 | Included |
| Concrete stain (water-based) | $0.10 – $0.30 | Included |
| Sealer (2 coats) | $0.20 – $0.60 | Included |
| Prep materials (etcher, cleaner, tape) | $0.10 – $0.25 | Included |
| Tools (sprayer, roller, PPE) | $50 – $150 total | N/A |
| Total DIY | $0.50 – $1.50 | — |
| Total professional | — | $2 – $8 |
For a 500-square-foot area, a DIY staining project typically costs $250 to $750 for materials and tools. Professional staining for the same area runs $1,000 to $4,000, depending on the complexity of the design, number of colors, and amount of prep work needed.
Compared to other flooring options, stained concrete is exceptionally affordable. At $2 to $8 per square foot installed, it costs less than most hardwood, tile, and even quality LVP options while delivering a unique, custom look.
DIY Difficulty Assessment
| Stain Type | DIY Difficulty | Key Challenges |
|---|---|---|
| Water-based stain | Easy to moderate | Even application, avoiding lap marks |
| Acid stain | Moderate to difficult | Safety (acid handling), neutralizing, unpredictable results |
| Multi-color / decorative | Difficult | Pattern creation, color blending, taping designs |
Water-based stain is a very achievable DIY project for homeowners comfortable with basic home improvement. The process is similar to painting — clean, apply, dry, seal. The results are predictable and the materials are safe and easy to work with.
Acid stain requires more caution and skill. The corrosive acid demands proper safety equipment and handling. The results are inherently unpredictable — the final color depends on the concrete’s unique composition and cannot be perfectly controlled. First-time acid stainers should practice on a test slab or inconspicuous area before tackling the main floor.
Stained Concrete vs Epoxy vs Paint
| Feature | Concrete Stain | Epoxy Coating | Concrete Paint |
|---|---|---|---|
| Appearance | Natural, translucent, variegated | Solid color, metallic, or flake | Solid, opaque color |
| Durability | Good (depends on sealer) | Excellent | Fair (chips, peels over time) |
| Thickness | Penetrates — no added thickness | Adds 10–20 mils | Adds 2–5 mils |
| Cost (per sq ft) | $2 – $8 installed | $3 – $12 installed | $1 – $3 installed |
| Moisture resistance | Moderate (sealer-dependent) | High (seamless barrier) | Low (peels with moisture) |
| Longevity | 10 – 20 years (with resealing) | 15 – 25 years | 2 – 5 years |
| DIY friendly | Yes (water-based) | Moderate | Yes |
| Best for | Living spaces, patios, decorative | Garages, basements, commercial | Budget temporary solution |
Concrete stain is the best choice when you want to preserve the natural texture and feel of concrete while adding color. It does not peel, chip, or flake because the color is in the concrete, not on top of it.
Epoxy is the better choice when maximum durability, moisture resistance, and a thick protective layer are needed — particularly for garages and high-traffic commercial spaces.
Concrete paint is the budget option but has the shortest lifespan. It sits on the surface, which means it chips, peels, and wears off with traffic. Paint is best for temporary solutions or low-traffic areas where appearance is not critical.
Maintenance of Stained Concrete
- Dust mop or sweep daily — grit and sand act as abrasives on the sealer
- Damp mop weekly — use a pH-neutral cleaner; avoid acidic or harsh chemicals
- Clean spills promptly — especially acidic substances (wine, vinegar, citrus) that can etch the sealer
- Reseal on schedule — acrylic sealer every 1–3 years; polyurethane every 3–5 years
- Use furniture pads — prevent scratching and abrasion from furniture legs
- Place mats at entryways — reduces grit tracked onto the floor
Frequently Asked Questions
Can you stain old concrete?
Yes, old concrete can be stained as long as the surface is clean and free of sealers, paint, or coatings. Old concrete often produces the most interesting results with acid stain because decades of mineral deposits create unique color variation. Thorough cleaning and possible etching are required for proper stain penetration.
How long does concrete stain last?
Acid stain creates a permanent chemical change in the concrete that lasts the life of the slab. Water-based stain is semi-permanent and can wear in high-traffic areas over 5 to 15 years. In both cases, the sealer on top determines the practical lifespan — reseal every 1 to 5 years depending on traffic and sealer type.
Is stained concrete slippery?
Stained and sealed concrete can be slippery, especially when wet. For areas that may get wet (entryways, kitchens, outdoor patios), add a non-slip additive to the final sealer coat. This creates traction without significantly affecting the appearance of the stained floor.
Can you stain concrete that has been painted?
The paint must be completely removed before staining. Concrete stain (especially acid stain) needs to penetrate the bare concrete surface to work. Grinding, chemical stripping, or shot-blasting can remove old paint. Any remaining paint residue will block the stain and create blotchy, inconsistent results.
What is the cheapest way to stain concrete?
A DIY project using water-based concrete stain is the most affordable approach. Materials (stain, sealer, etcher, and basic tools) cost $0.50 to $1.50 per square foot. For a 500-square-foot garage or basement, the total material cost is typically $250 to $750 — making it one of the most affordable flooring transformations available.
Does acid stain concrete look the same on every slab?
No. Acid stain reacts with the unique mineral composition of each concrete slab, so the results vary from slab to slab. Age, curing conditions, mix design, and prior treatments all affect the final color. This unpredictability is part of acid stain’s appeal — each floor is one of a kind — but it means you cannot precisely match a color sample or photo.
Can you stain concrete in a basement?
Yes, basement concrete staining is a popular and effective flooring solution. Ensure the slab is dry and free of moisture vapor before staining (conduct a moisture test). Use water-based stain for easier, low-odor application in the enclosed space. Acid stain can be used but requires excellent ventilation due to fumes. Always seal the finished floor to protect against moisture from below.