Bare concrete in a garage is a magnet for oil stains, dust, and hairline cracks that spread every winter. Coating that slab is one of the smartest upgrades a homeowner can make, and an acrylic garage floor is often the fastest, most budget-friendly way to get there. Unlike a full epoxy system that ties up your garage for days, an acrylic coating can go down over a weekend and have you parking on it again by Monday. Here is exactly what acrylic delivers, where it falls short, and how to apply it so it actually lasts.
Part of our Epoxy, Concrete & Garage Floors guide — explore the full guide →
Let’s cover what acrylic coatings are, what they cost, how they stack up against epoxy and polyaspartic, and the step-by-step process to get a finish you won’t regret.
What Is an Acrylic Garage Floor Coating
Acrylic is a water- or solvent-based resin that dries into a thin, breathable film over concrete. It’s the same broad chemistry family behind many exterior paints, engineered specifically for floors. Because it’s thinner than epoxy — typically 2 to 4 mils dry versus epoxy’s 10-plus mils — it goes on fast, cures fast, and lets the slab breathe, which matters if your concrete tends to hold moisture.
You’ll find it sold as concrete floor paint, acrylic sealer, and elastomeric coatings. The trade-off for that speed and low cost is durability. Acrylic won’t stand up to the same abuse as a thick two-part epoxy, but for many homeowners who mostly want a clean, sealed, better-looking floor, it hits the sweet spot.
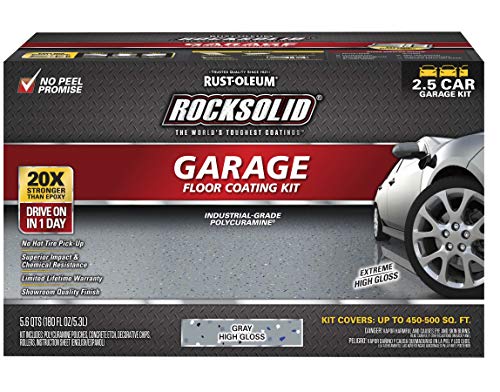
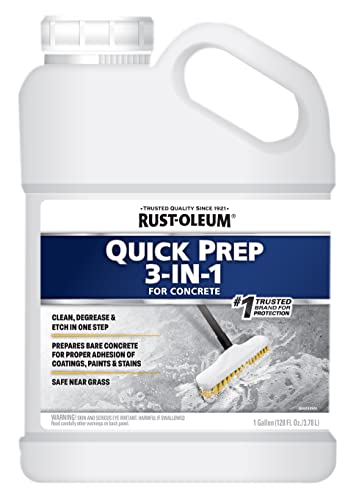

If you’re running out of room even with a clean garage floor, a backyard shed takes the overflow — seasonal gear, tools, lawn equipment. And if you’re parking outside while the garage doubles as a workshop, a carport keeps your car covered without needing a second garage.
We may earn a commission when you purchase through our links.
Cost of an Acrylic Garage Floor
Price is where acrylic really wins. It’s one of the most affordable ways to transform a concrete slab, whether you DIY or hire out.
- DIY materials: $0.50 to $1.50 per square foot for the coating, plus cleaner, etcher, and rollers
- Professional installation: $2 to $5 per square foot all-in
- Typical two-car garage (400 to 500 sq ft): $200 to $750 for a DIY job, $800 to $2,500 professionally installed
Compare that to a professional epoxy floor at $4 to $9 per square foot or polyaspartic at $5 to $12, and you can see why acrylic stays popular with cost-conscious homeowners. Just factor in that you may need to recoat every 2 to 4 years, which affects the long-term math.
Acrylic vs. Epoxy vs. Polyaspartic
Choosing a garage coating comes down to how you actually use the space. Here’s an honest side-by-side of the three most common options.
Acrylic
Cheapest and fastest, cures in 24 hours, breathes well over damp slabs, and touches up easily. But it’s the least durable — it scratches, wears in tire paths, and can soften under hot tires that sit parked all day. Best for light-duty garages, workshops, and basements.
Epoxy
Thick, hard, and chemical-resistant with a glossy showroom finish. It handles dropped tools and oil far better than acrylic but takes 3 to 7 days to fully cure, can peel if the slab wasn’t prepped right, and yellows in direct sun. A solid middle-ground for most home garages.
Polyaspartic
The premium choice — UV-stable, cures in hours even in cold weather, and outlasts both others by years. It also costs the most and usually requires professional installation because the working time is so short.
How to Apply an Acrylic Garage Floor
The finish lives and dies on prep. As a rule, 80 percent of the job is cleaning and etching, and 20 percent is rolling on the coating. Skip the prep and it will peel no matter how good the product is.
- Clear and clean: Empty the garage and sweep, then degrease with a concrete cleaner. Scrub out every oil spot — coating won’t bond over grease.
- Etch or grind: Apply an acid or citric etcher to open the concrete pores, or rent a grinder for a stronger bond. Rinse thoroughly and let it dry.
- Test for moisture: Tape a 2-by-2-foot plastic sheet to the slab overnight. Condensation underneath means the slab is too damp to coat — fix drainage first.
- Repair cracks: Fill cracks and spalls with a concrete patch and let them cure per the label.
- Prime if specified: Some acrylic systems call for a primer coat; follow the manufacturer.
- Roll the first coat: Cut in edges with a brush, then roll the main field with a 3/8-inch nap roller in thin, even passes.
- Recoat: Let the first coat dry 4 to 8 hours, then apply a second. Broadcast anti-slip grit into the final coat if the floor gets wet.
- Cure before use: Walk on it after 24 hours; wait 48 to 72 hours before parking a car.
Work when the slab and air temperature sit between 50 and 90 degrees Fahrenheit, and keep humidity moderate. Coating in the cold or the damp is the fastest way to a peeling floor.
Durability and What to Expect
Set realistic expectations and you’ll be happy with an acrylic garage floor. It resists dust, water, and mild chemicals well, cleans up with a mop, and brightens a dingy garage instantly. What it won’t do is shrug off dragged toolboxes, dropped wrenches, or a hot tire parked in the same spot every afternoon.
In a typical home garage, expect 2 to 4 years before the high-traffic tire lanes start to thin and you’ll want a fresh coat. The upside is that recoating is genuinely easy — a light scuff, a clean, and a fresh coat, no full teardown. Many homeowners are fine with that maintenance rhythm given how little each recoat costs.
Maintenance Tips to Extend the Life
A little routine care stretches the years between recoats considerably. These habits keep the surface looking sharp.
- Sweep or dust-mop weekly to keep grit from grinding into the finish.
- Wipe spills promptly — oil, gas, and brake fluid can soften acrylic if they sit.
- Use furniture pads or plywood under jack stands and heavy tool chests to spread the load.
- Park on a mat if you have a hot-tire pickup problem; it protects the high-stress zones.
- Rinse and mop a few times a year with a mild cleaner — never harsh solvents.
Common Mistakes to Avoid
Most acrylic floor failures trace back to a handful of avoidable errors, and knowing them ahead of time saves you a peeling mess six months down the road. The number one culprit is coating over a slab that wasn’t cleaned or etched properly. Concrete looks clean to the eye but holds a slick, closed surface that coating simply can’t grip without etching or grinding first.
The second big mistake is ignoring moisture. A slab on grade without a vapor barrier can wick water up from below, and that moisture pushes the coating right off the surface in bubbles and flakes. Always run the plastic-sheet test before you open a single can. The third error is applying the coating too thick in one pass to save time — thick acrylic traps solvent, stays tacky, and never fully hardens. Thin, even coats always outperform one heavy one.
Finally, plenty of homeowners park a car on the floor far too soon. The surface may feel dry to the touch in a day, but the coating keeps curing and hardening for several more. Drive on it early and hot tires will lift the finish. Patience through that first 72 hours protects everything you just paid for.
Is an Acrylic Garage Floor Right for You
Weigh your priorities honestly. If you want the toughest, longest-lasting finish and don’t mind the cost or the wait, epoxy or polyaspartic makes more sense. But if your goal is a clean, sealed, better-looking garage on a tight budget and a tight timeline, acrylic is hard to beat.
For light-to-moderate use, a well-prepped acrylic garage floor gives you a genuine upgrade for a fraction of the price, and the easy recoat process means you’re never locked into an expensive redo. Nail the prep, coat in the right conditions, and keep up with simple maintenance — do that, and your garage floor will look sharp and stay protected for years to come.