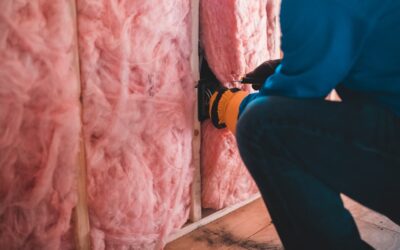
Old insulation is easy to ignore because it lives out of sight — but the moment it becomes contaminated by rodents, soaked by a roof leak, or coated in mold, it turns from an asset into a liability. Attic insulation removal clears out that compromised material so fresh insulation can restore your home’s energy efficiency and indoor air quality. It is a dusty, physically demanding job with real health hazards, which is why understanding the process, the gear, and the true costs matters before you decide to DIY or hire out.
- When Insulation Actually Needs to Go
- Blown-In vs. Batt Removal
- The Vacuum Removal Method
- Essential Safety Gear
- Handling Contaminated Insulation
- Preparing the Attic and Your Home
- Disposal and What It Costs to Haul Away
- What Comes After Removal
- What Attic Insulation Removal Costs
- Should You DIY or Hire It Out?
When Insulation Actually Needs to Go
Not all old insulation needs removal. Perfectly good fiberglass can last 80 to 100 years. Removal makes sense only under specific conditions, and knowing them saves you from an unnecessary and grueling project:
- Rodent infestation: Mice and rats leave droppings, urine, and nesting material that harbor bacteria and odor.
- Water damage: Wet insulation loses its R-value and breeds mold — a roof leak often ruins the batting below it.
- Mold growth: Visible mold means the material is a health hazard and must come out.
- Age and settling: Insulation that has compressed or degraded no longer insulates effectively.
- Renovation access: Rewiring or adding ductwork sometimes requires clearing the attic.
If your insulation is dry, clean, and pest-free, you are usually better off simply adding more on top rather than removing what is there.
Blown-In vs. Batt Removal
The type of insulation dramatically changes the difficulty. Loose-fill blown insulation — cellulose or fiberglass — is the messiest to remove because it is thousands of loose particles blanketing the attic floor and settling into every joist bay. It requires an industrial insulation vacuum to extract efficiently.
Batt and roll insulation, by contrast, can be rolled up, bagged, and carried out by hand. It is still dusty and awkward in a cramped attic, but no special equipment is needed. Knowing which you have tells you whether you can DIY with basic tools or need a rented vacuum.
The Vacuum Removal Method
For blown-in insulation, professionals use a gas-powered insulation vacuum with a long hose fed into the attic. The machine sucks loose fill through the hose and deposits it into large disposal bags outside. A homeowner can rent a comparable unit for roughly $200 to $400 per day, though the machines are large and often trailer-mounted.
Feed the hose across the attic methodically, working from the far corners back toward the access hatch so you never have to walk back through cleared areas. The vacuum handles the bulk, but you will still need to hand-clean corners, wipe down joists, and bag the last debris the hose cannot reach.
Essential Safety Gear
This is not a job to do in a t-shirt. Attics trap heat, insulation fibers irritate skin and lungs, and contaminated material carries biological hazards. Protect yourself with:
- An N95 or, for contaminated attics, a P100 respirator
- Full-coverage disposable coveralls, gloves, and eye protection
- Knee pads and sturdy boots for moving across joists
- Plenty of water and breaks — attic temperatures can exceed 120°F in summer
Never step between joists onto the ceiling drywall. It will not hold your weight, and you will end up putting a foot through the room below. Lay plywood planks across the joists to create safe walking paths.
Handling Contaminated Insulation
Rodent-soiled or moldy insulation is a health hazard beyond the fiber irritation. Rodent droppings can carry hantavirus, and mold spores aggravate respiratory conditions. Mist the material lightly before removal to keep spores and particles from going airborne, and double-bag everything in heavy contractor bags.
After removal, sanitize the attic. Vacuum the joist bays, then treat exposed surfaces with an appropriate disinfectant to kill lingering bacteria and mold. If rodents were the cause, seal every entry point before installing new insulation — otherwise the problem simply returns and ruins the fresh material.
Preparing the Attic and Your Home
Good preparation makes the difference between a controlled job and a mess that spreads through your whole house. Before you start, lay down plastic sheeting or drop cloths along the path from the attic hatch to the exterior door so falling debris and dust don’t grind into your carpet and floors. Seal off the attic access opening with plastic when you take breaks to keep airborne fibers from drifting down into living spaces.
Set up your disposal staging outside near the access point — heavy contractor bags, a wheelbarrow, or a rented dumpster depending on the volume. Blown-in insulation from an average attic can fill dozens of bags, so having a clear, close path to your disposal container saves countless trips. Also confirm your attic has adequate lighting; a clip-on work light or headlamp beats fumbling in the dark across joists, and good visibility keeps you safely on the framing rather than stepping through the ceiling.
Disposal and What It Costs to Haul Away
Getting the old material out of the attic is only half the battle — you still have to dispose of it. Clean, uncontaminated fiberglass or cellulose can usually go to a standard landfill or transfer station, with dump fees typically running $30 to $80 depending on volume and your local rates. Bag it tightly so loose fill does not blow around during transport.
Contaminated insulation is a different matter. Material soiled by rodents, soaked by water, or laced with mold may be classified as hazardous or biohazardous waste in some jurisdictions, requiring special handling and higher disposal fees. Check with your local waste authority before hauling it, and double-bag contaminated material to prevent leakage. Many professional removal companies include disposal in their quote, which is one of the conveniences you pay for when hiring out a contaminated job.
What Comes After Removal
Empty joist bays are only a temporary state — bare attics leak enormous amounts of energy, so plan the next step before you even finish removing the old material. Once the attic is clear and sanitized, this is the ideal window to air-seal the ceiling plane: caulk and foam around plumbing penetrations, wiring holes, and the attic hatch while everything is exposed and accessible. You will never have easier access than right now.
With air sealing done, install fresh insulation to the recommended R-value for your climate — typically R-38 to R-60 in most of the country. If rodents were the reason for removal, this is also the moment to seal every entry point they used, from gaps around vents to gaps where utility lines enter. Skip that step and the new insulation you just paid for becomes the next infestation’s nesting material within a season.
What Attic Insulation Removal Costs
DIY removal costs mainly the equipment rental and disposal. Budget $200 to $400 for a vacuum rental, plus dump fees for the bagged material, landing most DIY jobs between $300 and $600 in out-of-pocket costs — plus a long, hot day of labor.
Hiring a professional typically runs $1 to $2 per square foot for standard removal, or $1,500 to $3,000 for an average attic. Contaminated or moldy attics cost more because of the extra containment, sanitizing, and hazardous disposal — sometimes $2 to $4 per square foot. Given the health risks and physical demands, many homeowners find the pro price worth every dollar.
Should You DIY or Hire It Out?
Batt insulation in a clean, accessible attic is a reasonable DIY project if you have the gear and stamina. Blown-in insulation, contaminated material, or a tight, hard-to-reach attic tilts strongly toward hiring professionals who have the vacuum equipment, containment protocols, and disposal channels ready to go.
Whatever route you choose, do not leave the attic empty for long. Bare joists mean sky-high energy bills, so plan the new insulation installation to follow removal closely. Done right — old material out, entry points sealed, surfaces sanitized, and fresh insulation in — the project restores both your comfort and your home’s efficiency for decades to come.