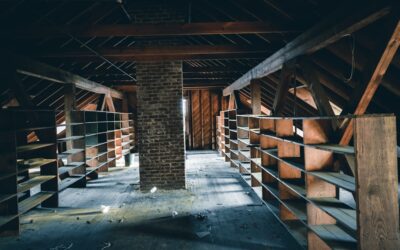
Poor attic ventilation silently destroys roofs from the inside out. Trapped heat and moisture warp sheathing, accelerate shingle aging, and create conditions for mold and ice dams. This attic ventilation guide covers the systems that keep your attic dry and your roof lasting its full lifespan, whether you are troubleshooting an existing problem or planning ventilation for new construction.
Why Attic Ventilation Matters
During summer, an unventilated attic can reach 150 to 160 degrees Fahrenheit, radiating heat into the living space below and forcing your AC to work overtime. In winter, warm moist air rising from the house condenses on cold roof sheathing, leading to wood rot and mold. Ice dams form when attic heat melts snow on the upper roof, which refreezes at the colder eaves and backs water under shingles.
Proper ventilation creates a continuous airflow path: cool outside air enters through intake vents at the eaves, rises as it warms, and exits through exhaust vents near the ridge. This convective loop keeps the attic temperature closer to the outdoor temperature, which is exactly what you want in both summer and winter. The Department of Energy and most shingle manufacturers require adequate ventilation to maintain warranty coverage.
The 1:150 and 1:300 Rules
Building codes specify the ratio of net free vent area (NFA) to attic floor area. The baseline rule is 1 square foot of NFA for every 150 square feet of attic floor (1:150 ratio). If you have a vapor barrier on the warm side of the ceiling insulation and balance intake and exhaust within 10% of each other, you can use the less restrictive 1:300 ratio.
For a 1,500-square-foot attic using the 1:300 ratio, you need 5 square feet (720 square inches) of total NFA, split roughly 50/50 between intake and exhaust. In practice, slightly more intake than exhaust (60/40 split) is ideal because positive pressure in the attic prevents conditioned air from being sucked up through ceiling penetrations.
Soffit Vents: The Intake Foundation
Soffit vents mounted in the eave overhang provide the intake half of the ventilation equation. Three common styles serve different soffit constructions. Continuous strip vents run the full length of the soffit and provide the most NFA per linear foot, typically 9 to 12 square inches per foot. Individual rectangular vents (8×16 inches) install in cutouts between rafter tails and work well for retrofits. Perforated soffit panels replace entire sections of the soffit material with vented aluminum or vinyl panels.
The most common soffit vent mistake is blocking them with insulation. When blown-in or batt insulation extends to the eave, it covers the soffit vent opening and kills airflow. Install polystyrene or cardboard rafter baffles (also called insulation baffles or vent chutes) in every rafter bay from the soffit to at least 2 feet above the top plate. These $1 to $2 channels maintain the air gap between insulation and roof sheathing that makes the entire ventilation system work.
Ridge Vents: The Preferred Exhaust
Ridge vents run along the peak of the roof, providing exhaust ventilation across the entire ridge line. Because hot air naturally rises to the highest point in the attic, ridge vents work with physics rather than against it. A typical shingle-over ridge vent like the GAF Cobra or Air Vent ShingleVent II provides 18 square inches of NFA per linear foot and blends into the roofline invisibly.
Installation involves cutting a 1-inch slot on each side of the ridge board, laying the vent material over the opening, and capping it with ridge shingles. Ridge vents work best when paired with continuous soffit intake, creating balanced airflow from eave to peak across every rafter bay. If your home has a hip roof with short or no ridgeline, ridge vents alone may not provide enough exhaust area, and you will need to supplement with other exhaust methods.
Other Exhaust Vent Options
Several alternatives to ridge vents serve specific situations.
- Box vents (static vents): Square or round metal vents installed near the ridge on the back slope. Each provides 50 to 70 square inches of NFA. A typical roof needs 6 to 10 box vents, spaced evenly across the upper third of the roof. Cost: $5 to $15 each plus installation.
- Turbine vents (whirlybirds): Wind-driven spinning vents that increase exhaust flow in breezy conditions. Each 12-inch turbine provides roughly 150 square inches of NFA. They work well in windy regions but offer no advantage on calm days.
- Gable vents: Louvered openings in the gable end walls. While common on older homes, gable vents create horizontal cross-ventilation that can actually short-circuit the intended eave-to-ridge airflow. Roofing professionals increasingly recommend sealing gable vents when ridge and soffit vents are installed.
- Powered attic fans: Thermostat-controlled electric fans that actively pull air through the attic. Covered in detail in the next section.
Powered Attic Ventilators: Pros and Cons
Roof-mounted or gable-mounted powered fans use electricity to force air through the attic at rates of 1,000 to 2,000 CFM. They excel at rapidly cooling superheated attics during peak summer and are most beneficial in hot, humid climates where passive ventilation alone cannot keep up.
The main argument against powered fans is energy cost and the potential to depressurize the attic, which can pull conditioned air up through ceiling penetrations (recessed lights, attic hatches, plumbing chases) and actually increase your cooling bill. Solar-powered attic fans ($200 to $500 installed) eliminate the electrical cost concern and provide useful airflow on the sunny days when attics get hottest. Brands like Remington Solar and Natural Light offer 25-watt to 40-watt models that move 800 to 1,600 CFM without touching your electric bill.
If you install a powered fan, ensure you have adequate intake ventilation. A fan pulling 1,400 CFM needs at least 700 square inches of NFA intake to avoid creating negative pressure. Without enough intake, the fan starves for air and pulls from wherever it can, including through your air-conditioned rooms below.
Troubleshooting Common Ventilation Problems
Several symptoms point to ventilation deficiency. Curling or premature aging of shingles on one section of the roof suggests localized hot spots from blocked rafter bays. Frost or condensation on the underside of roof sheathing in winter means warm moist air is reaching cold surfaces without being vented. Ice dams along the eaves indicate the attic is too warm, melting snow unevenly.
Start troubleshooting by climbing into the attic on a sunny afternoon. Feel for airflow near the soffits and at the ridge. If there is no perceptible air movement, check that soffit vents are not blocked by insulation, paint, or debris. Verify that rafter baffles are installed in every bay. Check that exhaust vents are not clogged with wasp nests, leaves, or deteriorated felt underlayment. Sometimes the fix is as simple as clearing blocked soffits, which costs nothing but an afternoon of work and immediately restores the airflow path your attic ventilation system was designed to provide.