
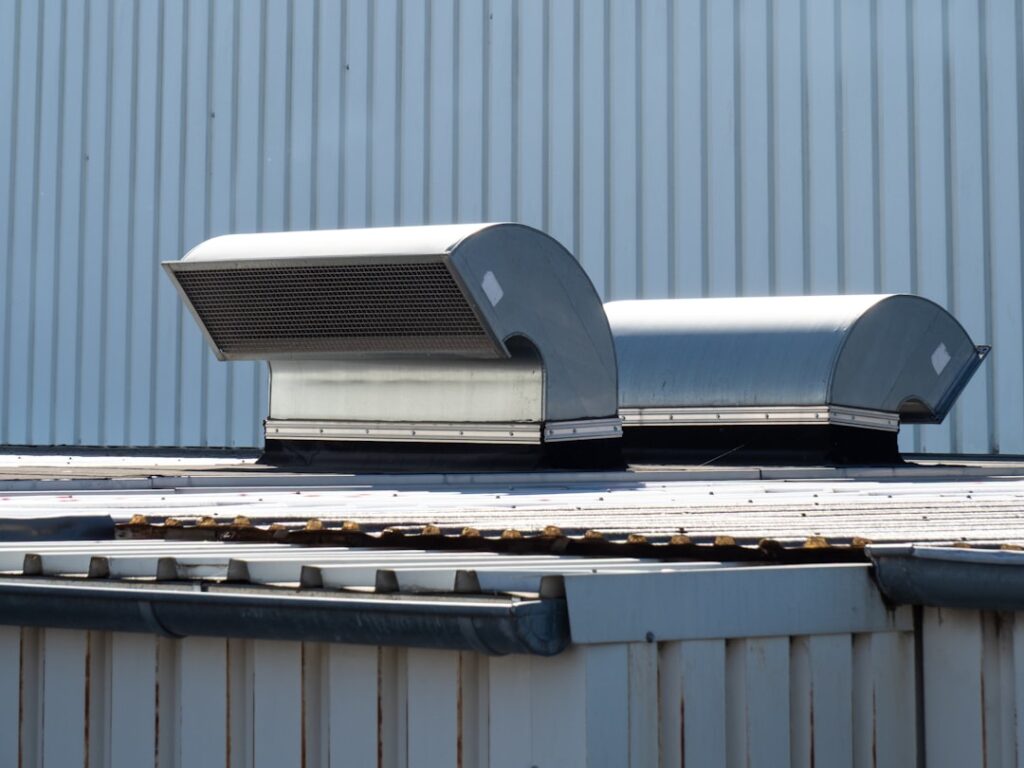
Cutting a hole in a perfectly good roof feels wrong the first time you do it — which is exactly why so many attics stay under-vented for decades. Done correctly, roof vent installation is a half-day job that requires a circular saw, a flat bar, roofing cement, and the nerve to make the cut. Done sloppily, it is the most common source of self-inflicted roof leaks I see. This guide walks through installing the two most common exhaust vents — box (static) vents and ridge vents — plus the soffit intake work that makes them function.
- Plan the System Before You Cut
- Tools and Materials
- Installing a Box Vent, Step by Step
- 1. Locate from inside the attic
- 2. Cut the hole
- 3. Slip the flange under the shingles
- 4. Cement, nail, and reseal
- Installing a Ridge Vent, Step by Step
- Don't Skip the Intake Side
- Five Mistakes That Cause Leaks and Callbacks
- Special Cases: Gable Vents, Steep Roofs, and Old Decking
- DIY or Hire It Out?
Plan the System Before You Cut
Vents are a system, not a decoration, so start with the math. Measure your attic floor area and divide by 300: a 1,200 sq ft attic needs 4 sq ft (576 sq in) of net free vent area, split evenly between intake low and exhaust high. Check the NFVA rating printed on your chosen vents — a standard box vent provides about 50 sq in, so that attic needs six of them, or roughly 16 linear feet of ridge vent at 18 sq in per foot. Decide on one exhaust type only; mixing ridge vents with box vents lets air short-circuit between them. For the full theory on balancing intake and exhaust, read our roof ventilation guide before you climb the ladder.
Pick a mild, dry day between 45 and 85°F. Cold shingles crack when you lift them; hot ones tear and scar. Work in the morning before the south slope gets soft.
Tools and Materials
- Circular saw with an old carbide blade, depth set to sheathing thickness (usually 1/2 inch)
- Reciprocating saw or jigsaw for finishing cuts near rafters
- Flat pry bar and hook-blade utility knife
- 1 1/4 to 1 1/2 inch galvanized roofing nails
- Roofing cement (Henry 208 or similar, about $8 a quart) and a caulk gun
- Chalk line, tape measure, drill with a long bit for locator holes
- Fall protection: harness and anchor on anything steeper than 6/12
Installing a Box Vent, Step by Step
1. Locate from inside the attic
Position box vents on the rear slope, centered between rafters, 18 to 24 inches below the ridge. From inside the attic, drive a long drill bit or screw up through the deck at the center of each planned vent so you can find the spot on the roof surface without guessing.
2. Cut the hole
On the roof, use the locator hole as your center point and mark the cutout — most 50 sq in box vents call for a 10 x 10 inch opening; follow the template in the box. Cut through shingles and sheathing together with the circular saw set just deep enough to clear the deck. Pull the cutout and confirm you’re centered between rafters.
3. Slip the flange under the shingles
This is where leaks are born. Break the seal strips and loosen shingles around the hole with the flat bar. The vent flange must slide under the shingles above the hole and along the upper half of the sides, and sit on top of the shingles below the hole. Water running downslope should never meet a flange edge it can sneak under.
4. Cement, nail, and reseal
Bed the underside of the top flange in roofing cement, nail the corners and every 4 inches along the flange with roofing nails, then cement over any exposed nail heads. Reseat the lifted shingles and dab cement under each tab so wind can’t work them loose. Total time per vent: 30 to 45 minutes once you’ve done one.
Installing a Ridge Vent, Step by Step
1. Strip the cap shingles
Pry off the ridge caps carefully — you’ll want intact ones as a color reference for the new caps. Stop the vent 6 to 12 inches short of each gable end or any point where the ridge meets a wall or chimney.
2. Cut the slot
Snap chalk lines 3/4 to 1 inch on each side of the ridge center (check your vent’s spec — most call for a 1 1/2 to 2 inch total slot). Set the saw to sheathing depth and cut both lines, then remove the sheathing strip. On homes with a ridge board, cut 1 inch back from each side of the board instead. Wear eye protection; you’re sawing through granules and old nails.
3. Install the vent and cap it
Roll or place the vent (GAF Cobra, Owens Corning VentSure, and Air Vent ShingleVent II all run $2 to $4 per linear foot) centered over the slot and fasten with the 2 1/2 to 3 inch nails supplied, snug but not crushing the baffle. Nail new cap shingles over the vent with the same long nails, keeping standard 5 inch exposure. End plugs or folded vent ends close off the terminations.
Don’t Skip the Intake Side
Exhaust vents without soffit intake pull air from your living space — or pull rain through themselves. While the ladder is out, verify every soffit bay is open. Push insulation back from the eaves inside the attic and staple foam baffles ($2 to $4 each) in each rafter bay to keep the channel clear. Solid soffits need vents: hole-saw round aluminum inserts ($2 each) or a continuous strip vent. Aim for intake NFVA equal to or greater than your new exhaust total.
Five Mistakes That Cause Leaks and Callbacks
- Flange on top of the upslope shingles. Guarantees a leak in the first hard rain. Water must always shed over, never into, the flange.
- Cutting the ridge slot too long. Ending the cut at the gable edge invites wind-driven rain and snow. Hold back at least 6 inches.
- Overdriven nails. Crushed vent baffles and cracked flanges leak; drive nails flush, not buried.
- Relying on caulk instead of layering. Roofing cement is a backup, not the waterproofing plan. Sealant fails in 5 to 10 years; correct shingle layering lasts the life of the roof.
- Leaving old vents in place. Converting to ridge vent? Remove box vents and patch the deck with sheathing, felt, and shingles — don’t just leave competing exhaust holes.
Special Cases: Gable Vents, Steep Roofs, and Old Decking
A few situations change the playbook. If your house has existing gable vents and you’re adding a ridge vent, block the gable vents off from inside with rigid foam or plywood — left open, crosswinds blow through them and short-circuit the soffit-to-ridge path you just built. On roofs steeper than 8/12, rent or buy roof jacks and a plank ($40 to $80 for a set of three jacks) and anchor a harness before making any cuts; the vent work itself is identical, but every task takes twice as long when you can’t stand freely.
Plank-decked roofs from before the 1970s deserve extra caution at the ridge. Individual 1×6 or 1×8 boards can be cupped or loose, and a circular saw grabbing a loose plank edge kicks back hard. Slow the cut, check board fastening as you go, and re-nail any plank the saw exposes as loose. If your cut reveals rot, blackened sheathing, or delaminated plywood, stop and address the moisture history first — new vents help going forward, but they don’t restore structural decking, and shingling over compromised wood wastes the repair.
DIY or Hire It Out?
Installing four box vents or 30 feet of ridge vent is a legitimate DIY job on a walkable 4/12 to 6/12 roof: budget $150 to $350 in materials and half a day. Contractors charge $75 to $150 per box vent installed and $8 to $12 per linear foot for ridge vent, so a typical whole-house job runs $400 to $900 — reasonable if your roof is steep, slate, tile, or three stories up. Whatever you choose, test the result: on the next 90°F day, an attic that used to hit 150°F should stay under 115 to 120°F, and in winter the underside of the sheathing should stay frost-free. That’s how you know the holes you cut are earning their keep.


